


Peppers are a warm weather vegetable in the nightshade family (Solanaceae). They are not at all frost hardy, and they require a fairly long growing season to ripen fully. They occupy their space for the whole growing season. Within the basic divisions of sweet peppers and hot peppers, there are numerous types.
Among sweet peppers, as well as the familiar bells, there are:
•Frying Peppers: Long, tapered, thin walled, sweet fruity-flavored peppers (Bull’s Horn, Corno di Toro);
•Cubanelles (shorter fryers), with mild, non-pungent flavors. Also used for pickling;
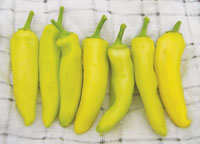
•Banana peppers (long, pointed, tend to be earlier ripening than bells). Mild flavor. Hungarian Wax are hot bananas.
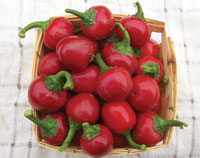
•Cherry peppers (1-1.5” round, sweet or hot). These are used for pickling and gourmet snacks;
•Paprikas can be sweet or hot, often 4-5” long, 1.5” wide. Can be dried and ground.
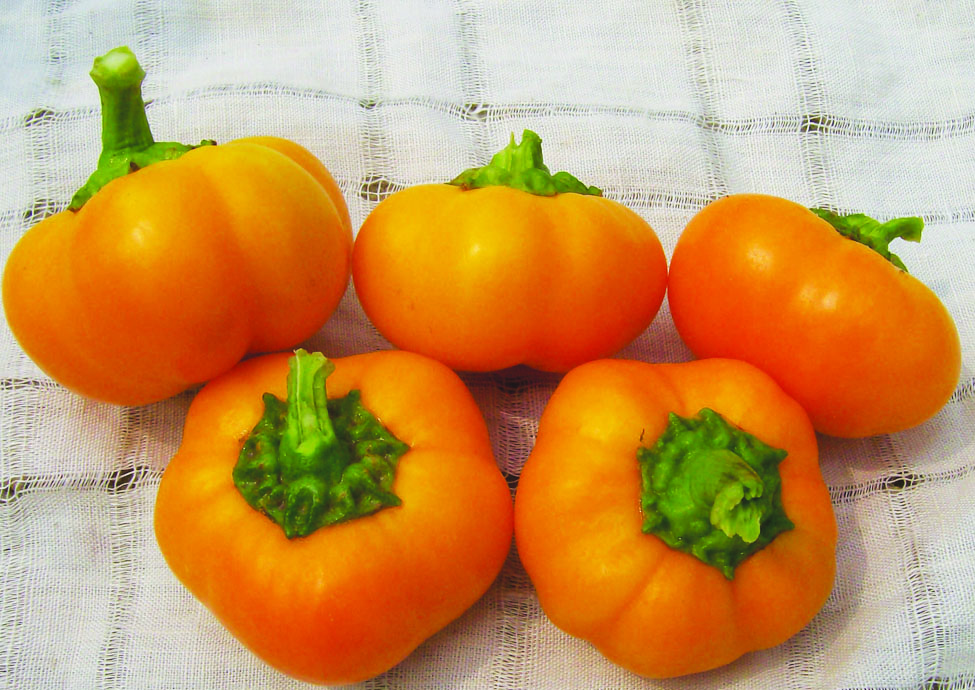
•Pimientos (cheese peppers). Ribbed, flattened small globes. Juicy and full-flavored. Good for eating out-of-hand. (Apple, Cheese Pimiento)
Our favorite varieties of sweet peppers include Fat N Sassy, Turino, World Beater, Napoleon, Bullnose, Super Shepherd, Valencia, Giant Szegedi, Corona, Gourmet. Others I’ve heard recommended are Chinese Giant, Honeybelle, Jupiter, Flamingo (a cubanelle), Giant Marconi (bull’s horn type), and the small Pizza Pepper.
Factors to consider when choosing varieties are productivity, earliness, size, shape, flavor, leaf cover (to avoid sunscald), and fruit wall thickness. Small-fruited varieties tolerate hot humid conditions better than large-fruited ones.
Seed savers should note that most peppers are Capsicum annuum and will cross with each other. Habeneros and other Scotch Bonnets are C. chinense and will not cross with C. annuum. A few unusual peppers are C. frutescens (Tabasco) or C. baccatum.
We grow only relatively few hot peppers, so this article focuses mostly on sweet peppers. Our basic hot peppers are Jalapeno and Habanero, with a few Thai Dragon, Fish, Serrano, Anaheim and Cayenne for drying. See the interesting chart of over 50 hot peppers and their heat ratings at www.usHOTstuff.com. See also the Chile Pepper Institute at www.chilepepperinstitute.org/ for lots of information.
Crop requirements
A soil pH of 5.5-6.5 is ideal. Peppers require soils with fairly abundant nitrogen, phosphorus and potassium, but not too much nitrogen during flowering, or the fruit set may be reduced, and the foliage may be overgrown. During fruit enlargement, foliar feeds of fish emulsion may be used.
Most peppers require 65-75 days to mature from transplanting. Peppers grow slowly unless the nights are warmer than 55°F. Below 52°F they get stunted for a day or two, and 50°F shocks them more seriously. Hot peppers get hotter with hotter, drier weather, and also with less fertile soil.
As far as planting quantities go, plant 4 or 5 for each person you are providing for. We generally plant 45 in our hoophouse, and about 350 outdoors, for 100 people.
Crop rotations
We often plant our main-crop sweet peppers into a no-till mulch of mowed overwintered rye, hairy vetch and Austrian winter peas (as we do for our paste tomatoes). Here in central Virginia, we sow this cover crop mix around Sept. 7 following spring broccoli (and perhaps a quick summer cover crop like buckwheat and soy). No-till planting has advantages of reducing the tractor passes across the field by eliminating a disking, and the vetch and peas provide all the nitrogen needed by the pepper crop. The disadvantage of this system is that the soil stays cooler than disked up soil, and so the ripening of the peppers is delayed. For earlier crops, it’s better to disk or till, and warm the soil with black plastic mulch. We plant an early crop in our hoophouse and so the later ripening of the outdoor crop is not a problem. Some growers use the biodegradable black plastic mulch and when it starts to disintegrate, they cover it with straw or hay mulch for the rest of the season. This method gives all-season weed control, warms the soil quicker than organic mulch early on, and avoids having to remove plastic later. (But the biodegradable mulch may not fit with USDA Organic certification.)
After the pepper harvests finish with the frosts, we sow rye with crimson clover or Austrian winter peas, which have time to flower before we plant watermelons the next year. Although tomatoes and peppers appear only once in our 10 year rotation, potatoes appear twice, so the time between nightshade crops is usually 3 years.
Sowing
Pepper seed has a short shelf life. We sow sweet peppers and hot peppers as early as Jan. 24 for planting out April 1 in the hoophouse as a 9-week-old transplant. We used to sow Jan. 17, but it’s so hard to keep peppers going in very coldweather, that we’ve decided to wait a week in future. Even so, this year we had unseasonably cold weather early in March and lost some of our peppers. For outdoor planting we sow Feb. 8 and transplant May 8 (12 weeks). We could probably wait a week or two to sow, and use a younger transplant. Pepper transplants do take longer to grow than tomatoes.
There are a few seed-borne diseases of peppers, and you can heat-treat your seeds to kill these diseases: immerse them in 122°F water for 25 minutes, then cool, drain and sow. Some people soak seeds in a 1:4 bleach solution (1.05% sodium hypochlorite) for 40 minutes with constant agitation. Then rinse with vinegar, then water. Pepper seeds are fussier than tomato seeds. Keep the soil moisture low, water with warm water. Start in cells 2-2.25” diameter, 2.25-3” deep. We use inserts with 38 round cells in a 1020 sheet, or else deep 9-packs. Pot up to 3 or 3.5” pots as needed. If we start ours in 9-packs, we pot up, but if we start them in round 38 cell size, we can plant out straight from those.
Peppers are slow to germinate: they take 25 days at 60°F, 12.5 days at 68°F, 8.4 days at 77°F, or 7.6 days at 86°F, so the ideal range is 68-86°F, with 60°F as a minimum and 95°F as a maximum. Peppers need to be grown without any checks to growth, if they are to do well. Promote the uninterrupted growth of the seedlings, until it’s time to give them a cold conditioning which is said to increase the number of fruit. Grow the new seedlings at 70°F in the daytime and 62°F at night. When the third true leaf appears, reduce the night temperature to 53-55°F for 4 weeks, then raise the temperature to 70°F day and night. We make a hooped tent of slitted plastic sheeting inside our greenhouse to house the pepper seedlings for the first few weeks, and then move them out to the greenhouse proper. Ours get cooler than ideal, and I manage to almost convince myself that we are doing something close to this conditioning!
Prepare for planting out by hardening off the transplants over 7-10 days. Do this by reducing moisture slightly, but never let the plants wilt. Don’t harden off nightshades by reducing temperatures. Gradual exposure to sun and wind is helpful.
Transplanting
Plants that are 8 weeks of age is the minimum, and older plants can be used, so long as they are still actively growing, not root-bound, and not yet fruiting. Peppers love sun and heat, so if necessary, wait for the right weather, and move your transplants up to larger containers. Bigger plants can take one or two degrees cooler conditions than small ones. Average soil temperatures of 65°F are best. The full blooming or the falling blossoms of the American Dogwood is a good phenological indicator for suitable planting temperatures. This is usually a couple of weeks after the average last frost date. Spacing of 18-24” in the row and 30-36” between rows is usual. We plant a single row at 24” spacing in the 4’ beds in the hoophouse, where the plants grow huge. Another method is to plant double rows 12” apart in beds on 5’ centers. Outdoors we plant at 18” in the row and 66” between rows, so that we can unroll big round hay bales as mulch between the rows. In wet areas, we have planted peppers on ridges. Our no-till mulch dies pretty quickly, so we top it up with spoiled hay. This also reduces the soil temperature, but the saving in dealing with weeds is worth it. We set out irrigation drip tape before we roll the mulch.
Growing
In the hoophouse we use 5’ stakes every 2 or 3 plants and do Florida string-weaving as we do for tomatoes, to provide the sturdy support that the huge plants there will need. Outdoors we have started using short 2’ stakes every 3 plants, and doing two rounds of string weaving, to help prevent branches from breaking off.
Peppers are drought-tolerant to some extent, but drought-stressed plants can produce thin-walled fruit which may even be slightly bitter. An inch of water per week throughout the season is about right. Drip irrigation or overhead watering which finishes before noon will reduce fungal diseases caused by wet foliage in cooler temperatures.
Foliar feeding with fish or seaweed emulsion can be used once fruits have started to set. Foliar calcium sprays may strengthen the fruit walls and help against pests. Boron may also help. Maintain high levels of phosphorus for sustained yields. (Perhaps like us and many other organic growers, you are dealing with an excess of phosphorus in your soils and don’t need to worry about maintaining high levels!)
By the way, it is untrue that if hot peppers are planted next to sweet peppers they’ll cause the sweet peppers to become hot. But water-stress can heat up sweet peppers. Obviously, you want to keep hot peppers separate from sweet peppers when it comes to harvesting and marketing!
Pests and diseases
We do not have many bug problems on peppers here. Cutworms, flea beetles and aphids can present problems, as can “fruit worms” — Corn Earworm, Fall Armyworm and European Corn Borer. ECB is worse where fruits are crowded, and can introduce soft bacterial rots, so thinning overloaded plants is wise.
Blossom End Rot due to calcium up-take shortages, especially in dry weather, can occur. Sunscald can happen if the leaf coverage is inadequate.
Diseases of peppers include Bacterial Speck, Verticillium Wilt, Anthracnose, Septoria Leaf Spot, Tobacco Mosaic Virus, Tomato Spotted Wilt Virus and other viruses. Monitoring and controlling aphids and thrips can help prevent diseases they vector. We try to prevent smokers from handling our pepper plants, as TMV can spread from commercial cigarettes to plants. Soft bacterial rots can follow injury caused by insects or mechanical damage. Fungal diseases can be reduced by minimizing soil splash with mulch and drip irrigation.
Season extension
At the beginning of the season, row cover can protect a first outdoor planting from a surprise frost. Because peppers are not at all cold tolerant, it’s better to wait rather than to risk too early a planting. A hoophouse or a greenhouse offers great opportunities for growing earlies, or a cold frame can be used for slightly early transplants after the spring seedlings free up space there. We have planted peppers in our coldframe, and then set flats diagonally between thesmall plants until we didn’t need the frames for transplants any more, and the peppers can grow to full size there.
At the other end of the season, the fall frost threatens to end pepper harvests. Often there is a period of mild weather after the very first frost, and if you can protect your plants from major damage, they can continue to ripen fine peppers for several more weeks. Throwing rowcover over your plants for a night or two may be worthwhile. When the first frosts threaten, we start a special harvesting style, picking all the peppers exposed to the sky, regardless of ripeness. The first frosts often just nip the tops of the plants, and peppers protected by leaves will be fine. Running overnight or pre-dawn sprinkler irrigation can protect from frost – just be sure to keep the water on until the sun is up and warming the plants. After that, each time frost threatens, we harvest all the exposed peppers as well as the ripe and damaged ones. Just be sure not to include the dull-colored very immature ones, which will rot more easily. Some people pull up whole plants and hang them upside down in a frost-proof building to continue ripening indoors. Peppers will keep for 4-6 weeks in a cooler if needed. Another option for a small number of plants is to pull the plants, stand them in buckets with the roots in water, and store in a cool location for up to 4 weeks. Cooling definitely compromises the flavor of peppers, but if your only other option is no peppers, it can be worth it.
Season extension during very hot weather is a matter of cooling the plants below 90°F during flowering to reduce stress. Shade cloth, or overhead irrigation for half an hour at noon, may help. Maintain high levels of phosphorus for sustained yields all season. Foliar calcium and boron sprays may strengthen the fruit walls and so increase the marketable yield, but take your most recent soil test results into account before adding minerals.
Harvest
Green or red? All peppers will eventually ripen to some shade of red or orange. There is a market for green peppers, even though the ripe ones are more nutritious. Of course, if you harvest all the green ones as soon as they get big, you’ll never get ripe ones before the end of the season. Some growers harvest a few green peppers from each plant if the plant looks overloaded, then wait for the rest to ripen. Some designate some rows to reserve for harvesting red. Red peppers bring a better price than green ones, but production is lower. Everyone has to find their own balance between quantity, quality, demand, supply and price. Expect to wait 55-65days from transplanting for full-size immature (green) peppers and another 2 weeks or so (70-85 days) for ripe peppers. Yields will likely be 5-18 pounds/10’ of row. If you harvest partially colored peppers you can finish the ripening off the plant. Harvest at least twice a week, to reduce losses to pests and diseases. We pick ours 3 times a week. What we do is to harvest all the fully ripe ones, all the damaged ones for processing, and a few green ones if the plant is heavily laden. We don’t pick the partially ripe (multi-colored) ones. This is a straightforward instruction we can give our crew, so that most of the peppers get a chance to ripen fully.
We harvest by grasping the pepper with a thumb at the top and the fingers at the bottom of the fruit. Then we snap the pepper upwards and break the stem. Some growers recommend cutting the stems, to minimize damage to the plants. Certainly everyone harvesting needs to know the branches are very brittle and care needs to be taken.
Pam Dawling is the garden manager at Twin Oaks Community in Virginia. She oversees the production of nearly all the fresh and preserved produce for the community’s 100 residents.
Copyright Growing For Market Magazine.
All rights reserved. No portion of this article may be copied
in any manner for use other than by the subscriber without
permission from the publisher.