


I think every farmer who uses a walk-in cooler has been flummoxed by unexpected and unwanted condensation at some point in time. I, for example, was horrified to discover water collecting under the plastic ceiling panels of my storage cooler during its first season of use. I’ve also heard plenty of condensation-related horror stories: soaked insulation, moldy walls, and water pooling into light fixtures.
On the less serious side, condensation commonly forms inside bags and containers used to store produce either temporarily or long-term. This unwanted moisture can quickly lead to decay. What’s going on, and what can we do to fix these problems? This article will cover the root causes of condensation and how to prevent problems in the context of cold storage.
My forthcoming book, Beyond the Root Cellar, goes into more detail about preventing condensation problems when designing coolers, especially in the context of winter veggie storage. I encourage you to check it out- it’s available for preorder now from Growing for Market, with books available this November.

The author’s book about growing and storing produce is available for pre-order now and will ship in November.
To predict when and where condensation will form, it’s helpful to understand the relationship between air temperature, relative humidity, and dew point. At its basic level, air temperature is a measure of how fast the air molecules are zinging around. The relative humidity — usually given as a percentage — is the amount of water vapor in the air relative to the maximum amount of moisture the air can hold at that temperature.
At high temperatures, fast-moving water molecules are less likely to bump into each other and stick, while at low temperatures, the sluggish molecules more easily clump together and accumulate into droplets. Thus, the warmer the air, the more water it can hold. Put another way, when you increase the air temperature, relative humidity drops.
Water will condense on any surface that is cooler than the air’s dew point.
If you cool air down, relative humidity will gradually increase until at some point, the air reaches its holding capacity and water droplets begin forming. This temperature is the dew point— or the low temperature at which relative humidity reaches 100 percent. In nature, it’s the temperature at which dew forms, hence the name. It’s important to remember that dew point is really an indicator of the amount of moisture in the air and is independent of air temperature. A high dew point means there’s lots of moisture in the air, while a low dew point means the air is dry. Temperature and dew point can change independently of one another, whereas relative humidity depends on the other two.
I like to draw an analogy between a walk-in cooler and a glass of ice water when thinking about condensation in the context of cold storage. On a hot summer day, the water glass’ outer surface gets covered in “sweat” as the air touches a cold surface that’s below its dew point. The same thing would happen if a walk-in cooler had walls made of single-pane glass—a surprising amount of water would form on the outer walls of the room.
That doesn’t happen, of course, because walls are not typically made of glass, and we cover our coolers with insulation. The thing about insulation, though, is that it doesn’t warm a surface; it simply slows the flow of heat. If you examined a cross-section of a walk-in cooler’s insulated wall and measured temperature at different locations, you’d find that the temperature changed more-or-less linearly from one side of the wall to the other.
At some point close to the “cooler” side of the wall, the temperature would drop below the dew point. Thus, with an insulated cold room, all that condensation you might imagine forming if the walls were made of glass is (or could be) forming somewhere inside the walls, where it’s out of sight. Scary thought!
Where is all that moisture coming from? For walk-in coolers in the summertime, the outside air can be a nearly limitless source of water. That’s because water vapor naturally moves from areas of high concentration to areas of low concentration, and warm air can hold way more moisture than cold air.
Imagine an 8-foot cube of air; at 68°F and 60 percent relative humidity, there are about ¾ cups of water dissolved in that air. At 32°F and 60 percent relative humidity, there are just 3 tablespoons of water in the air. Even at 95 percent relative humidity, an 8-foot cube of 32°F air only has about ¼ cups of water in it. In the context of a summertime cooler, moisture from outside is constantly trying to worm its way inside because of the difference in water vapor concentrations.
Inside the cooler, the veggies/flowers themselves can be another source of moisture. Even after cutting/harvesting, veggies and flowers are still alive and transpiring water vapor. And sometimes we are the sources of moisture. Not only do our bodies expel moisture if we’re spending lots of time in the cooler, but we may also employ humidifiers to meet the moisture needs of whatever we’re storing.
The culmination of all these things is why moisture management is an essential part of designing and building coolers. If you’re building a cooler yourself, it’s important to incorporate vapor barriers to control the flow of air and moisture and prevent unwanted condensation inside walls and ceilings. A well-placed vapor barrier will stop moisture-laden air from contacting surfaces below the dew point.
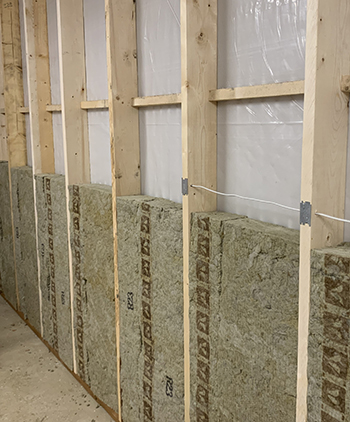
Here’s an interior cooler wall built to resist problems with moisture: a polyethylene vapor barrier on the warm side of the wall, mineral wool insulation which doesn’t readily absorb moisture, and a pressure-treated base plate.
For a summer-use cooler, vapor barriers should go on the outside, whereas heated or conditioned spaces for winter storage need vapor barriers on the inside. Few construction materials are true vapor barriers — glass and metal foils are some rare examples. This is why pre-fab cooler panels are coated with metal on both sides. Water vapor cannot move through the metal covering the panels. (Air and moisture can get through seams between panels if not sealed correctly, leading to issues with condensation there.)
Most construction materials are vapor retarders, meaning they only slow, not stop, the diffusion of water vapor through them. Some materials like gypsum drywall and house wrap are very porous to water vapor, whereas other materials like 6-mil polyethylene sheeting and several inches of closed-cell foam don’t let much humidity through.
Water vapor will condense from the air anytime the air touches a surface below its dew point. If that surface happens to be below freezing, condensation will form as ice. All photos courtesy of the author.
Look up the vapor permeance of any material you plan to use as an intentional vapor barrier and shoot for less than 1 perm. The vapor permeance of some materials changes when wet. Half-inch CDX plywood, for example, has a vapor permeance around 0.5 perms when dry, but that balloons to near 20 perms when wet.
You might be thinking, “I installed a vapor barrier in my walk-in cooler and am still seeing condensation issues inside the walls and ceiling.” This brings me to the golden rule of condensation troubleshooting: Anytime we see condensation forming in a cooler, it’s because moisture-laden air is touching a surface below its dew point. The key to fixing (or better yet, avoiding) a condensation problem is identifying where and how this is occurring. Let’s go over a few examples and how these problems could be fixed or avoided.
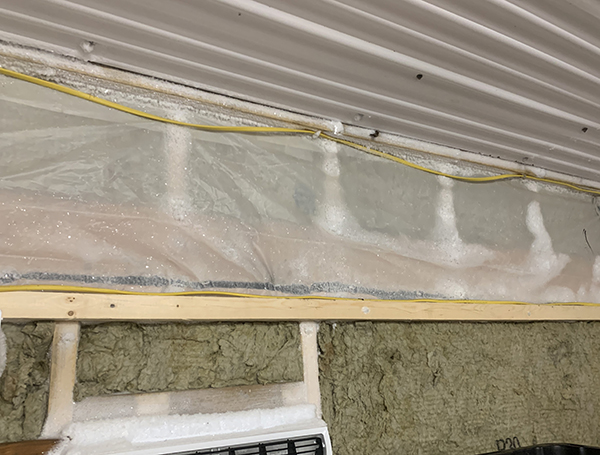
I spoke to a farmer who had condensation forming in the ceiling of the DIY walk-in cooler — so much so that their light fixtures were filling with water. The cooler consisted of a couple layers of foam board over simple framing, and the outer layers of foam were taped at the seams to form a vapor barrier to the outside.
So, what was going wrong? The outer vapor barrier was failing, or more specifically, the tape was failing and warm air from outside was sneaking through. The farmer had used construction seaming tape, the red tape usually used for sealing seams of house wrap and polyethylene sheeting. This tape works for a time on foam boards but isn’t designed to stick to foam indefinitely. Instead, the farmer could have filled the seams between foam sheets with spray foam before covering them with foil HVAC tape for a redundant and longer-lasting seal.
Vapor barriers need to be built to last, and the seals should be perfect — or as close to perfect as possible. When installing vapor barriers, don’t overlook sealing against air movement. Humid air sneaking through gaps, cracks, holes, and so on will lead to more condensation than water vapor diffusion.
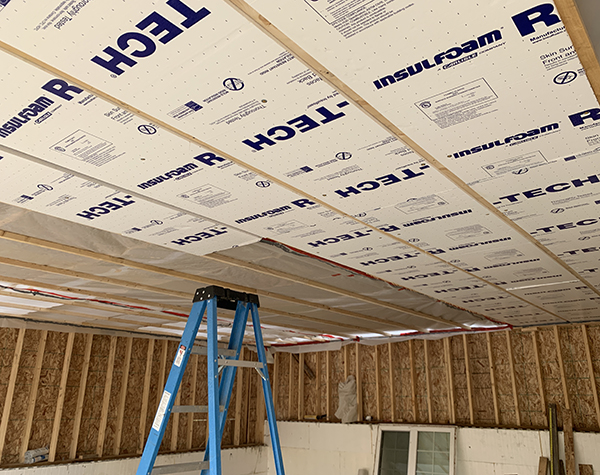
The Offbeet Farm cooler during construction. Inside, a polyethylene vapor barrier and foam board sheets sit underneath the corrugated ceiling panels (not pictured), which are fastened into the furring strips. Those fasteners were part of a condensation issue I experienced early on.
When using foam board as both insulation and vapor barriers, be sure to seal between the sheets in the manner described above — with both spray foam and foil tape (recommended by Store it Cold). If you’re using polyethylene sheeting as a vapor barrier, seal it to the walls, floors, and overlapping sheets with a sturdy bead of polyurethane-based caulk. In Alaska, it’s common to use Tremco Acoustical Sealant.
Put your staples right through the bead of caulk, and for extra security, tape the loose flaps down with construction seaming tape. Some builders go so far as to tape over every staple that’s not set into caulking. If your insulation and vapor barrier is spray polyurethane foam (SPF), first make sure it’s closed-cell foam. Then, ensure full coverage of all joins, cracks, and so on to a depth of at least 1½ inches.
The first year I fired up my storage cooler for fall harvest, condensation collected underneath the corrugated plastic ceiling panels, and it took me a while to figure out what was going on. The ceiling is well-insulated and has a polyethylene vapor barrier underneath a layer of 2-inch EPS foam board. The interior finish layer is corrugated plastic panels fastened into furring strips set between the foam sheets.
From above (the attic side) there are 10 inches of mineral wool batts between the trusses. (Note, my cooler is set up primarily for wintertime use, hence the vapor barrier toward the inside.) Key clues were that condensation appeared to concentrate within the direct path of airflow from my Coolbot system, which is set high near the ceiling, and I keep the room very humid near 95 percent relative humidity.
What was happening? Turns out the metal fasteners in the direct path of air coming from the Coolbot system were going below the dew point in the room. Water collected on the heads and shafts of those fasteners where exposed to the air — some of which dripped, while some collected under the plastic panels. To fix the problem, I simply directed the AC vents downward, away from the ceiling and viola — no more dripping.
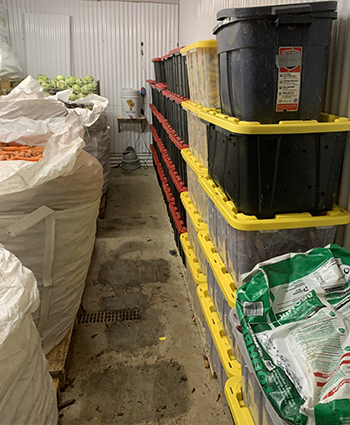
The cooler at Offbeet Farm in Fairbanks, Alaska, loaded with storage crops for winter.
Similar issues can arise when metal fasteners go through a vapor barrier. Metal is a great heat conductor, and if exposed to refrigeration in the cooler, heat will constantly be siphoned away from the metal to make the entire length of a fastener relatively cold. If those metal fasteners are exposed to humid air, condensation will accumulate.
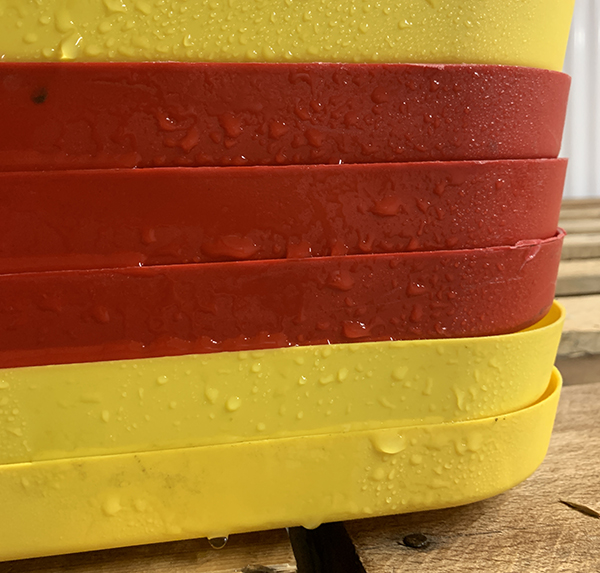
The last example is one most any veggie or flower farmer has seen but touches on other common issues. You harvest a Rubbermaid tote full of kale, dahlias, or other produce. After closing the tote and putting it in the walk-in cooler, you return the next day to find the inside of the tote soaked with condensation.
![]()
Daikon radishes inside a tote generate enough moisture through respiration to fog up the clear plastic walls, even with holes in the container.
What’s happening here? Condensation is coming from a couple sources. The first and most obvious is the veggies or flowers themselves. They’re still alive post-harvest and are actively transpiring water vapor. Inside the enclosed container, the relative humidity quickly reaches 100 percent, and condensation collects on the container’s walls and lid especially.
There’s also a small amount of condensation coming from the air trapped within the enclosed container. Let’s say it’s 70°F outside with 40 percent relative humidity. When that closed tote enters your 38°F or 40°F cooler, the air within will eventually drop below its dew point of approximately 45°F.
A Rubbermaid tote full of produce serves as an analogy for your entire walk-in cooler. It’s an enclosed space filled with living and breathing produce, and you occasionally open the door to let relatively warm, moisture-laden air (in the summertime, anyway) inside. The same things happening inside an enclosed tote occur in your walk-in cooler as a whole.
These factors usually don’t lead to condensation issues until outdoor weather cools and the dehumidifying effects of our refrigeration systems decrease as they run less often. The key to fixing this problem within a cooler is the same as for a tote full of produce: ventilation. Peppering a produce tote with holes will alleviate much of the condensation and, likewise, ventilating a cold-storage room (especially during the winter) will dilute the humid air within. Within a cooler, you can also use air circulation to alleviate issues of moisture buildup and cold spots.
Condensation in walk-in coolers is a common problem and can be tricky to figure out. Just remember that wherever condensation is occurring, humid air is encountering a surface below its dew point. The key is to figure out how that’s happening and to devise a way to stop it.
Sam Knapp runs Offbeet Farm, a diversified veggie farm in Fairbanks, Alaska, focused on storage crops sold during the winter. He’s the author of the forthcoming book, Beyond the Root Cellar, which is available for pre-order now from Growing for Market before its release this November. As always, subscribers get 20% off all the books we sell including this one. For more information about the farm and the book, visit www.offbeetalaska.com.
Copyright Growing For Market Magazine.
All rights reserved. No portion of this article may be copied
in any manner for use other than by the subscriber without
permission from the publisher.