


China asters (Callistephus chinensis) are a staple crop on our cut flower farm, Moonshot Farm in East Windsor, New Jersey. They fill an important late summer focal flower gap, generally blooming in August after our main lisianthus flush in July and before the dahlias in September. Asters have an awesome vase life for our retail customers. They also come in a range of delicate colors and shapes, making them coveted by floral designers and wedding couples.
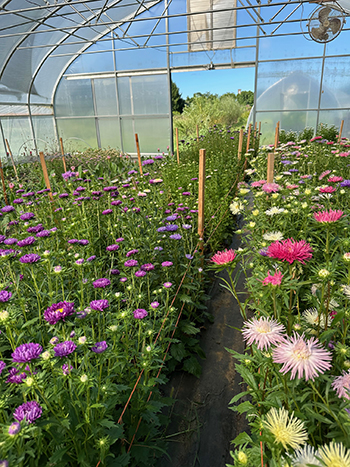
Asters get quite tall in the tunnel and require support netting – we like to use cattle panels held up on wooden posts with zip ties.
Although they have these fine qualities, asters are notoriously tricky for farmers to grow successfully, as they often succumb to disease or bloom on tiny stems. We had plenty of issues with asters during our first few seasons. I seem to get more questions about them than any other flower. Here are some of my top tips for growing asters successfully so that you can succeed with them.
It’s all about daylength
Asters have funky daylength requirements that align with the natural daylength cycles around the summer solstice. They put on vegetative growth during short, but lengthening days, set bud during long days (over 14 hours), then, are triggered to bloom during shortening days. For most growers in the Northern Hemisphere, this will translate to planting asters out at least several weeks before the summer solstice, so that asters have enough time to bulk up before the days start to shorten.
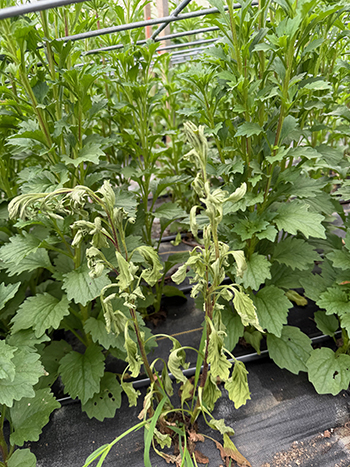
Asters melting down from fusarium wilt. We prevent this by rotating our aster crop, planting resilient varieties, and using bio fungicide like Rootshield.
Because of these daylength requirements, succession planting asters can be tricky. Taller spray varieties (like “Matsumoto”) can be successfully planted over several weeks for a slightly longer bloom window. We also get a natural succession by planting earlier and later blooming varieties (more on variety selection below). More extended successions can be accomplished in controlled greenhouses with supplemental light to manipulate daylength.
Germination and seedling stage
I hear from growers that they struggle with germinating asters. My biggest tip is to use fresh seed. We purchase new seed each year for our asters and generally get excellent germination on most varieties.
We have a few different seed-starting methods, including starting seeds in the greenhouse as well as in a DIY germination chamber built from an old freezer with a crockpot. We’ve tried asters in the germ chamber but actually have the best results starting them in the greenhouse with a method we learned from Michelle Elston at Roots Cut Flower Farm in Carlisle, Pennsylvania.
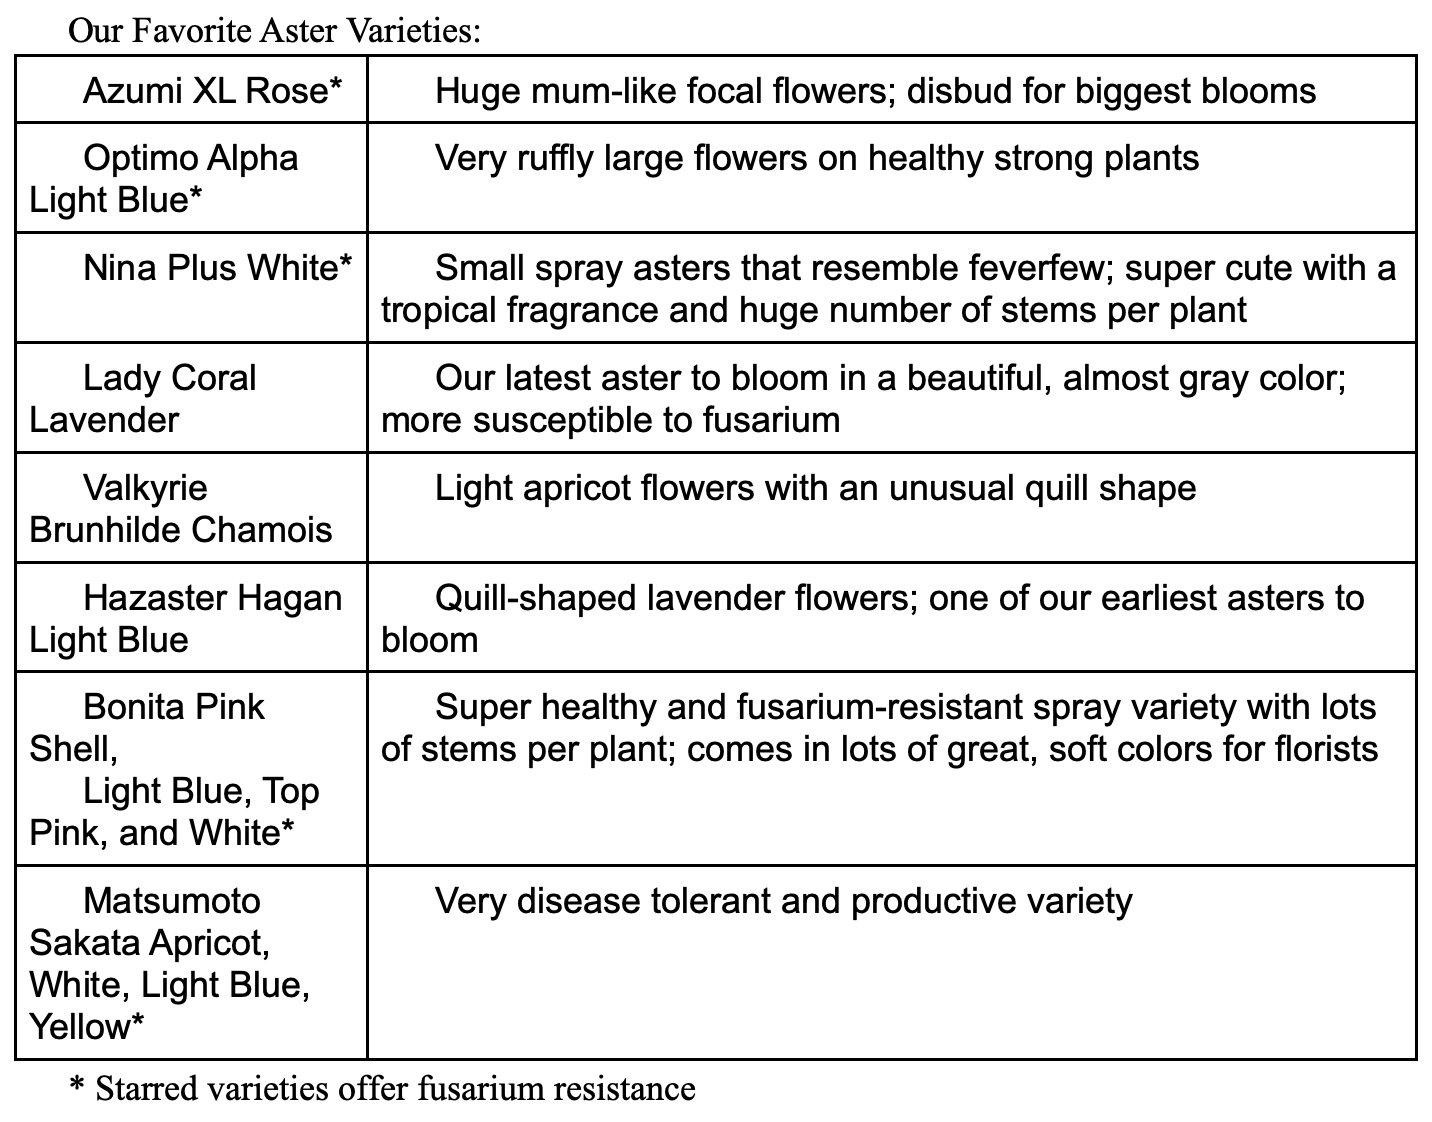
The author’s go-to aster varieties. All images courtesy of the author.
After sowing, we add a layer of vermiculite and then cover the trays with a layer of frost fabric/Agribon. The fabric retains moisture and lets light in as the seedlings emerge. Sometimes asters have unevenly timed germination, so this method works well as the seedlings take their time to emerge. The sprouted seeds get enough light, while the unsprouted seeds get enough moisture. Once the seedlings have fully emerged we remove the fabric to promote airflow.
We start asters (and almost everything on our farm) in 128 cell plug trays using a compost-based medium (Fort Light from Vermont Compost). Asters are prone to a variety of soil-borne diseases, and promoting a strong microbiome from the start really helps them stay strong.
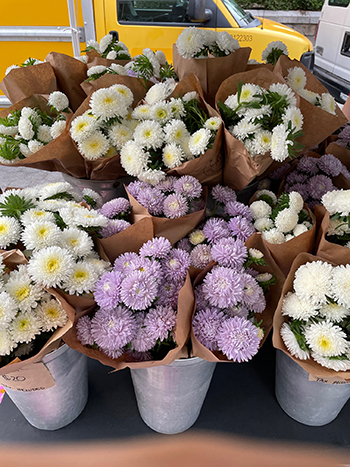
Straight bunches of aster displayed at the farmers market.
Asters are prone to stress during the seedling stage. Keep them consistently watered, but not too wet, and around 70°F during this stage. We ideally transplant asters no later than one month after germination. Plant breeder Sakata’s culture sheet — a great resource on asters — recommends transplanting them on days 25 to 28. If asters get stressed during the plug stage, they will bloom prematurely on short stems. Unfortunately, they won’t recover.
Growing on
To maximize stem length and plant vigor, we grow all of our asters in the high tunnel. Asters have a relatively small plant habit and benefit from mulch to help outcompete weeds. We plant our asters on 6-inch spacing into landscape fabric. In order to promote the longest stems possible, we do not pinch our asters and typically get two to three large branching stems per plant depending on the variety.
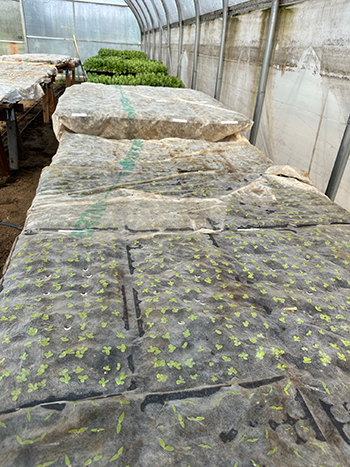
Germinating asters in the greenhouse under a layer of frost fabric to lock in moisture but allow light.
Especially in the tunnel, asters grow quite tall and their lanky stems require support. We use 4-foot wide cattle panels attached to wooden posts with zip ties. The metal panels do a great job holding the plants up and are easier to harvest through than plastic netting.
Asters work well with our crop plan as they can be transplanted into late May and even early June after overwintered crops like foxglove and lupine have finished for the season. After the asters bloom in August/September, there’s even time for a quick cover crop like buckwheat before the following year’s overwintered annuals get planted in November.
Pests and disease
Asters have a well-earned reputation as drama queens when it comes to pests and disease. Probably most notorious, asters are prone to a devastating disease called Aster Yellows. Aster Yellows is transmitted through leaf hoppers so can be prevented by minimizing insect pressure. However, if Aster Yellows is prevalent in your area, it may not be worth growing a big aster crop. Look around at wildflowers in the aster family on your property, such as like fleabane and coneflower, if they show signs of Aster Yellows disease like yellowing leaves, stunted growth, and deformed flowers, proceed with caution.
Bonita shell pink, a fusarium-resistant spray variety that is one of our favorites.
We prevent leafhoppers and other pests from invading our asters by using insect netting. We install it in the sidewalls and over the doors and vents of our high tunnels. You could also grow asters inside low tunnels covered with netting. In our experience, leaf hoppers are difficult to control with beneficial insects as they require generalist predators like lacewings. Exclusion with netting seems to be the best approach, and we have also had success controlling them with organic biological pesticides like NoFly.
Thrips are another major pest for asters and the insect netting also excludes the majority of them. We also use beneficial nematodes and predatory mites for thrips control. See my GFM April 2024 article “Year-round flower farm pest management” for more detail on how we control thrips and other pests.
In addition to these pests, asters are prone to soil-borne diseases, particularly fusarium. Crop rotation and avoiding planting asters where we’ve grown other fusarium-prone crops (like lisianthus) is the first step in preventing it. We also apply Rootshield, a biological fungicide, to our asters at the time of transplant and then again around six to eight weeks later. Many new varieties of asters are being bred for fusarium tolerance, and I’ve highlighted those in my recommended varieties chart. If you struggle with fusarium, try these new varieties instead of older heirloom aster varieties.
Like many cut flowers, asters can also get botrytis, especially during humid conditions. To help prevent botrytis we encourage good airflow with fans and apply weekly calcium to our crop, which has the added benefit of encouraging strong, sturdy stems. We apply foliar calcium with a product like BioWorks OnGard in a backpack sprayer. We find calcium works best and doesn’t clump up if applied on its own rather than mixed with other products besides the OnGard.
Disbudding and harvesting
Asters are similar to chrysanthemums in their growth habit — some varieties form a spray while others are grown for a single large flower. Spray asters do best if the lowest, first flower is snipped off before it blooms (like lisianthus). This encourages the rest of the stem to open more evenly.
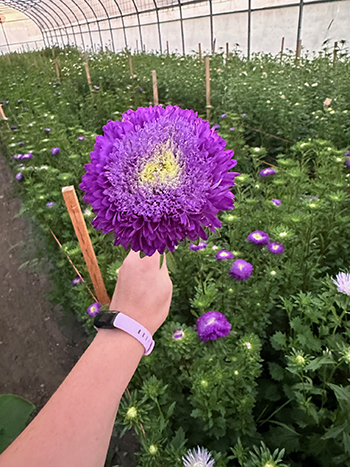
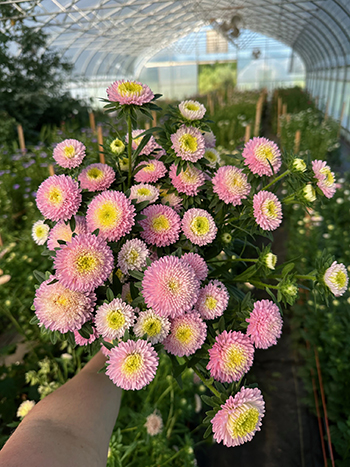
Asters can be disbudded like mums to produce single stems of larger flowers. Variety- Azumi XL in Blue. (Facing page) We love asters for the variety of colors, shapes, and sizes they come in.
For focal varieties, you can remove all but the largest central bud to encourage a bigger flower. You can also grow these varieties as sprays of slightly smaller blooms. For our retail market, we find that sprays sell very well and that disbudded asters are rarely worth the extra labor.
Asters have an excellent vase life and a long harvest window. We like to harvest them when around half the flowers are fully open and the rest are starting to open. They will continue to open up slightly in the vase. Asters have hairy stems that promote bacterial growth. We use Chrysal Holding Solution in our buckets to help the water stay fresh.
Asters are excellent as both filler and focal flowers in retail bouquets, and we also find they sell quite well in straight single varietal bunches. If you’ve struggled with asters, I hope some of these tips help you succeed in growing a great crop. They’re now a must-grow on our farm and a flower our customers look forward to every late summer.
Rebecca Kutzer-Rice owns Moonshot Farm, a specialty cut flower farm in East Windsor, NJ. She grows flowers year-round including in a geothermal greenhouse, for retail markets in and around NYC.
Copyright Growing For Market Magazine.
All rights reserved. No portion of this article may be copied
in any manner for use other than by the subscriber without
permission from the publisher.