


In 2020 the conventional metal hoop greenhouse I had been using for propagation was going to be repurposed for COVID reasons and I needed an alternative for 2021, so I built a small wooden greenhouse, just 11’x18’. I chose to do this for a few reasons: It was cheaper than metal construction (at least the materials were), it was a size I could build on my urban lot without a permit, and I thought it might look nicer.
For less than $700 in materials I spent a few days (spread out over a couple of months) building the greenhouse, complete with doors on both ends and a roof vent with an automatic opener. For the past five seasons this has been my only propagation house and it’s worked well enough to support my little urban farm, and a couple of others.
When pulling the plastic, cover the end walls first and secure the plastic to the insides of the walls. Then pull the plastic over the hoops and tack it at the ridge and the corners with short pieces of lath over the gussets. You can then roll lath to the inside of the plastic, pull tight and screw through the plastic and lath into the face of the end wall hoop.
It probably would have continued to work for at least a few more seasons but the truth was with the typical plastic greenhouse film it wasn’t the most attractive part of our home garden so my partner decided she wanted to look at something prettier and last month we took it down and are passing the re-usable parts to another urban farm.
I’m not going to fully detail the construction out here, but if you have a decent understanding of basic carpentry this quick explanation should be enough to go off of to create your own design. I based mine on one that Ray Devries from Ralph’s Greenhouse (ironically not a greenhouse operation) shared with me. They build these quite a bit larger and move them around with a tractor so some of their details are different.
For materials I used all untreated, standard-and-better grade fir lumber, which is typical here in the Pacific Northwest. After more than five years with no protection the base that was sitting on the ground was pretty rotten. It wasn’t rotten to the point of being a problem for the standing structure, but definitely not salvageable. I was pretty minimalistic with my use of screws, and used relatively light weight #8 deck screws.
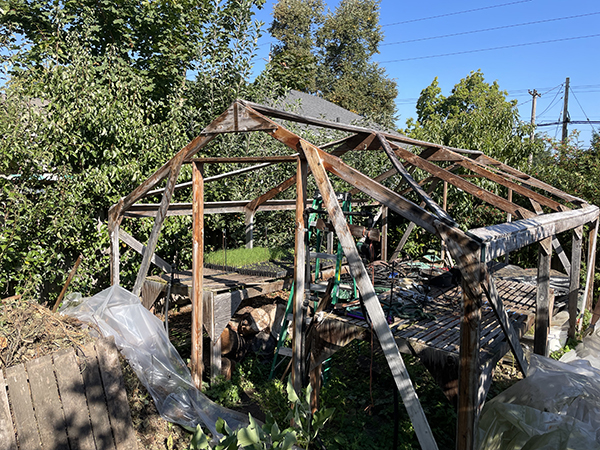
This is a photo of the bare frame after five years with all of the purlins and braces in place. The frame for the roof vent has been removed in this photo. It can be installed either before or after the plastic.
Some of those were broken so it might have been better to use heavier ones. On the other hand, the structure was still solid so maybe it was fine for my purpose. The only repair I made in the five years it was in use was one of the door handles that came loose. I think all of the materials other than the base plates will be re-usable and will last through another round of greenhouse plastic.
Here are the basics of the construction from the foundation up:
Foundation
I simply leveled a dirt pad the size of the greenhouse to start. On that I built a simple wood frame from 2x4s that was 11’x18’. The base frame is in two layers with the sacrificial lower level being 2x4s on edge and then a base plate on that from 2x4s sitting flat. This was made from 8’, 10’ and 12’ 2x4s with but with joints and corners supported with short pieces of 2×4, 6-12” long.
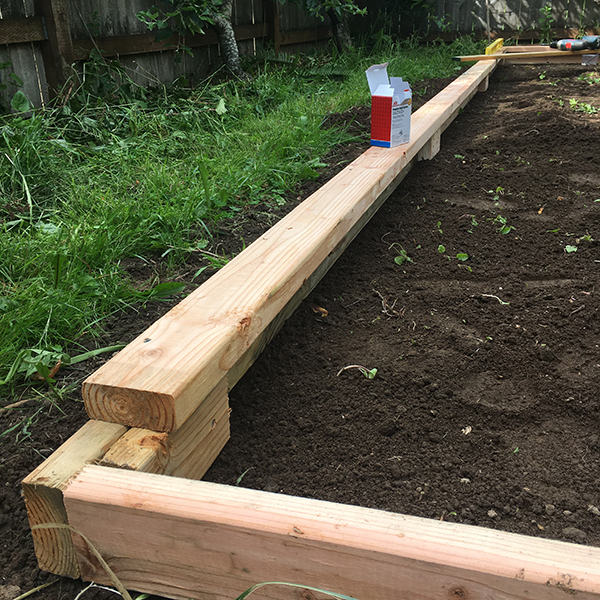
The base for the foundation is built on a flat dirt pad.The base plates are added to the sacrificial boards sitting on the ground. All joints are staggered for extra support and backed with extra 2×4 scraps.
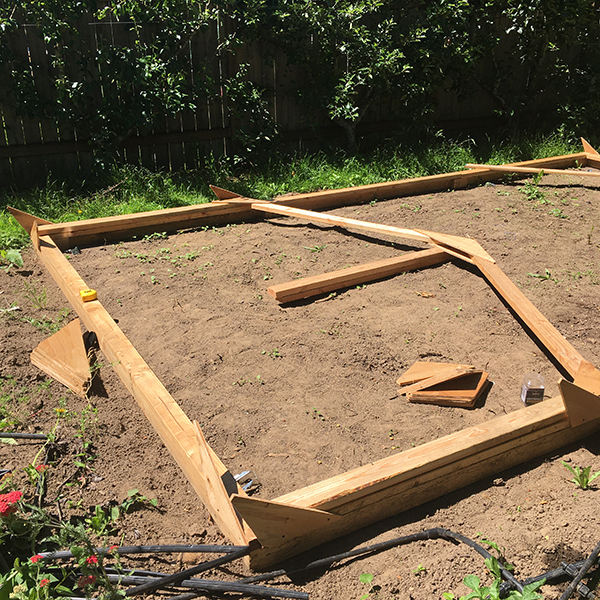
To help in building the hoops I used some of the gussets, scrap wood and the base frame to make a simple jig holding everything in alignment while I screwed the hoops together while they were flat on the ground. This is much easier than trying to do it while they are standing up. All photos courtesy of the author.
Hoops
The hoops are also made from 2x4s with four hoops for the structure, one every 6’ on the frame. To make the hoops there are two uprights and two rafters per hoop, joined by ½” plywood gussets at the joints. For the connection between the rafter and upright I cut a bird’s mouth in the rafter so that it sits locked to the upright. The hoops are attached to the base plate with Simpson brackets. On the outer hoops I bent the brackets down on the outer edges to attach to the face.
Purlins, wall and roof bracing
There are 1×4 purlins at the top of the uprights, and the top and bottoms of the rafters. These are 6’ and 12’ long and butt joints are staggered. In addition to the purlins there are 1×4 cross braces that run from the bottom of the outside rafters to the tops of the next hoops. There are also 1×4 cross braces for the walls running from the bottoms of the inside hoops to the top of the uprights on the end walls.
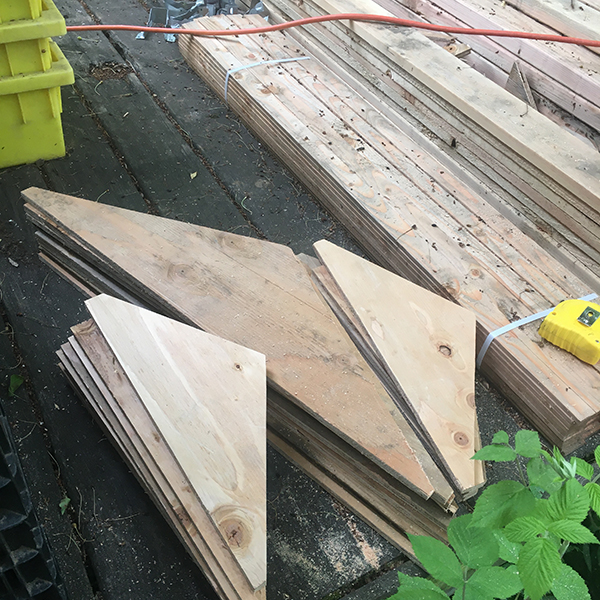
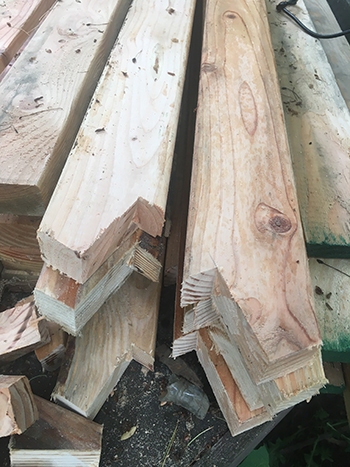
All of the gussets are cut from plywood in advance.
End walls and door frames
The uprights on the door frame are 2x4s that have a 1 ½”x ½” rabbet for the door to sit in. It’s also notched at the top to fit into the top of the door frame which has the same rabbet. The top of the frame extends past the uprights to screw directly into the hoops. To make it easier and more secure to screw the top into the hoops I notched the ends of the top of the frame so that they sit flush with the outside of the hoop but overlap the inside. At the base of the door frame, I used an extra 2×4 block to secure it to the base plate.
To keep the end walls square, attach 1×4 bracing from the base of the outer hoop up to the rafter just outside the door frame.
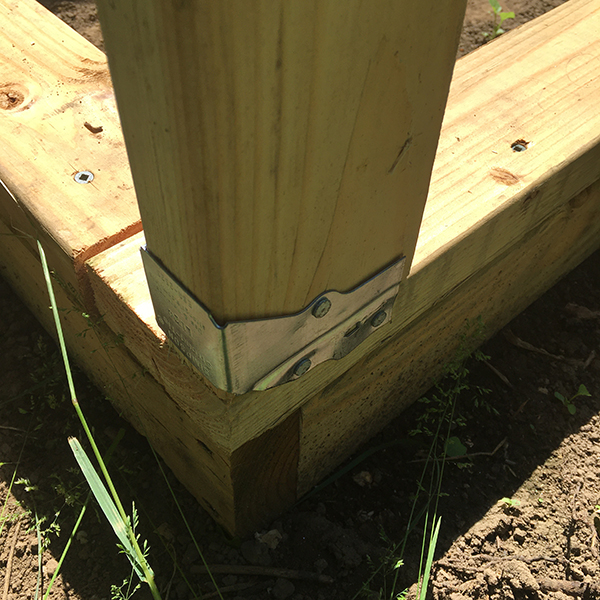
Simpson brackets hold the uprights to the base plate. For the brackets on the ends the tab on the bottom was hammered down so that it sat flush on the face of the base plate (shown here).
The rafters have birds mouths cut on the ends to better lock into the uprights.
Doors
The doors are made from overlapped 2x4s on edge so that the thickness of the door is 1 ½”. There are two vertical members and three horizontal, glued and screwed together. These hang on two regular door hinges in the door frames. The lap joints connected in this way are enough to keep the door from sagging.
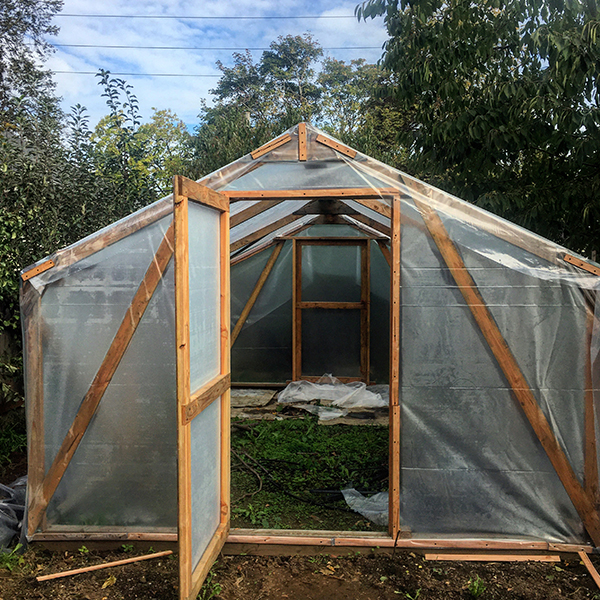
Skinning the greenhouse with plastic
With the doors mounted in the frame on their hinges, but without the latches installed, cut a piece of plastic to generously fit each end wall, leaving enough to cover the rest of the frame with at least 2’ overlap at the bottoms of the walls and 6” overlap on the ends.
Attach the plastic to the end wall by rolling the edges around lath strips and then screwing through the lath into the frame. These strips should be attached to the narrow edges of the hoops between the purlins and wind braces, and to the base plate. Do this on all of the edges first, then attach lath strips all around the door frame and all around the edge of the door. Keep things tight! Once this is all in place slice through the plastic at the top and bottom and non-hinge side of the door. Leave the hinge side connected. Now the doors are able to swing open and you can install the latches.
Repeat the process with the big piece of the plastic, rolling the edges in lath and screwing them to the face of the end walls. To anchor the whole structure down dig a 6-8” deep trench on the long sides and press the plastic down into the trenches. It’s important that the plastic create a J shape, filling the bottom of the trench and coming back up at least a little. Then backfill with dirt and the weight of the soil will hold the whole structure down.
Alternatively, you can drill holes in the base plate and use long pieces of bent rebar driven in at an angle, or some other type of soil anchors. You definitely want to anchor the house well as it is essentially a big sail that will catch even a little wind.
Door latches
The latch on the door is wooden and made from 1×2 and plywood gussets. Part of the 1×2 is cut down to 1×1 and that part extends through a hole cut in the door. On the inside there is a second 1×2 section screwed on at a 90-degree angle and lined up to catch against the back of the door frame when rotated horizontally. On the outside of the door two plywood gussets are used to attach the 1×1 section to another piece of 1×2 that acts as the handle. This is mounted 90 degrees from the interior 1×2 latch so that the handle is straight down when the door is latched.
Roof vent
Using 1×2 and plywood for corner gussets make the frame for a window wide enough that it will rest on the two inside hoops, approximately 6’ wide and 18” deep.
Cut a 2×2 the same width as the window frame and notch it so it sits between down between the rafters but also overlaps the rafters matching the thickness of the top purlin. Use 1×2 sections to fill in the gap between the rafter and plastic between the top purlin and the 2×2.
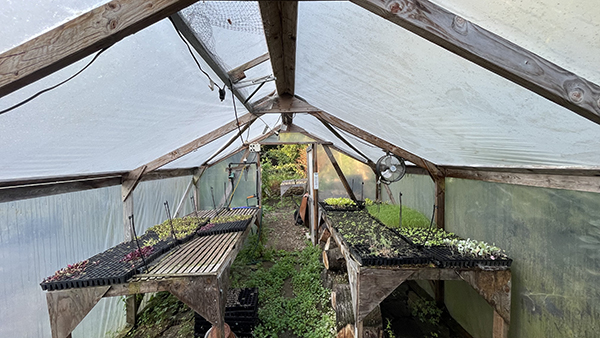
This is the interior of the tunnel shortly before it was taken apart after 5 years of heavy use. The tables in this hoop house are detailed in my book Build Your Own Farm Tools. They are seven years old and in need of simple repairs but are still very functional, even after a couple of moves over the years.
Carefully cut the roof plastic in an x where the window opening will be. Pop your head through the opening and screw lath to the face of the frame on the sides and bottom. You do not need to do this on the top edge.
Cut a piece of 2×3 or 2×4 the length of the window. This will sit on the ridge purlin on the opposite side. Rip an angle at the top that will match up with the window frame when it is sitting flat against the roof. Cover the window frame in plastic using the same rolled plastic lath technique on the bottom edge but putting the lath on the top face on the short sides and the top.
Leave 6” of plastic hanging off the top edge. Attach the 6” of plastic to the piece cut to sit on the opposite side of the roof by butting that angle up against the window frame and then screwing a piece of lath over the plastic and into the wood. This will create a plastic hinge and will leave enough plastic to protect the wood. I added two pieces of nylon webbing as an additional hinge support, but I think this was unnecessary and that the plastic by itself makes a good hinge.
The trickiest part of the whole thing probably comes next. Poke your head up through the hole in the roof and carefully maneuver the window frame so that the piece it is hinged to sits at the ridge. Screw this piece to the ridge and if you’ve done it right the window will now close flush over the hole in the roof once you retreat into the greenhouse.
Next mount a wax cylinder opener to the bottom edge of the window so that when the air in the greenhouse heats up the window will open automatically to vent the greenhouse. This may require adding a block of wood to the inside of the window frame.
I added wooden seedling benches (the ones in my Build Your Own Farm Tools book) with irrigation on a battery timer, and some 10” circulating fans, also on a timer, as well as electric bottom heat mats. In our climate the bottom heat mats were enough heat that I could scrape by without any additional heating.
I suspect that the base frame might last better if it were built on a pad with better drainage (crushed rock?), or even concrete (but that would add to the cost). The sacrificial wood pieces on the bottom can be replaced when the plastic needs to be replaced after 5-8 years. Metal framed hoop houses are definitely a more durable solution and are slightly faster to build (since the hoops are pre-built), but this worked well for my needs for the past five years and so maybe it’ll work well for some of you out there.
Josh Volk farms in Portland, Oregon, and does consulting and education under the name Slow Hand Farm. He is the author of the books Compact Farms: 15 Proven Plans for Market Farms on 5 Acres or Less, and Build Your Own Farm Tools, Equipment & Systems for the Small-Scale Farm & Market Garden, both available from Growing for Market. He can be found at SlowHandFarm.com.
Copyright Growing For Market Magazine.
All rights reserved. No portion of this article may be copied
in any manner for use other than by the subscriber without
permission from the publisher.