


If you’re like me, you’ve probably seen endless footage and photos of pristine looking market gardens where all the plants look amazing and there is nothing to do but plant and harvest. A good market garden can get to a point in which pest and disease pressure and fertility issues become virtual non-factors, but that is not the story in a first-year no-till garden.
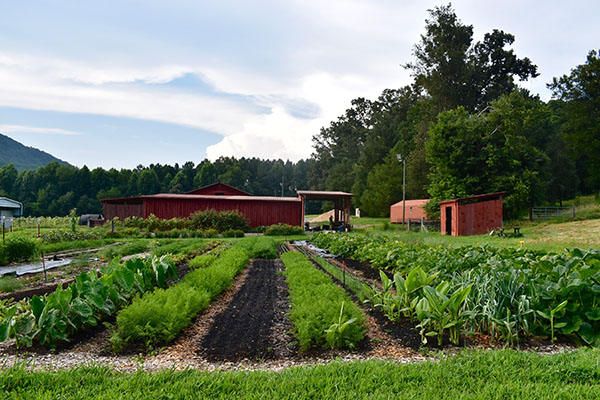
The market garden in the full abundance and beauty of July. All images courtesy of the author.
Don’t get me wrong, we are very happy with how our first year went at Wild East Farm in Marion, North Carolina. On less than 1/4 acre we harvested thousands of pounds of food and sold over $30,000 in produce. And we wanted to share all the lessons we learned from a first-year no-till market garden in hopes that others can use the knowledge.
Establishing the beds
To offer some background, we used a deep compost system to establish our no-till beds. Our first year we had two different methods of site preparation — mostly a factor of how much time we had to prep the ground. For our first garden block, which consisted of forty 50-foot beds, we were in a time pinch. We moved onto the property in November of 2022 and wanted to start planting by March. I opened up the plot using a borrowed spader implement over the winter and in February began making beds directly on the spaded ground.
To establish the beds, I built a wooden frame out of scrap wood that was 25 feet long, 30 inches wide, and 5 inches deep. The 25-foot length worked well for our plans, as we wanted all of our beds to be in multiples of 25 feet, either 50 feet, 75 feet, or 100 feet. The 30-inch width standardized the bed widths to match all of the popular market garden tools which are designed around 30 inches. Using 5-inch boards allowed us to also standardize the depth of compost applied to each bed.
Using a borrowed Bobcat from a neighbor or our tractor bucket, we laid out the frame in the location of the bed, dumped the compost into the frame, and raked it smooth to the level of the top of the frame. After we filled the frame, it went down the bed to continue it or was moved over to the next bed.
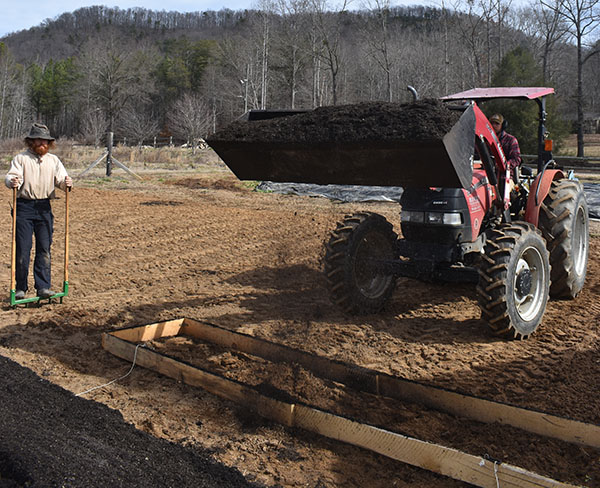
Dumping compost into our makeshift bed frame using a tractor saves our backs and a lot of time. We make sure to broadfork where the tractor has already driven before applying compost to new beds.
For the second set of garden blocks we built last year, we used a more intensive and, in my mind, better site preparation protocol. First we ran pigs through the plot for four weeks in February and allowed them to do an initial tilling. Once we moved the pigs off of this paddock, I went through again with the spader and followed that by sowing a buckwheat cover crop.
By May, the buckwheat was in full flower and I scythed it down and we laid silage tarp over the area until August. The three months of occultation broke down the immense amount of organic matter from the buckwheat and smothered any weed seeds that germinated. In August, we removed the tarps and built beds using the same method as before.
We chose this method because it offered a quick and smooth work flow. Two of us could easily build twenty 50-foot beds in just half a day, as opposed to the labor of doing it with wheelbarrows. There are drawbacks to this method, however. The repetitive driving of heavy machinery over where the beds will be laid certainly compacts the soil. We took care only to do this in dry weather, so as to minimize this impact, but it was noticeable. More on this later. Ultimately, we prioritized saving our backs and saving time and I have no regrets about doing so, as this is the only time heavy machinery will ever be driven in these spaces.
Sourcing organic matter
Once the beds were made, we immediately could start planting. This is only the case because we had the foresight to purchase the compost over a month in advance of applying it. I knew from experience managing another farm that this particular source delivered compost very hot and very dry. The process of loading the compost into their truck reignites the composting process, which is why it was always so hot on arrival.
Trying to plant into hot, dry compost will lead to some very unhappy plants. By getting it delivered ahead, it was able to finish properly and get rained on enough that it would be ready to plant into once we made our beds.
Another note on compost is that of availability and cost. We are fortunate to live within delivery distance from one of the better compost producers in our area, Atlas Organics. They can deliver by the tractor-trailer load which comes out to about 50 cubic yards. That quantity runs us about $1,300 per load, which is a significant investment. However, that level of investment is only necessary in the establishment phase to get that first thick application down.
After that, we can apply just 1 to 2 inches per year on each bed and maintain a thick enough sheet to maintain a deep compost system. We also see it as an investment in topsoil and fertility that negates the necessity of purchasing a tractor or BCS and implements and the running cost of fuel. The $1,300 worth of compost covers about 20 of the 50-foot beds and can pay for itself from a few crops off a 50-foot bed in the first year. Those numbers work for us.
For the pathways, we applied wood chips in the same thickness as the beds so that the paths and beds were level. This reduces erosion from beds into paths and creates a very ergonomic layout whereby stepping over and straddling beds is very easy — even for short-legged people like myself.
I like the chips, but there are limitations and drawbacks. Firstly, it is hard to keep them from getting into the beds. The odd chip on a bed surface does not bother me. But chips washing into or getting kicked into beds and then getting incorporated at bed flips has caused some noticeable nitrogen availability issues in small patches. We observed that plants growing where chips got incorporated into the compost performed very poorly and rarely made it to harvest. Also wood chip availability is a challenge in our rural setting. We get the odd delivery from local tree companies and utility services, but they are often not in our area so we have to take what we can get.
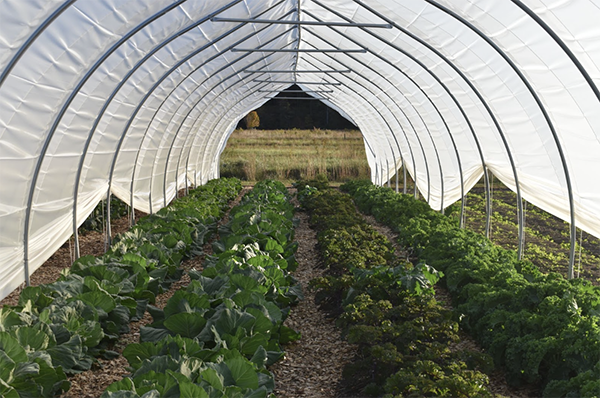
Caterpillar tunnels fit beautifully into a no-till set up and can easily be moved around our permanent beds.
I purchased two tractor-trailer loads of chips in the first year to get us started. The first I bought in January and it cost about $650 for a full tractor trailer. Again, I purchased a load in April which ended up costing $1,300. It did not occur to me until afterward that the spring sap flowing in the wood of trees would add so much water weight, and the lumber mill I was buying from charges by the ton. By purchasing chips in the winter, when the cut trees are dry, I saved over $600 in what was just water.
This was an important lesson. In the future we may go toward using straw in pathways or just allowing compost in our pathways. For now, we are happy with the wood chips as they soak up extra moisture, provide an exceptionally clean working environment, and are adding loads of organic matter to the system. However, I am not attached to using them for the long haul.
What about the vegetables?
Now to the vegetables. The key takeaway in my experience using the deep compost system is that in the first year leafy crops and fruiting crops absolutely love it, whereas root crops are not so happy. Just eight weeks after planting, we started to have bumper crops of kale, cabbages, spinach, lettuce, and asian greens. That first summer, our tomatoes, summer squash, and peppers produced like I had never seen before.
Root crops were more of a challenge. While we grew some nice radishes and turnips, we had very limited success with beets and carrots. With the carrots in particular, I believe they grew past the compost layer and hit the compacted soil underneath, altering their shape and affecting their growth.
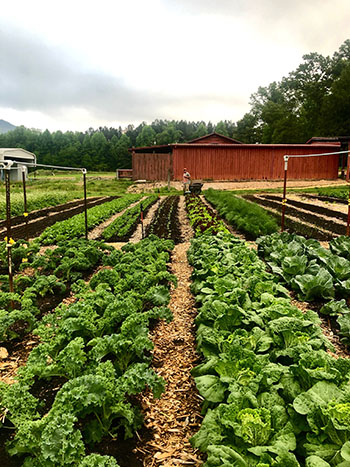
Greens crops looking good in the late spring. Note the wood chip pathways are as deep as the compost.
Additionally, very fine humic compost can develop somewhat of a surface compaction from rain and irrigation. This is partially why we invested in a tilther that has turned out to be very critical in our bed flips at this stage and part of why I think the root crops did not do as well as the other crops. We also only grew root crops in the first plot we established, which has a much heavier clay soil underneath the compost than our newer beds, and leads to poorer water infiltration and gas exchange beneath the compost layer.
While this was an issue this year in our context, I strongly believe that these issues will resolve themselves with time. By broad-forking and tilthing at each bed flip and allowing crop roots to decompose — and regularly adding additional compost — any compaction issues that we experienced in our first year will resolve themselves within two to three years. To anyone planning to go with this method, I would strongly suggest against planning on producing too may root crops and rather leaning on greens and fruiting crops in the first years.
Weeds and pests
Weeding is a question that comes up a lot around no-till. Proponents claim that weed pressure drops dramatically and skeptics don’t understand how it is possible to manage weeds without tillage and mechanical cultivation. In our first year, weeds were virtually a non-issue. Once a week between May and September I spent approximately 20 minutes pulling weeds. Even this amount of weeding was not a total necessity and had more to do with my preference of having a totally weed-free garden.
All the weeds that came up were perennials that poked up through the compost. Nutsedge, buttercup, dock, some shallow-rooted grasses, and a small, dreaded Bermuda grass patch were the only weeds we saw. Not a single annual weed appeared. While this likely will change as weed seeds blow in, I am confident that it will not ever become an issue because the conditions for annual weeds to germinate are not there.
Annual weeds are ‘earth repair mechanisms’ and are simply fulfilling their ecological role of attempting to rapidly cover bare soil. Since our soil is never bare and is constantly covered in a compost mulch that also acts as our growing medium, annual weeds, even if the seeds are present are not stimulated to germinate. Now that we’ve invested in the right tools to have very uniform spacing, hoeing with a wire weeder and occasionally hand-picking, perennial weeds will be short work that we only do a few times throughout the season. That allows us to spend most of our time harvesting, flipping beds, and planting.
In regards to pest and disease pressure, we use as few sprays as possible, all of which are organic. In our first year all I applied was Bt (Bacillus thuringiensis) to brassicas in order to eliminate cabbage moth caterpillar damage. In addition to that, I applied a weekly spray of actively aerated compost tea. That is all.
All other issues that came up were a matter of issues in the soil or fertility imbalances that impacted the plants’ health. In our most poorly draining soils, we had some issues with anaerobic conditions leading to disease. Rather than trying to acutely fix those problems, we took them out of production, put them into cover crop, and will continue to de-compact and fix them over time.
If we saw aphids, that to me indicated too much nitrogen, I deduced I should reduce spraying compost tea and fertigating crops. These adjustments helped and it is the type of mindset that we are going to proceed with as much as feasible, as we’d rather focus on what it takes to grow healthy plants than finding the best product to apply.
Future plans
As I write this we have a future garden plot that is tarped for the winter and that we will make more beds on in February for March planting. We are going to use the same methods to establish these beds, and I expect some of the same first year issues to exist there. That is okay. It is a matter of tradeoffs at the end of the day. I am happy to take on the challenges of establishing a no-till garden if it means that we won’t be reliant on machinery for vegetable production. I am also very excited to learn our context specific challenges that come out of using this system. So, it is hard to even frame ‘failures’ in the negative; they are all just learning opportunities.
After implementing and working in the deep compost no-till system, I am firmly a proponent of its viability and merits as a method for producing commercial vegetables. That said, I think it is only truly viable in this form on a very small scale. I have a hard time imagining these methods working on a scale of more than a few acres, but I would be glad to see examples proving me wrong.
We like the micro-scale and like growing our production by intensifying rather than increasing space. If you are curious about no-till growing, dive into it, learn from the challenges and be inspired by the successes. It is a truly beautiful way to grow produce. I deeply value our commitment to not being reliant on expensive tools and machinery to provide our community with vegetables all year long.
Noah is a farmer, writer, and educator that has gratefully called Western North Carolina home since 2014. At the core of all he does is an interest in relationship, both human-human and human-earth. This is why he farms: so that he can spend as much of his waking life as possible engaged in all forms of deep relationship with his community.
Copyright Growing For Market Magazine.
All rights reserved. No portion of this article may be copied
in any manner for use other than by the subscriber without
permission from the publisher.