


If you are managing a small scale farm or market garden, you are likely already aware of the importance of soil health management. You are probably also aware of the skyrocketing cost of amendments and fertilizers. While vermicomposting on your farm won’t necessarily replace or eliminate those costs, it will greatly reduce them as well as provide benefits that just adding fertilizer will not provide. I have been vermicomposting for 7 years, and it is something I am quite passionate about. I also managed a small 1/3 acre farm over the course of the past three seasons and was astounded by how drastically our production increased each year during that time. I truly believe that the increase is largely due to our worm casting and worm tea regimen that I built into my systems on the farm. I hope that this article will encourage you to consider building vermicomposting into your systems on your farm.
A bit about me
My name is Ro Kicker, and I am a passionate farmer, educator, and community builder in Saint Louis, MO, which is now zone 7a. I work for a local nonprofit that is focused on food justice and building resilient local food systems. I am now in a new position that is focused primarily on education for emerging farmers. I am responsible for supporting the professional development of our farm team, leading our apprentice program for brand new growers, and leading our Farmer in Training program for season-long farmers developing skills at an intermediate level. I am also the founder of a local community garden called Feed the People Garden Project that is focused on community building, education, and growing and distributing a lot of free fresh produce. I most recently in November 2023 attended The Worm Farming Conference in Valdosta, GA which inspired me to start my new LLC, Ro’s Wigglers (www.roswigglers.com). Ro’s Wigglers is primarily focused on supporting beginners that are interested in starting their first worm bins. I also sell worm castings and composting worms. Basically, I am obsessed with all things farming, food justice, compost, and vermicompost and want to spread that joy and knowledge to others.
Benefits of vermicomposting on a small scale farm?
So why would you want to add vermicomposting to your farm system? Well for starters, vermicomposting is a sustainable, affordable way to drastically improve the health of your soil. Worm castings (a polite way of saying worm poo) are absolutely loaded with biology that will greatly enhance and support all the living creatures in your soil food web. This biology makes it possible for your crops to be able to more effectively uptake the nutrients from the soil. Worm castings will also improve your soil structure and water retention capabilities. While worm castings do not entirely replace important nutrients needed in your soil, they are a great way to supplement and reduce your fertilizer costs. They provide a slow release, longer term feeding of nitrogen, potassium, and phosphorus as well as a wide range of micronutrients, which ultimately depends on what you are feeding your worms. Worm castings also are known to greatly increase pest and disease resistance to your crops. In addition to mixing the castings into your farm soil, you can also mix them into your potting mix for seed starting, which will give you seriously healthy seedlings. Seedlings that start off strong and healthy have a much greater ability to ward off pests and disease.Seedlings grown in potting mix that contains worm castings will also develop stronger root systems, resulting in strong plants and higher production rates. In addition, by adding worm castings to your farm plots, you will notice an increase in germination rates for your direct-sown crops.

I raised the bin on center blocks and added a modification to make the harvesting process easier. Now I can simply put bins under the front and use a push broom to pull the castings into the bins. All images courtesy of the author.
My vermicompost system
On my farm, I have a 4ft by 8ft continuous flow through (CFT) vermicompost system from Michigan Soil Works (now called Worm Gear) set up inside the greenhouse. I love the way that the CFT system works with our overall systems, where I am able to link as many things together as possible for great overall efficiency and maximum benefit. I will say that I do NOT recommend keeping your worms in the greenhouse if you can avoid it. The composting worms that I use, red wigglers and European nightcrawlers, are some of the more common composting worms. They require temperatures that stay between 45-85 degrees fahrenheit. In the summer, our greenhouse gets MUCH hotter than that, so I had to set it up so that our worms had A/C while the rest of us are sweating. The farm I manage is an urban farm, and we are very limited on storage space and options. Ideally, you would want to keep your system in a temperature regulated building, a basement, or at least an area with a lot of shade.
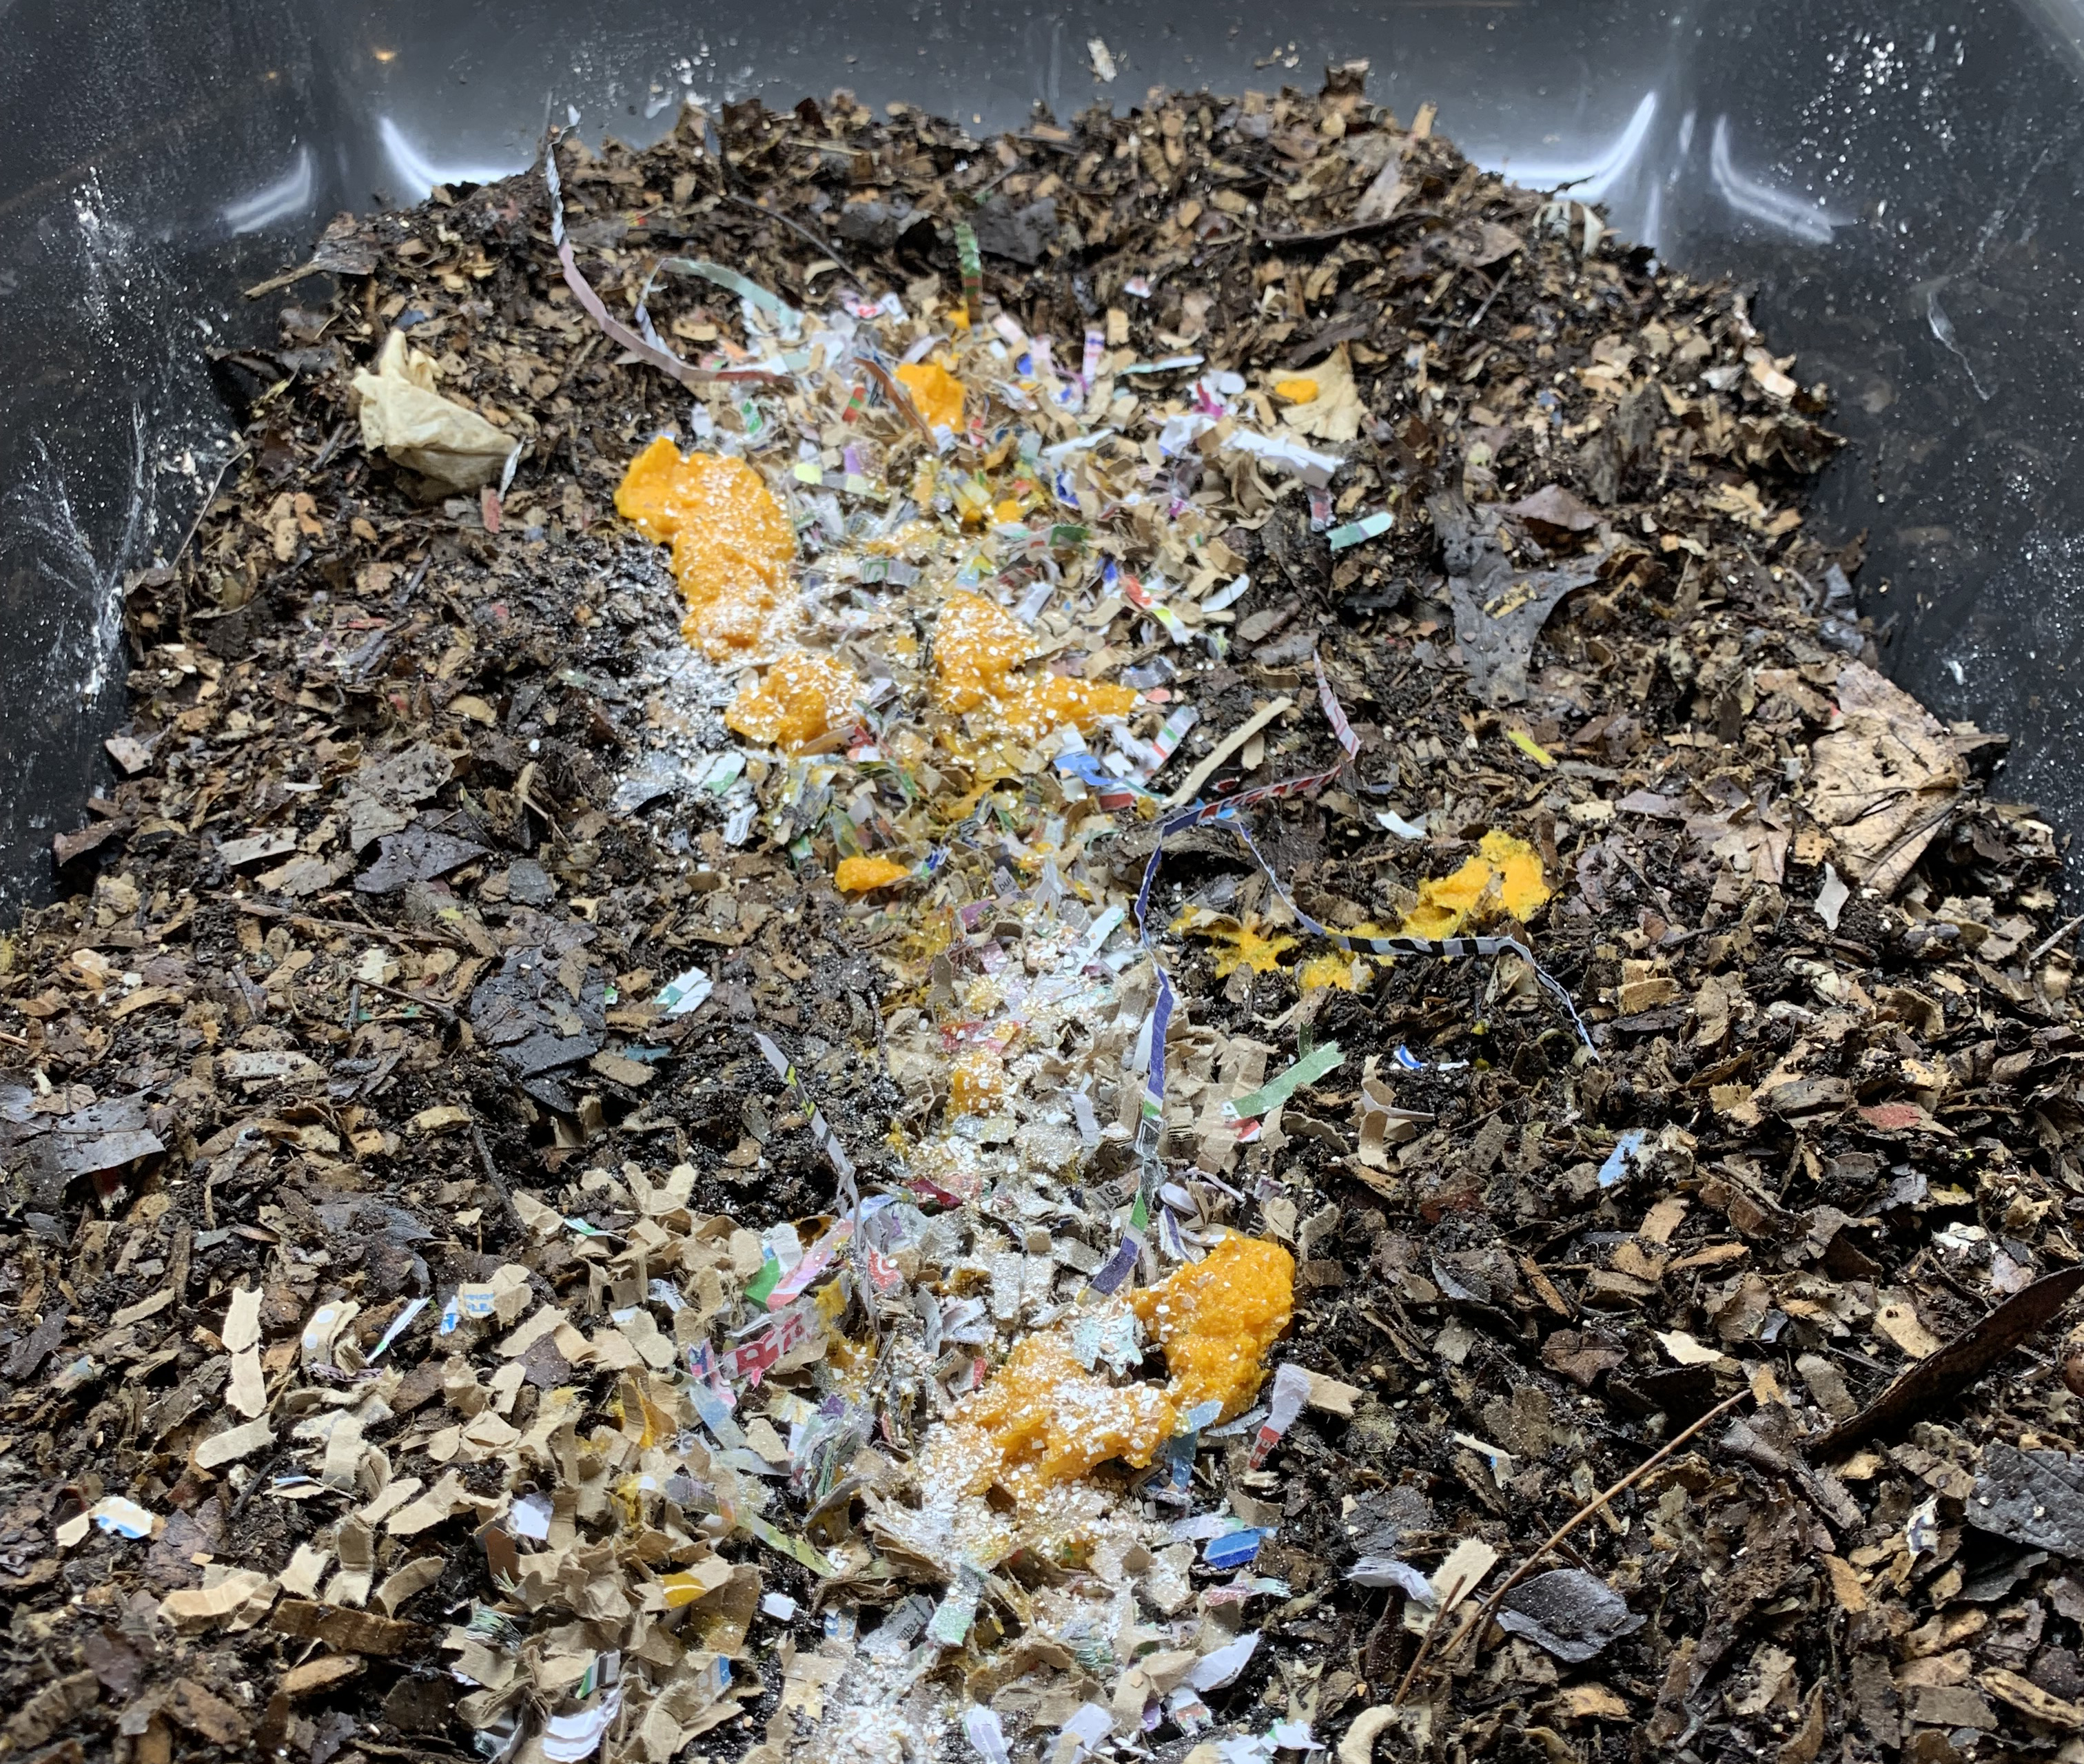
Options to feed your worms include fruit and veggie scraps, the undesirable parts from harvest day, pulled weeds, composted manure, coffee grounds, almost finished compost and mulched leaves. Consider what you have access to and go from there.
The way that a CFT system works is that you add 1-2 inches of new food and bedding material to the top of the bin each week, and harvest the finished castings from the bottom of the bin. Ideally, the worms are supposed to continue to migrate up toward the new food and bedding, leaving behind only the castings, but we always end up with some stragglers that we sift out and put back into the top of the bin. Here is how our system functions and is built into our routine:
1. Each week: Harvest castings from the bottom of the CFT system. Ours is designed with a hand winch that you crank. It drags a metal blade along the bottom 1 inch of the bin and drops the castings down below. There are also plenty of DIY options that would involve just scraping a long tined metal rake along the bottom to harvest the castings.
a. Sprinkle the castings into a new area of the production space, gently rake in, and record on the laminated sheet so we know where we have added castings. (see pic)

This is the hand winch that is used to crank the blade along the bottom of the bin and harvest castings.
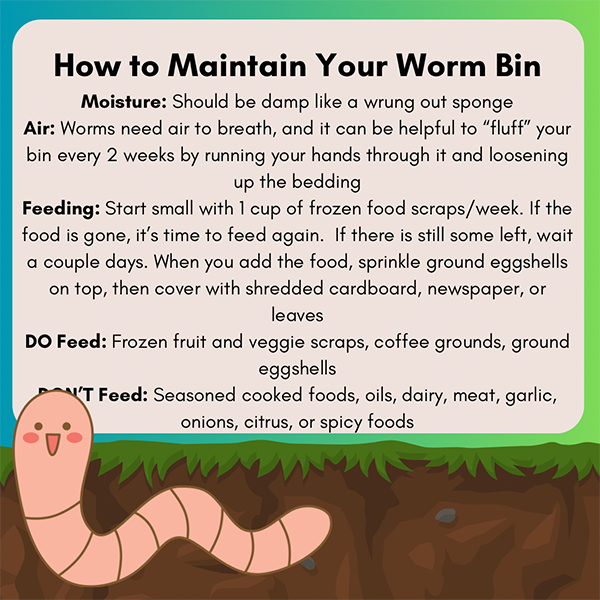
2. Each week: Add 1-2 inches of almost finished compost from our compost bins to the top of the CFT worm system. Sprinkle ground eggshells on top to provide grit for the worms. Water the bin with rain water or water that has been allowed to sit 24 hours to let the chlorine evaporate out (chlorine kills the microbes we are trying to grow). Keep watering evenly until you see some drips coming out the bottom of the bin.
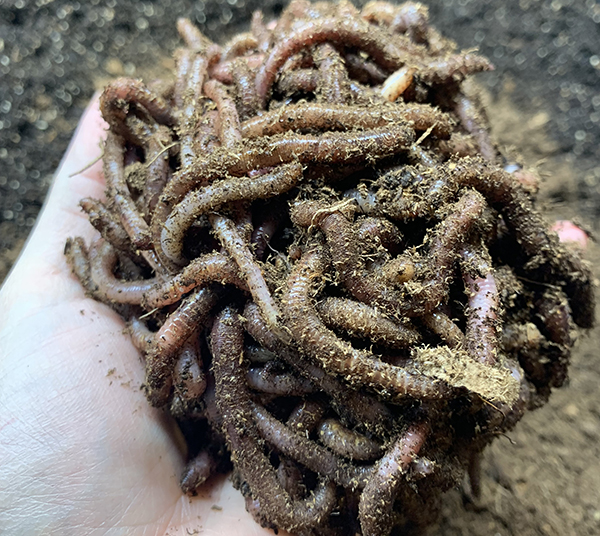
The stars of the show. The author uses red wigglers and European nightcrawlers.
3. Each week: Foliar spray a new farm plot with worm tea. We keep a 55 gallon barrel of worm tea brewing in the greenhouse. It is a fairly simple setup with an aerator pump, some pvc tubing with holes in the bottom where the air comes out, and a big mesh bag that we fill with worm castings. When we prepare a new batch to brew, we simply fill the mesh bag with fresh worm castings and hang it on the side of the barrel, fill the barrel with rain water from our rain tank, add 3 tablespoons of unsulphured molasses to feed the microbes, and turn on the air pump. Sometimes I also add a little bit of fish emulsion and epsom salt to give it an extra boost for fruiting crops.
4. Each month: Do a soil drench on one farm plot with worm tea. I usually wait until we have a big volunteer group and just send them back and forth with watering cans. On a larger scale, I’m sure there are better, more efficient ways to do this.
You can of course adapt these steps to work within your context. If you don’t have as much capacity, consider doing these steps less frequently, or choosing one method at a time such as only doing foliar sprays or only adding castings to your soil.
Considerations for your farm
Have I convinced you that starting a vermicompost operation on your farm is a good idea? Then here are some things to think about:
1. Budget: How much money would you like to invest? The 4ft by 8ft CFT system that I have from Worm Gear with a hand winch was $6,995. They have larger systems, as well as pricier motorized systems as well, but the price also goes up. I will say that in the 3 years we have had this system, it has more than paid for itself. A way to put it into perspective is thinking about how much the alternative approach of outsourcing worm castings would cost. On average, a delivered 1 ton super sack of worm castings costs around $800, and you still have to pay a hefty delivery fee. However, I also recognize that is a large chunk of money to come up with, and there are many ways to design your own CFT system for significantly lower cost. That approach does, however, cost you more of your time, and depending on the materials used will likely also have to be replaced sooner.
2. What quantity of worm castings do you need for your farm scale? On our farm, we have 1/3 acre in production. We add approximately 6 5 gallon buckets of worm castings to 2 50ft long, 30in wide farm rows (3 buckets/row). Our 4ft x 8ft CFT system is perfect for that amount. Do you want to only produce enough castings to do regular foliar sprays? Then you may only need a small stackable system. Do you want to produce more castings than you need and/or breed worms to sell? This can be a fantastic way to add an additional revenue stream to your farm.
3. What kind of system will you use and what storage options do you have available? Are you interested in a CFT system? A smaller stackable system? Shelves with mortar trays or bus tubs? (Worm farmers often utilize this system for what are called “breeder bins” to be able to reproduce and sell as many worms as possible). Outdoor windrows? A long, more shallow system that allows for the “wedge” technique? The wedge technique involves starting your worms and bedding at one end of the system, and feeding the next section over each week so that the worms finish off the material and continue to migrate toward the new food source, leaving behind finished worm castings for you to easily harvest. The most commonly used composting worms, red wigglers and European nightcrawlers, require temps that stay between 45-85 degrees fahrenheit, so this will be an important consideration for storage options. Do you have room in a basement to keep your worms? A covered space in the shade? A temperature regulated outbuilding? All are great options and just depend on the context of your farm and climate.

I used some scrap material I had to create an additional grow bench on top of the worm bin to maximize growing space in the greenhouse.
4. How will you build vermicomposting into your farm system? Do you want to amend your soil with worm castings at the beginning or end of the growing season? As part of each bed flip? Do you want to regularly side dress with worm castings? Do you want to just stick with regular foliar sprays? How much time do you want to dedicate to managing your vermicompost system? A small stackable tray can handle a great deal of neglect, as can a larger CFT system, whereas individual bins on shelves or a shallower wedge system will need more frequent feeding and moisture checks.
5. What will you feed your worms? Some options include fruit and veggie scraps, the undesirable parts from harvest day, weeds pulled, composted manure, coffee grounds, almost finished compost, mulched leaves. Consider what you have access to and go from there.
How to keep your worms happy.
There is a lot to consider if you are thinking about building vermicomposting into your practices, but it is absolutely worth it once you get your systems in place. The benefits on your farm will be astounding, and I imagine you will be asking yourself why you didn’t start sooner. While there is way more information on this subject than I can possibly fit into this article, I hope that it has your wheels spinning on how you might include worms in the mix on your farm.
With a strong commitment to food justice, inclusion, and equity, combined with a deep passion for gardening and community building, Ro can be found in many community spaces throughout St. Louis. Most recently, in November 2023, Ro founded Ro’s Wigglers, which finds great satisfaction in helping to spread the word about how beneficial vermicomposting is. They work to take the guesswork out of worm bins so that interested beginners can take that first step in their journey into the wonderful world of vermicompost!
For many years, Ro has felt drawn to the soil, to growing and donating food, and to connecting with the community through urban agriculture. In 2017, they founded and continue to run the Feed the People Garden Project out of their own backyard! With the help of community volunteers and some beautiful compost, they have worked to bring fresh food to those in the community who often need it most.
After completing the EarthDance Organic Farm School Apprenticeship Program, Ro joined the Urban Harvest STL team in November 2020 as Farm Manager, and was later promoted to Farm Training Specialist, where they focused on the important work of “growing growers” in STL.
As of April 2024, Ro has fully leaned into self-employment, happily running Ro’s Wigglers LLC. They attend vending events at farmers markets and other community engagement events, lead vermicomposting workshops, and support local folks with garden and compost consultations. Ro is loving life and the opportunities to talk to people interested in learning more about vermicomposting, soil health, and getting their gardens started up. Ro always enjoys reminding folks of the Ro’s Wigglers tagline: Healthy Soil. Healthy Plants. Happy Worms.
Copyright Growing For Market Magazine.
All rights reserved. No portion of this article may be copied
in any manner for use other than by the subscriber without
permission from the publisher.