© 2009-2015 Pam Dawling and New Society Publishers
In hard financial times, it’s a waste to throw out all leftover seed at the end of the planting season and buy all new for next year. Yet it’s a bigger waste to keep everything and risk poor germination of a vital crop. Here’s a systematic method to minimize the chances of throwing out good seed, keeping bad seed, buying too little or buying too much. The key components are:
• storing seed well, so it will grow next year, and you know you can rely on it;
• planning row footage of each crop for next year;
• knowing how much seed is usually sown per 100 feet;
• calculating how much your farm uses per 100 feet (optional fine tuning);
• quantifying how much seed you have left;
• deciding which old seed to keep and which is unreliable;
• calculating how much seed to buy;
• deciding how much extra to buy in case a sowing fails;
• then placing your orders early, to increase the chances of getting exactly what you want.
Seed storage
Let’s start here, because unless you store seeds well, there’s no point in carrying them over for next year. Good seed storage conditions are: dry, cool, dark and rodent-proof. Paper packets on a window ledge in the breezeway are fairly doomed! Seeds have an amazing capacity to draw in water from the air, or from soil, or from damp fingers. And once partially hydrated, the seed respiration rate speeds up. They revive from dormancy only to die when the conditions aren’t good enough to really grow. When planting in our garden, we ask crew to keep one hand clean and dry for sowing the seed, and to avoid putting any seed that gets mixed with soil back in the packet. Soil always contains some moisture, so dirty = damp.
The paper packets which seeds are sold in are not designed for long-term storage. Foil packets are a lot better but add to the cost of seeds, so many seed suppliers sell in paper, and growers can provide their own long term storage containers. The storage life of seed is halved for every 1 percent rise in the moisture content of the seed above the very dry 5 percent. So it’s wise to put freshly arrived seed packets in waterproof containers, away from humid air. Airtight conditions are generally the same as watertight. Plastic, glass and metal boxes can all fit the bill. During the sowing season, we keep our seeds in plastic coffee containers with clip-on lids and built-in handles. Glass jars are probably more airtight, but we try to keep glass away from our garden because of the danger of cuts from broken glass. Also, the plastic jars are almost opaque, so they help keep the seeds in the dark. We group seed packets by type: one jar for Nightshades, one for Big Leafy Brassicas, one for Rooty Brassicas, and so on. This means we take the Summer Squash jar to the field to sow the squash, and if the ‘Zephyr’ seed runs out, we can finish the row with Gentry, as we have the seed right there. Some other growers prefer to keep seed packets in alphabetical order in rectangular plastic shoe-box sized containers. Heavy duty zip-topped plastic bags are useful as a first layer of defense against the elements. We store bigger seeds like beans and corn in 2- to 5-gallon buckets with tight-fitting lids.
We store the seed jars and buckets at the back of the shed where it is quite dark. At the end of April, May and June, I take the seeds we won’t need again till fall (or next spring) to a cooler storage space in the basement. In April, that’s the spinach, peas, chard and beets. At the end of May, it’s the radishes, alliums, watermelon, winter squash. In June, it’s the nightshades, okra, peanuts, melons. The shed is dark, dry and fairly cool, but for summer, we’d rather keep the seed we won’t need soon in a place that’s cooler. For every 18 degrees above 32°F, the life of seed is halved.
We put spinach seed (double-bagged for airtightness) in the freezer for two weeks or more before we need it for fall sowing. This helps break the heat-induced dormancy. I have heard some people keep lettuce seed in the fridge during the summer, and I often have good intentions, but so far I haven’t managed to do that. Fridges are nice and cool, but also very humid, so seed containers for refrigerated seeds must be really airtight.
If you have seed you won’t sow for many months (for instance, you deliberately bought enough for five years, or it’s an heirloom from Auntie Doris that isn’t available commercially), then you can store the seed in the freezer. Freezing doesn’t kill seeds! Some growers believe plastic bags do let some moisture through, and they recommend freezing in glass jars, with the lids sealed with Parafim self-sealing tape. Parafim is a grafting tape, and is available from Southern Exposure Seed Exchange and other companies who sell supplies for grafting or for seed saving. Seeds that are sufficiently dry to freeze are those at 5 percent moisture content or less. They snap or shatter when bent or hit – they don’t mush. If you need to dry your seed further before freezing, put it in a jar with some desiccant such as silica gel until the seed snaps. Use a volume of silica gel equal to the volume of seed. In a pinch, far from town, you can use three times the volume of dried milk in place of silica.
Seed viability
Opinions vary a bit about the shelf life of seeds. Spinach, for example, is sometimes listed as being good for one year; in other references, it’s four years. The fuller story is that storage conditions make a big difference, as explained above. You can make your own decisions, weighing up the information supplied, your knowledge of how carefully you stored the seeds, the information on each packet about percentage germination when you bought it, and the economic importance to you of that particular crop. If you always transplant lettuce, as I do, you can risk one of your four varieties in that sowing coming up poorly, and just plant out more of the other three if it fails. Many seed catalogs include information about seed longevity, and so does Nancy Bubel in The Seed Starters Handbook. Frank Tozer in The Organic Gardeners Handbook has a table including minimum, average, and maximum.
A simplified version is as follows:
Year of purchase only: Parsnips, parsley, salsify, and the even rarer sea kale, scorzonera.
2 years: Corn, peas and beans of all kinds, onions, chives, okra, dandelion, martynia.
3 years: Carrots, leeks, asparagus, turnips, rutabagas.
4 years: Spinach, peppers, chard, pumpkins, squash, watermelons, basil, artichokes and cardoons.
5 years: most Brassicas, beets, tomatoes, eggplant, cucumbers, muskmelons, celery, celeriac, lettuce, endive, chicory.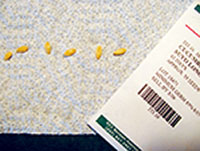
If in doubt, consider running some germination tests on critical packets of seed. Take a sturdy paper towel, folded in half, or a coffee filter, and dampen it by spraying with water. Count out 10-100 seeds, and set them in a line in the fold or seam of the paper. The more seeds you can test, the more representative your result will be. Roll the paper loosely and put the roll in a plastic bag in a warm place, at a similar temperature to seed starting for that crop. One winter I made the mistake of trying to germinate watermelon seeds on the bathroom counter – it was too cold! Unroll and check the seeds twice a day. Initially your inspections will only be providing an air change for the seeds, but soon you should see little sprouts emerging from the seeds. Spritz the seeds with water as needed. Count how many germinate and also notice if they are quick (vigorous) or slow (low-vigor seed, not for use in challenging conditions). When no more germinate, you have your final figure on germination. This will help you decide whether the seed is worth relying on next year and whether you need to sow it thickly.
Crop review and planning
As I wrote in the December 2007 issue of GFM, we conduct a crop review meeting each fall to record our impressions of that year’s crops. This information helps us decide what to grow next year. It helps to have this information before buying seeds. We have a series of garden planning sessions, starting in mid-October and running through to mid-February. A more compressed sequence would be entirely possible, but we enjoy taking life slower in the winter, so we do one or two steps each week. In preparation for the crop review, we gather any notes and information we have on the year’s crops, figures for yields, info from the row tags (“bolted early 4/15” scrawled in pencil on the row label). We consolidate this and put the relevant bits onto our crop review form, leaving lots of space to write down useful stuff that people mention during the meeting.
This all helps us make a rough plan for how much of what to grow for the following year. (Less eggplant! More melons! Fewer sowings of beans!) We do the detailed layout planning later, which has the disadvantage that we sometimes change our minds by then and don’t need exactly the seed we ordered! But it’s close.
How much seed
Catalogs usually include guidance on how much seed to buy per 100 feet of row, and you can use this information to help you decide how much to order. If you have kept good records, after you have inventoried your leftover seeds, you will be able to calculate (or have your computer calculate) exactly how much seed per 100 feet you actually use on your farm. Add the seed bought to the seed left over from the previous year, subtract the seed left at the end of this season, and you have a figure for the amount of that seed you actually used this year. Add up the row feet from all the plantings of that crop, then divide the total seed used by the row feet. Multiply the answer by 100 to find the amount of seed for 100 feet, and record your figures to use when ordering new seed. This level of fine tuning can help ensure you buy the right amount of seed, whether you are heavy-handed or parsimonious when sowing, compared to the catalog average figures.
We have made ourselves a spreadsheet for seed inventory and order. It lists each crop in alphabetical order, with all the varieties of that crop in alphabetical order. Then we record the row feet, the amount of seed per 100 feet, then a formula to calculate the amount of seed needed. Next is a column for the amount of seed on hand, and a column with a formula to calculate the additional seed needed. The Inventory version of the spreadsheet refers to the year past, and then the seed on hand figures are carried forward to the Seed Order version of the spreadsheet.
Doing a seed inventory
Depending on your preference, you can either weigh your seeds, or eyeball the packets and estimate the proportion left. We used to just guess, but we weren’t very good at it, so more recently we have started to weigh our seeds, to help us get a better idea of what we actually use. It’s a nice indoor job once the weather has deteriorated. We use an old mechanical beam balance we were given, but there are electronic scales that are accurate in weighing quantities smaller than a gram. We have developed shortcuts so that we don’t empty each packet out into the scale pan. We keep a list of the weights of the standard paper packets from each supplier, weigh the packets and just subtract the weight of an empty packet of that size. We also keep a zip-top bag handy and use that for seeds in random bags.
At the same time we look at the age of the seed and decide whether to sow it next year or not. If we think it’s too old, we consign it to an Old Seeds Bucket (still in the packet). We make sure to subtract the weight of that seed from our calculations, so we don’t confuse ourselves into thinking we sowed it. That would falsely increase the “Amount of Seed Used” figure and cause us to buy even more next year – the opposite of what we hope to do in making our orders closer to our actual needs!
Calculating the seed order
When we figure out how much seed to order we do add in some extra for some things – crops that can be difficult to germinate, or that we really don’t want to cut too close. We add 20 percent extra for most crops, but only 5 percent for kale, 10 percent for onions and collards, and 30 percent for melons. These numbers are based on our experiences – yours might be different.
We also know which seed we can buy in bulk and use over several years. This gives us an additional security against poor germination, or plagues of grasshoppers or caterpillars. For me, a big bag of broccoli seed for each of our main varieties gives some kind of warm glow of horticultural security!
This is the time to adjust the “Seed per 100 feet” column using your own information from the year past and feed in the next year’s crop plan for varieties and succession plantings. Keep notes about any problems or questions you need to resolve later, and be sure to order enough seeds to cover these eventualities.
We have found it worthwhile to proofread our inventory and order form carefully before making our final decisions, as mistakes not discovered till planting day can be a big problem!
Placing your seed orders
On the Seed Order version of our spreadsheet, we include columns for the name of the supplier we buy that variety from (actually we just use the initial), the item number in the catalog, the packet size and the price. (Be careful though, if you carry this information over from year to year – prices may change!)
Once we have composed our total seed order, we can get the computer to sort the orders by the name of the supplier. Then we can separate the orders to each supplier onto different pages, and calculate the total price for each supplier. This also gives the opportunity to look at price breaks for large orders, and move an item from one supplier to another, if that makes sense. At this point we usually make a cup of tea and reward ourselves with an “impulse buy” or two, if that doesn’t push us up into a higher shipping cost bracket, or blow the budget!
Each spreadsheet page can then be rearranged to put the columns in the order most compatible with the order form used by that supplier. Once you have done your calculations, you can place your orders, nice and early, to increase the chances of getting exactly what you want. On-line ordering is usually quickest and sometimes offers extra discounts. But don’t take that for granted. One year the best financial deal from Johnny’s involved inputting our orders onto their online form, printing it out and mailing it in!
Old Seeds Bucket
The Old Seeds Bucket may provide you a back-up plan if you somehow run out of seed during the growing season. You can reorder from a quick-to-respond seed company, and meanwhile make a sowing with your old seed. If the old seed germinates, you will be ahead of where you would be if you had to wait for the new seed to arrive. And you can keep the new seed for next year. If the old seed doesn’t come up well enough, you can use the new packet and be no worse off than if you had composted the old seed back in the winter.
We sometimes use a mixture of old seeds for a short-term summer cover crop. We take into account the preceding crop and the following one, and customize a mix that avoids those crop families (for a good rotation). Naturally, some crops like parsley and other small, slow-growing ones, never make good cover crops. But peas, beans, corn and brassicas can all make quick growth. Do be careful not to leave your free cover crops growing so long that they become problematic. This year we had a bed of cowpeas, corn and random old lettuce seed, sown beside our sweet corn. Our plans for that bed changed, and before we knew it, we had cover-crop popcorn tasselling out next to our sweet corn. Luckily we noticed in time and cut them down before they cross-pollinated our sweet corn and ruined the flavor.
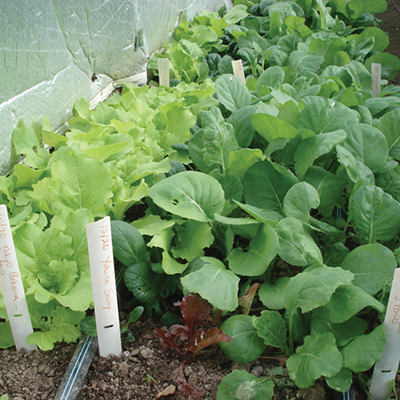
A third use for old seeds is micro-greens or salad mix. We have mixed leftover brassica, endive, beet and chard seeds to get a quick crop of salad mix from an unexpectedly empty spot in our hoophouse. Having these three possible uses for old seeds has helped us be more ruthless about throwing out old seeds at the end of each year.
Pam Dawling manages 3.5 acres of vegetable gardens at Twin Oaks Community in central Virginia. Some of this material is included in her book, Sustainable Market Farming: Intensive Vegetable Production on a Few Acres. It is widely available, including at www.sustainablemarketfarming.com, or by mail order from Sustainable Market Farming, 138 Twin Oaks Road, Louisa, Virginia 23093. Enclose a check (payable to Twin Oaks) for $40.45 including shipping. Pam’s blog is on her website and also on facebook.com/SustainableMarketFarming.
