This article was originally published in the June 2010 issue of Growing For Market Magazine.
Sweet corn presents challenges for organic farmers. Some of these can be easily overcome; others warrant careful consideration. There’s no denying that sweet corn takes up a lot of space, so if you are really short of land, you may decide to forego corn. On the other hand, corn doesn’t take a lot of work, so if you have space, but are short of help, corn is a good choice. The rewards are probably obvious: devoted, satisfied customers! Organically grown hybrid varieties (such as Luscious, Sugar Pearl, Brocade) are available, which helps USDA Organic certified commercial growers.
Genotypes and varieties
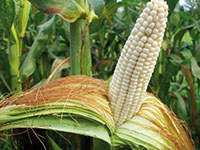
With most food crops, cross-pollination with other varieties or types is only a problem for those growing seed. With sweet corn, the seed is the food crop. Your neighbor’s GMO sweet corn could cross with your corn, if it’s close enough. Isolate these three categories: Super Sweet/Shrunken sweet corn varieties (sh2), all other types of sweet corn, and all other corn types, by at least 250’ (76m) from each other. Or isolate by time, which means sow on dates to achieve at least a 12-14 day gap between maturity of the different plantings. There are several basic types (genotypes) of sweet corn:
Open Pollinated (OP): Most OP sweet corns are noticeably less sweet than modern sweet corn, so consider using hybrids for your customers even if you like OP corn for yourself. OP varieties also deteriorate faster after harvest than hybrids, becoming starchier. ‘Luther Hill’ is said to be the sweetest OP variety.
Normal Sugary (su or ns): (su) types have the old-fashioned corn flavor but are sweeter than OPs, although the sweetness fairly rapidly disappears after harvest. Most can germinate well in cool soil.
Sugary-enhanced (se) and Sugary Enhanced Homozygous (se+ or se-se): (se and se+) types are more tender than (su), and slower to become starchy after harvest. Most, especially the (se+) types, are sweeter than (su) types.
TripleSweet Sugary Enhanced (se-se-se): Created to be sweeter than se-se.
Super Sweet (sh2), also known as Shrunken: (sh2) varieties are very sweet and slow to become starchy. If not isolated from all other types of corn, they will be very starchy and unpleasant. They have very poor cold soil germination. The kernels are smaller than other corns, giving this type its name. The seed needs careful handling, to prevent mashing between a seeder plate and the hopper.
Synergistic (se-se-se-sh2): These types are combinations of genetics from the 3 previous genotypes. Each ear has 75% (se) kernels and 25% (sh2) kernels. They are flavorful, tender and sweet, when they are ripe. If picked too soon, they are a watery disappointment.
Bt corn has been genetically modified so that Bt genes are incorporated in the corn, and so the corn includes its own insecticide. The reasons not to grow GMOs are many, including the spread of random bits of genetic material by cross-pollination with previously non-GMO crops, and the likely consequence of Bt-resistant insects. Fedco tests for the presence of “drifted-in” GMOs, and will pull seed from sale if it exceeds a threshold.
Some catalogs (Johnny’s, for example) indicate which varieties are suitable for certain latitudes because corn flowering is daylength sensitive. Many companies run cold-germination testing, and can tell you which varieties that year have good potential for early sowings.
We’re in zone 7, at latitude 38° North. We like Bodacious 77 day (se) yellow; Tuxedo, a tightly-wrapped 80 day (se) yellow; Kandy Korn, an 89 day workhorse (se) yellow; Luscious 77 day (se-se-se) bicolor, (organically grown, good cold soil emergence); Sugar Pearl 72 day (se+) white, (very short plants); Argent (se) white (tasty with tight husks); Silver Queen 96 day (su) white (long-time favorite, has some drought tolerance and insect resistance); and a late-maturing bicolor Seneca Dancer, which has sadly disappeared off the radar this year. Spring Treat, 66 day (se+) yellow, is one of the earliest yellow sweet corns, and has good cold soil tolerance.
Crop requirements
A pH of 6.0-6.5 is ideal. Very fertile soil is needed, including high phosphorus. P deficiency shows up as purple leaf tips and margins; N deficiency as pale spindly stalks, yellow leaf tips, shriveled tip kernels; Mg deficiency as white-yellow striping between veins, with older leaves reddish-purple, perhaps with dead tips. Corn is sensitive to deficiencies of zinc or copper, but less so to low levels of boron. In looking for deficiencies, it helps to know what is normal for that variety and to also consider water shortage.
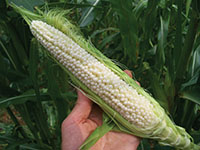
The number of rows of kernels on the cob is set 5 weeks after emergence (although each variety has a number that is usual, when conditions are good). Ear length and number of plants with double ears is established 9 weeks after emergence. There’s the feedback on your farm’s fertility plan.
Sweet corn needs warm soil. Catalogs usually indicate the soil temperature (measured at 9 a.m.) recommended for each variety. 50°F is the absolute minimum, and applies to treated seed and OP or (su) varieties only. 60°F is better for most, and 65°F or higher required by some varieties. Natural II is an organic seed coating containing nutrients which help the seed get growing quickly and strongly. It performs almost as well as the old standard fungicide treatment, without the disadvantages. Common phenology signs for the season being advanced enough to sow corn are that oak leaves are the size of squirrels’ ears, and that ragweed is germinating. For us, the first corn sowing date is usually around April 26, which is also our average last frost date.
Corn has no tolerance of frost, but escape from a late spring frost is possible if the seedlings are less than two weeks old and not yet very tall, as the growing point may still be underground. Thus, in an apparently warm and dry spring, it is possible to risk an early planting as much as 2-3 weeks before the last frost date. Having some transplant plugs for a backup helps reduce the risk level. Emergence takes 22 days at 50°F, 12 days at 59°F, 7 days at 68°F, and 4 days at 77°F.
Sowing
Corn is usually grown in rows about 36” apart. We sow fresh seed 6” apart, and if using seed from the year before, we plant it at 4” apart. Depth of sowing can vary with the soil temperature, being a very shallow 0.5” in spring, to 1” in summer when soils are warmer lower down, and seeds benefit from the extra moisture. Seedlings are thinned to 8-12” apart.
Research by Ray Samulis at Rutgers showed that the yield-reducing effect of shading by the leaves of adjoining plants is much less at distances greater than 8”, confirming that this spacing is usually optimal. Upper leaves get 7-9 times the light of lower leaves, therefore it is important that the upper leaves are in good condition to photosynthesize well. The lower ones get much less light, so may be broken off to make life easier for harvesters.
Corn is wind-pollinated (though you will find plenty of bees collecting pollen). For best pollination, plant in patches at least 4 rows wide. Inadequate pollination leads to gappy ears.
Corn seed must have moisture to germinate. If you have tractor equipment that supplies water while seeding, all well and good. If you use a push seeder, irrigate after sowing. Because we sow small areas of many different varieties, (and because people love to plant corn), we sow by hand. Our method has the advantage of delivering water right where the seed needs it. We measure and flag the rows, put out ropes on stakes, and make furrows. The rope and its shadow make useful guides for keeping straight lines. Next we have someone flood the drills with water from a hose, and we hand sow into the mud. After covering the seed and tamping the soil, we ignore the patch until the seed germinates. The watering in the furrow reliably provides enough water to get the plants up out of the ground. The ropes deter the crows. This method is slower than machine planting, but for us, the advantages outweigh the extra time. We use overhead irrigation for corn. If you use drip tape, you might set out the tape, turn on the water for long enough to mark the soil with damp spots, then sow with a jab planter.
Transplanting
It is quite possible to transplant sweet corn, so those in marginal climates don’t need to give up hope. We usually prepare some plugs the same day we sow our first corn outdoors and use these to fill gaps at the first cultivation. We use 200-cell styrofoam Speedling flats, 1”. We float these in a tank of water until we set them out. Some vegetable seedlings would drown if continuously in water, but corn does not. I believe it is important to transplant the corn before the plant gets too big, and the taproot takes off. 2-3” plants seem OK. The plugs transplant easily using butter knives.
Cultivation
Generally, corn needs cultivating at least twice, once two weeks after sowing, and once at 4 weeks. Even better are cultivations at 7, 14, around 21 days or 6-12” tall and finally around 35 days or 18-20” tall. We use a walk-behind tiller, and follow up with hoeing and thinning. A wheel hoe can be a useful tool. After about 30 days, corn plants get too big to get machinery between the rows.
At tight spacing, adequate irrigation becomes more important. Never allow soil in corn plantings to dry out. More than 1” per week may be needed for maximum productivity, although corn is more drought tolerant than some crops. The most important times for watering are silking and ear-filling.
There used to be a belief that it helped production to remove the suckers that came from the base of the plant. This idea has been tested, and that practice has been found unhelpful.
Flame weeding can be used after planting, pre-emergence, or, with care, after the crop is 2” tall, using a directed flame. Consult ATTRA.
Undersowing
Some growers recommend undersowing with dwarf white clover as a living mulch. Others have found the clover out-competes the corn, becomes invasive and hard to get rid of. We undersow with soybeans at the last cultivation. Soybeans are not the legume supplying the highest amount of nitrogen, but they are cheap, quick, somewhat shade tolerant and can withstand the foot traffic during harvesting. Other growers sow forage brassicas under corn at the last cultivation. Research has shown that this does not depress corn yields. The brassicas can be harvested for forage after the sweet corn harvest is finished.
Rotations
If you use legumes in the winter cover crop preceding the later sowings of corn, a good stand can provide all the nitrogen the corn needs (100-125 lbs/acre). When the legume reaches its flowering point, the nitrogen nodules on the roots contain the maximum nitrogen.
Three out of ten plots in our garden are partially or wholly filled with corn. We make sure we have two or three years without corn between the corn years. Happily, corn is the only crop member of the grass family that we grow. Here’s our sequence:
Plantings 1 & 2: Winter-killed cover crop of oats, (or sometimes a clover patch which has been growing all the previous year). Early corn, followed by garlic planted in early November (half the patch) and oats and soy in the other half.
Plantings 3, 4, & 5: Watermelons the previous year. Cover crop of winter rye with crimson clover (if sown before 10/14) or Austrian winter peas if later in October. Corn. More rye and crimson clover in October.
Planting 6: Winter Squash the previous year. Rye and winter peas. This corn is undersown with oats and soy as its following cover crop. We mow high after harvest, and leave the oats and soy to grow until winter-killed. This makes the patch easy to bring into use for our potatoes in March.
Successions
In order to have a continuous supply of sweet corn all summer, a bit of planning and record-keeping is called for, so that each year’s plan can be fine-tuned. The easy and approximate method of getting a good supply is to sow again when the previous sowing has 3-4 leaves, or is 1-2” tall. For a more even supply, sow several different varieties, with differing days to maturity, on the same date. We sow Bodacious, Kandy Korn and Silver Queen on the same day, and get over two weeks of harvests.
For fine-tuning for a really even supply, nothing beats having real information about what happened, written at the time it happened. We have a Planting Schedule on a clipboard in the shed, and we write down actual sowing dates (next to the planned sowing date), and harvest start and finish dates. Having graphs of sowing and harvest dates for each crop has been very useful for planning effective planting dates.
We make six plantings. 4/26, 5/19, 6/6, 6/24, 7/7, and 7/16 to provide fresh eating every two weeks. The planting intervals are 23, 18, 18, 13, and 9 days. Because we plant three varieties, new corn comes in three times during each two weeks. To calculate the last worthwhile sowing date, add the number of days to maturity, and the length of the harvest window, and subtract this number from your average first frost date. For our 10/14 frost date, using an 80 day corn with a seven-day harvest window as an example: 14 days in October + 30 in September + 31 in August + 12 days in July, bringing us back to July 19 for our final sowing of the year.
Pests and diseases
Crows and other birds can be troublesome, removing the seed before it even grows. We leave the row-marking ropes in place (when hand sowing), or put some sticks and string in after machine sowing. The bird-scaring flash-tape may be even more effective. Row cover would also work.
Raccoons: some say interplanting with big vining squashes deters critters, but I think it deters crew too!
There are several caterpillar pests. An integrated organic approach to keeping pest control numbers below economically damaging levels includes crop rotations, tillage, choosing resistant or tolerant varieties, encouraging beneficial insects, and ensuring adequate fertility and water. The next step is to scout for pests regularly, and take action as required.
Corn Ear Worm is the most common pest. There may be six generations a year in the South. These caterpillars can bite – it’s just a nip, but can be a shock! A first line of defense is to choose varieties with tighter husks, which are harder for the worms to get into (Bodacious, Tuxedo, Silver Queen). Natural predators can be encouraged by planting alyssum or other small, open-flowered plants. You could buy Trichogramma wasps. We buy our beneficial insects from Biocontrol in TN (www.biconet.com). Caterpillars can also be dealt with using a few drops of vegetable oil, in the tip of each ear. Mixing with Bt gives better results, when applied 2-3 days past the full-brush stage of silking. The Zea-later, available from Johnny’s, is a tool for applying this treatment. If pest numbers are not too high, you could simply cut or snap the ends off the ears after harvest.
European Corn Borer drills through the whorl of leaves of the young plants, leaving a pattern of large holes as the plant develops. Bt and Spinosad will kill these, as will Trichogramma wasps. To reduce damage in future years, be sure to mow and disk old corn stalks into the soil at the first opportunity. Organically farmed soils have less of a problem with ECB.
Fall Army Worm are also killed by Bt and Spinosad. These three pests can be monitored in a single program, starting at the whorl stage. At that point, scout for Fall Army Worm, and treat if infestation is greater than 15%. At the pre-tassel and tassel stage scout for ECB and FAW. If infestation exceeds 15%, make a foliar spray with Bt or Spinosad. Check again in a week and repeat if needed. Then at the early silk stage, look for corn ear worm (CEW), and if needed, do an oil injection of the tips. If you also see ECB moths, apply Bt or Spinosad.
Cutworm can be a problem following sod, or if there are adjacent grassy areas. Bait them with bran, cornmeal or hardwood sawdust mixed with molasses and water – these baits swell inside the pests and kill them.
Corn Rootworms are best controlled by rigorous rotations. For a more complete description of insect pests, I recommend the 2004 Organic Insect Management in Sweet Corn by Ruth Hazzard & Pam Westgate, www.umassvegetable.org.
It includes good photos of the beasties, and detailed instructions on applying vegetable oil and Bt for earworm, as well as treatment for Corn Borer and Fall Armyworm. There is a 2001 video Farmers and their Ecological Sweet Corn Production Practices, produced by Ruth Hazzard and Vern Grubinger, available from the UMass Extension Bookstore.
Corn Smut fungus, Ustilago maydis, is edible, known in Mexico as Huitlacoche. The edible stage is when the galls are firm and tender. The flavor is sweetish. ‘Silver Queen’ is the variety “best” at producing this fungus, should you wish to grow it. We find it worthwhile to carefully harvest the infected ears (or pieces of stem) into a special Smut Bucket, and take them to the compost pile.
Harvest
See the article by Dan Pratt in the June-July 2009 issue of Growing for Market. He harvests his corn before daybreak for best flavor, because the sugars manufactured in the plant the day before have become concentrated during the night. We’re not that dedicated. We harvest ours in the morning, and hurry it to the walk-in cooler.
Harvest may start 18-24 days after half the ear silks show, if the weather has been reasonably warm. Judging corn’s ripeness is a skill, based on information from many of the senses. The first sign we look for is brown dead silks. If the ear has passed that test, we investigate further. Each variety is a little different, so close attention is needed. Some varieties exhibit “flagging” of the ear, (it leans away from the stalk as it matures and gets heavier). All ears should look and feel plump, and be filled to the tip. New crew can test for ripeness by opening the side of the husk with thumb nails, and puncturing a kernel: the kernels should look filled out and squarish, not round and pearly; the juice should be milky, not watery, nor doughy. The advantage of opening the side of the husks is that it is possible to close the gap without risk of collecting dew or rainfall, if the ear is not ripe. If the ear is ripe, we bend it downwards, give it a quarter-turn twist, and then pull up away from the plant.
We harvest every other day, which balances getting the right amount with not spending more time than needed in there picking. Such a schedule can work well for CSA farms. Other growers could well need to harvest every day, if daily fresh corn is what your market needs.
After harvest, cool the corn quickly. Hydrocool if you have a large operation. Otherwise, simply refrigerate. Take steps while harvesting to keep the crop cool as you go. Never leave buckets of corn out in the sun. Even at room temperature, harvested OP ears lose half their sweetness in 24 hours.
Season extension
The use of transplants can provide an earlier harvest, as already mentioned. Clear plastic mulch is sometimes used to increase soil temperature and thus germination rate, as well as conserve moisture, and produce earlier maturing corn. The plastic is spread over the seeded beds, then cut and removed 30 days after corn emergence. Clean seed beds are needed for this method to work organically, and plastics disposal is an issue. Row cover is another way to warm soils (and keep birds off).
Seed saving
600’ for home use, 0.5-1 mile for commercial sale. Save at least 500 seeds from at least 10% of the plants in the field, in order to maintain vigor and enough genetic diversity. Don’t be tempted to save just two especially big ears!
More resources
ATTRA Sweet Corn: Organic Production 2008 http://attra.ncat.org/attra-pub/PDF/sweetcorn.pdf
North Carolina State Organic Sweet Corn Production 2005 www.ces.ncsu.edu/depts/hort/hil/hil-50.html
Cornell has a good Resource Guide for Organic Pest and Disease Management. Search under Crop management Practices for Sweet Corn. www.nysaes.cornell.edu/pp/resourceguide/cmp/corn.php
Cornell also has good IPM Fact Sheets for Vegetables: www.nysipm.cornell.edu/factsheets/vegetables/
Pam Dawling is garden manager at Twin Oaks Community in Louisa, Virginia. She can be contacted by email at [email protected].

