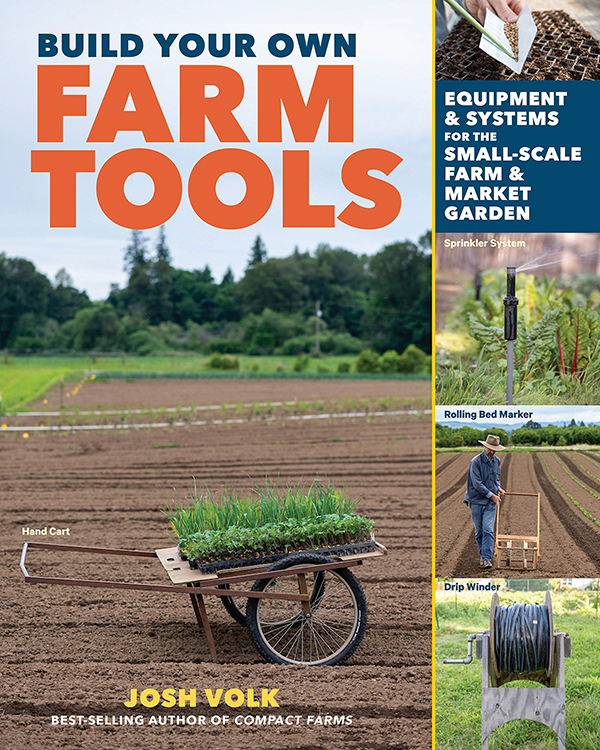
Equipment and Systems for the Small-Scale Farm and Market Garden
Reviewed by Pam Dawling
I knew from the start that I would like this book! Who among us hasn’t wrestled with tools that aren’t quite right, that we spent good money on? Handle too short? Wrong angle? Made for very large hands? Who hasn’t wished for a tool that isn’t commercially available yet?
The book is clearly illustrated with accurate line drawings – better than photos because there’s no extraneous stuff. The first chapter, Setting Up a Basic Shop, covers safety, tools, benches, tool use and maintenance. Having safety notes at the beginning is wise. Yes, don’t wear gloves when working near rotating machinery. Clear space around your work area and have good lighting. When needed, use ear protection, goggles, mask, helmet. No farmer wants an injury. We rely on our bodies to get our work done. Josh writes good advice.
The lists of basic tools are helpful, as is the beginner’s guide to driving screws, a task which many of us were not taught at home or school. I encourage everyone to read the introductory chapter. Even if you know it all, you may pick up a good way to explain things to your helpers. One thing that was not mentioned is a warning not to spread linseed oil rags out to air-dry after oiling tool handles. They can self-ignite – we burned a building down that way!
There are 19 projects, all made and used by the author and farmer friends. All can be built with commonly available tools and materials. There are clear instructions, a description of how the tool is used, and options for design modifications, including how you can apply the design features to other tools you might make. I instantly saw the wisdom of having a three-legged sawhorse for uneven ground – the milking stool principle applies!
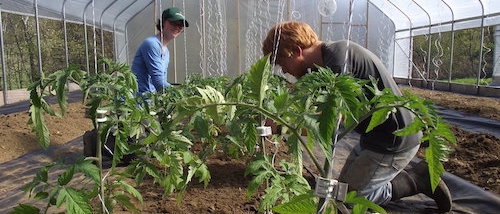
The greenhouse projects start with a simple potting bench made from standard size lumber. Make the height to fit the users. The slatted top is 42” x 8’, and you can customize by installing irrigation sprinklers, or hot water spaghetti tubing between the slats for a bottom-heating system, and/or insulation under the slats to prevent drafts from below.

Three homemade hoes are next., followed by a germination chamber made from wire shelving (as used in restaurant kitchens), surrounded by ½” exterior grade insulation board. Josh’s example holds 27 10x20 flats, and fits under their seeding bench. The heating is provided by a metal pan of water with a submersible 500 watt thermostatically-controlled aquarium heater.
A legless cantilevered potting bench with compost mixing tub follows. The key is to first find a tub the right size for your operation and build around it. Make a sliding plywood lid to cover the tub.
The field tool projects start with benders for making hoops from metal EMT conduit or chain-link fencing top-rail. You’ll need a different bender for each pipe size, and for each hoop size, but as they are made from scrap wood fastened onto vertical posts, you can line up a whole set in your barn. Instructions are included for drawing circles on wood, and calculating the pipe length for a given hoop diameter.
Next is a rolling bed marker. I once made one from plastic piping, following poor instructions online. It never worked. I don’t think it had been field-tested by the designer. No danger of that here! This design uses wood throughout, and marks lines across the bed every 12”, for rectangular plantings of three rows. You could modify it for more rows, or closer spacings, although not to mark a hexagonal (offset) grid, where plants are equally spaced in all directions.
Josh recommends making just one roller and using a 1-2-3 row choice with a 3-row roller or 1-2-4 row options with a 4-row roller. The 4-row roller can be used to plant 1-2-3-4-5-7 rows if you eyeball rows between the marked rows. Likewise, by planting between the lines across the bed, you can create plant spacings of 4-6-8-9-12-15-18”. Rolling bed markers work best when pulled over fairly flat bare soil, soon after raking or tilling.
The hand cart has bicycle wheels (smooth rolling), and a higher bed than the commercially available carts (less bending and lifting), can roll over planted beds (higher clearance), and has good balance so the load doesn’t shift in use. The frame is made from plain steel square tube. The handle is round tubing, and the fork legs for the wheels are flat steel. You can make a flat plywood bed to sit on top of the steel framework. It has no side walls, just a short rail at the back, making it easy to load, unload, or use as a workbench in the field.
The irrigation tools chapter includes a stand with mounted drum to reroll drip tape, and an easy-to-move sprinkler system. The drip system section includes the calculations for applying the amount of water needed. There are also explanations of hose threads and pipe threads and why they don’t fit together, and how to use various driptape fittings. It’s possible to unroll two lengths of driptape at once off a new roll by fastening the free end to the mainline pipe and walking out a loop of tape. You can actually leave the two lengths connected, saving yourself end caps. The drip tape tutorial is very user-friendly, leading you through their real-life example.
The sprinkler system mimics the K-line system used in pastures. It has sprinklers on sled bases connected by ¾” flexible poly irrigation tubing. The sprinklers are either pop-up lawn sprinklers, Wobblers or Nelson Windfighter ag sprinklers. PVC pipe nipples attach the sprinklers to the sled bases.
Josh includes a heart-warming page on the importance of finding good mentors “with a crafter’s mind” as Washington State farmer Rohn Amegatcher calls it. Learning this approach from a person who puzzles through challenges and fixes things themselves is worth even more than learning a particular fix.
The wash and pack tools start with a hand truck mini-pallet. Stack your crates up on one of these pallets, then move them with your hand truck. You can make these from scrap wood as it becomes available and you have time, or you can have an off-season project to make a set of 20.
Next is an onion bag filling stand, that works equally well for potatoes or other root crops. A simple spray table is up next, a slatted table with a slanted metal diverter below it (to keep your feet dry!) and side racks. There’s a page of design notes including making the table height, width and depth fit the humans. Important because the workers will be there for some time.
The barrel washer is next. We’ve long wanted one of these, but prices of ready-made ones are high. These instructions could help us make our own. This project has a high level of complexity, so I should make something easier first! The compact design (4’ long) uses less water than the big ones, and suits small-scale farms. You can add a gate to keep the water in the barrel for longer, saving water. The frame uses aluminum bicycle wheels.
The water supply runs from a garden hose into a length of PVC piping with three clip-on nozzles that can easily be removed for cleaning or replacement. There’s a flow-rate calculation page, and instructions on how to use the barrel washer manually or add a ¼ hp motor. There are tips for diverting and collecting the water that runs out, letting it settle and recirculating it as the first wash water. Design notes help you understand and optimize the washer.
A rolling packing table with a shelf for labels, tape, markers, order sheets is next. The table height adjusts for different workers, and the table surface is a store-bought plastic folding table, which can be removed and used as a regular table if your needs change. Most of the rest is plywood and standard lumber (plus casters). It’s straightforward to make but does require accuracy for smooth-operation.
If you want to move away from plastic crates, and have an upmarket look, the lightweight, lidded easy-to-carry CSA boxes are for you. Make them to fit efficiently in your vehicle and to hold a whole number of whatever size bags you pack into.
Next we move into the office. The main tools are computer, phone, pencil and paper. Josh explains, in 13 pages, how he uses spreadsheets, working back from his harvest goals to his planting schedule and field maps. If you are new to crop planning, this is a good primer.
You can quickly make your spreadsheet serve your needs. You can make a plan for a single CSA share, then multiply by the number of shares to get your harvest quantity. You can add in expected market sales, then proceed to make your Planting Plan.
Copy your Harvest Plan onto a new spreadsheet and parse it out into every single planting and the date to plant to meet your harvest date. You’ll need the days to maturity number, with a little wiggle room added. Include columns for the row length and the total space needed, in beds or in length x width areas. Make a greenhouse seedlings schedule for all the crops you transplant.
Sort your spreadsheets by date for your schedules, and in an alphabetical list of crops for seed ordering. You can even use spreadsheets to make your maps. If you record what actually happens, next year’s schedules and maps will be more fine-tuned to reality.
List the questions you need to answer and find an easy way to record the answers while you are using the tool. It’s easy to record packing data on record sheets in the packing shed. But in the field? Clipboards and paper, or pocket notebooks are useful too. Investigate whether it is actually more efficient for your crew to write information on paper, and later have someone transfer it onto a spreadsheet or database, or if it’s easier to have each person input directly on their phone, or a barn tablet. Google Forms may be useful for time studies of tasks. Different answers suit different people.
The appendices include basic math for tool design, length, area and volume, practical triangles and trigonometry, circles, and calculating and converting rates such as water flow and slope rise. I’m fortunate to be math literate, but I’ve found not everyone can do seat-of-the-pants mental arithmetic to figure how many stakes are needed for a certain bed length. Sad but true.
The section explaining mechanical principles is useful for those of us lacking an engineering or physics background. Force, strength, stress and strain are all explained in terms of a bag of potting mix on a table, and bending forces are explained setting it on the edge of a cantilevered table. The explanation of torque examines the casters on a barrel washer, and a wrench on a nut.
Flow rate and pressure are practical aspects of fluid dynamics. If your irrigation flow rate exceeds the maximum available, the pressure will drop. Pressure is generated by pumps, or by setting the water source higher up than the area to be watered. Pressure drops over the length of the piping, particularly at fittings. Use pipe runs that are as straight and short as possible, with the fewest fittings to restrict the flow. Small losses can add up.
The section on basic materials properties explains what you can expect from wood, steel, aluminum, PVC, and concrete. This very handy practical book deserves a place in your shop, barn or shed. You’ll refer to it often.
Build Your Own Farm Tools: Equipment and Systems for the Small-Scale Farm and Market Garden, is softcover, 208 pages, $19.95 or $15.96 for subscribers. Growing for Market Magazine subscribers receive 20% off this and all the books we sell. The book is currently available for presale; it will ship as soon as we get books in early August. To get your discount, just log in to the website, and subscriber prices will be displayed.