This article originally appeared in the March 2021 issue of Growing for Market Magazine.
Roving farm crew perspectives
For a small farm nerd, the best thing about touring farms around the country is experiencing growing systems in action. Over the past five years, I’ve done just that. My partner and I have had the amazing opportunity to work on more than 14 production-driven small farms and to visit dozens more. Whether a whole growing season or just a few days, getting our hands into a farm’s systems is amazingly informative. Plus, we get to analyze and compare a huge diversity of systems, ultimately picking what we think will work best for our clients or on our future farm.
Many dinner conversations sound like: “Let’s flip those beds Singing Frogs-style tomorrow and then establish a new block like Farmer Jesse did on that pasture.” “Maybe we should merge Steadfast’s greens washing setup with Hayshaker’s pack shed layout, but put the pack shed in the north end of a tunnel like StoneHouse Market Farm and Neversink did.”
“Remember those amazing under-heated potting benches Jolene designed using a hot water heater at Flying Onion Farm?”… and on it goes.
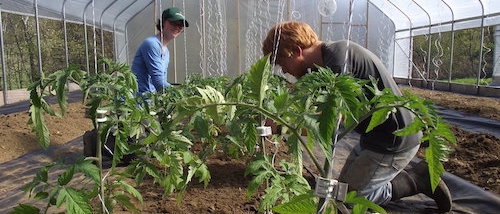
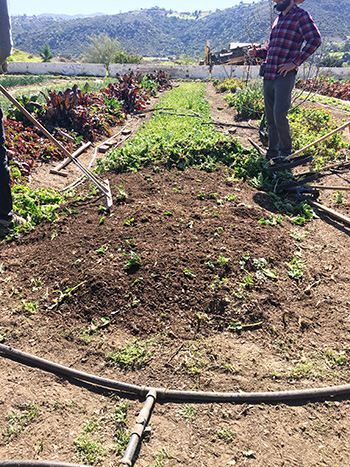
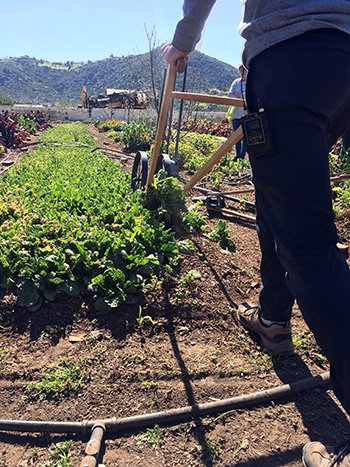
 Transplanting using a Gridder to mark the beds and Winstrip trays for seedlings. All images courtesy of the author.
We wish every farmer could have these same opportunities, so we’ve curated a sort of “Greatest Hits” of the most innovative systems we’ve encountered on the road. Of course we haven’t been to every awesome farm, so there are surely many more amazing methods we’ve yet to see. This article focuses on no-till bed flips and transplanting systems; the next will showcase pack shed and farmers market setups.
What do the best farming systems have in common?
Standard operating procedures (SOPs) sound like something out of a high-tech factory, but we’ve come to realize that SOPs are not only rigid assembly line practices; they are valuable tools for market growers.
From a farm manager’s perspective, SOPs are simply the way we want things to get done. From a worker’s perspective (especially a new worker), SOPs are a clear guide on how to perform farm tasks to our manager’s liking. As Carolina Lees wrote in her employee training article in the June/July 2020 GFM: “setting clear expectations is a key part of training.” SOPs do just that: clearly set the standard.
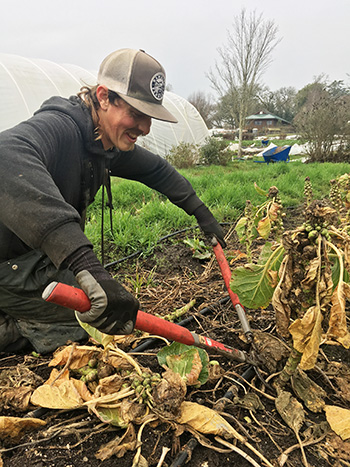 Using loppers to cut Brussels Sprouts off just below the soil line before a bed flip on Singing Frogs Farm.
Having been on both sides of this equation, I can say that farms with some sort of SOPs tend to get things done more efficiently and are less overwhelmed or stressed while doing it. When deciding on standard procedures for common farm tasks, I find it helpful to ask these questions:
—Can anyone be quickly trained to do it or does it require specialized skills?
—Are there lots of complicated steps? Can any steps be eliminated or consolidated?
—How many words does it take to describe the process? Can a photo-centric “how-to” sheet (Ben Hartman’s The Lean Farm style) communicate the instructions more quickly?
—Where do you store the required tools? How many back-and-forth steps are needed to get tools, complete the job, and put them back?
—How often is a task change required? By minimizing the change in movements, our brains can be ultra-focused and efficient at doing one thing at a time without constantly shifting gears.
Best of no-till bed flips—Singing Frogs Farm-style
By now, many readers have probably heard of the signature bed flip by Singing Frogs Farm in California. It was the ultimate game changer in my mind when moving from tillage to no-till. When it’s time to transition a bed to a new crop, lop the plant off just below the soil surface, rake, haul the residues out of the field, add a layer of compost, maybe broad fork, and then transplant new crops. Having flipped many beds on their farm during our spring contracts, I can say firsthand that this is a remarkably simple and effective way to flip a bed. We got old crops harvested and new crops planted very quickly. Nowadays, they have gotten their organic matter levels so high and their soil so aerated that they skip the compost and broadforking steps.
Recommended crops: Brassicas, tomatoes, peppers, cucumbers, any crop with a lot of biomass. Pros: It’s a simple, same-day flip and plant. It’s human-scale with easily accessible equipment (loppers and wheelbarrows); no machinery necessary. It keeps the roots intact to maintain soil structure and feed rhizosphere microbes. Those microbes can quickly colonize your new crops directly after transplanting.
Cons: It takes a little longer than machine power and requires bending over. You need to make sure you cut one-to-two inches below the soil surface so there aren’t any nubs from the stems of the previous crop sticking up. Hauling the large plants out of the field requires a nearby compost pile, but you can make this really efficient by bringing a load of finished compost back every time you go to dump the residues.
Common questions: Will the bases and roots of the old crop be in the way when you go to transplant or seed? It’s possible, but we’ve found that a seasoned transplanter can quickly move the new plant an inch to the side of the roots from the previous crop without slowing down. A fine compost layer mulched on top fixes that problem for smaller cell transplants or precision seeders like the Jang.
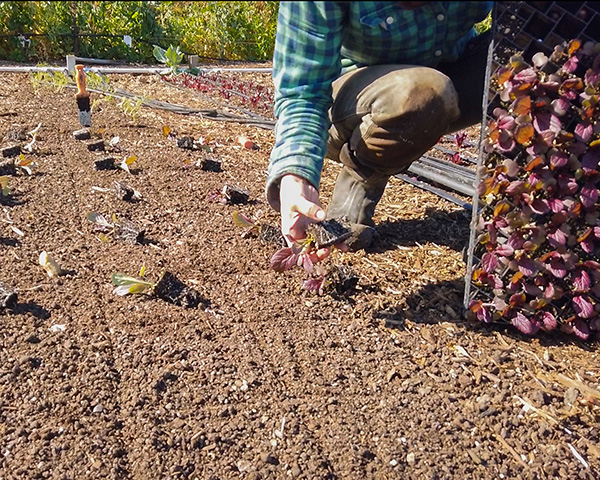
Jared’s Real Food lasagna-style
“Lasagna” gardening is a technique I previously associated with backyard hobby gardeners. Jared blew our minds when he applied this concept to a 3-acre production farm. Basically, you can build new beds or flip an existing bed by layering on the organic matter. One way he does this is by spreading straw and then dumping a thick layer of compost on top to get a bed started. To terminate an existing crop, he’ll simply wheel hoe the bed, rake off the residues, use the back of the rake to smooth the soil, add compost (optional), and then seed or plant.
 New lasagna beds at Jared's Real Food.
Recommended crops: Salad greens, head lettuce, bok choy, crops without woody stems.
Pros: This method builds organic matter very quickly. Jared’s beds are super rich, aerated, and microbiotically active. He rarely needs to add additional fertility. Cons: You need lots of straw, hay, chipped leaves, or compost, which can be a challenge for small farms to get their hands on.

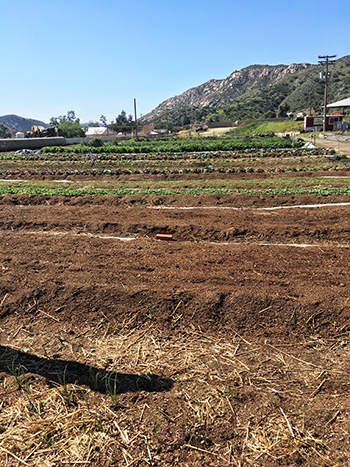
Flail and cover system from Rough Draft Farmstead
When we heard Hannah and Jesse of Rough Draft Farmstead needed help establishing beds at a new farm location, we jumped at the chance to book it to Kentucky. The new site was just a big pasture, so we started by flail mowing the grass as low as possible with a BCS flail mower attachment. Then, we lined out the field, rolled out some paper mulch pathways (optional), layered straw on the beds, added six inches of compost, and covered it all with silage tarps for a few weeks. The same concept applies to flipping existing beds: flail mow the crop, add compost (optional), and then plant or tarp.
Recommended crops: All low-growing or vining crops. Pros: This method keeps the chopped-up crop residues in place, adding organic matter and minimizing disturbance of the root zone. Residues will break down really quickly beneath the compost. If you don’t have compost, you can simply rake off the mowed residues as in Jared’s method. This mostly can be done in an upright position.
Cons: You need lots of compost. You need a flail mower — I am convinced this is one of best equipment investments to make. You could use a lawn mower without the bag for a cheaper option, but most lawn mowers lack the power to mow down something really tough like brassica residue, and rotary mowers tend to blow crop residue around more than a flail mower.
Hog-till (or chicken-till) at Urbavore Urban Farm
This unique farm in the heart of Kansas City, Missouri, is unlike any other. With no irrigation, no plastic tunnels, no fertilizers, and no tillage, Urbavore is almost a completely closed-loop, off-grid farm system. Bed flips are more like block flips that use animal power (heritage hogs or chickens) to turn in old crops, aerate the soil, and remove perennial weeds.
Recommended crops: All crops. Pros: With proper rotation, the soil is left in phenomenal condition. Livestock produce additional revenue for the farm, in this case eggs and meat. Hogs are especially adept at removing perennial weeds like dandelion and dock (because they love to eat the nutritious roots). If only they would eat bindweed!
Cons: Beds need to be re-shaped. The up-front investment in electric fencing can be considerable depending on your scale. Hogs need be monitored and moved every couple days to ensure they don’t compact the soil, so you need enough land for a rotation. Organic feed for the hogs is also a major cost.
 Using a rake after wheel hoeing to remove the previous crop at Jareds Real Food.
Weed-eater + rake or tarp
I can’t credit this method to any specific farm, but it really is as easy as it sounds. Go wild with the weed-eater and then rake off the residues or use occultation. Recommended crops: Salad greens, arugula, crops with tender stems. Pros: It’s quick and easy. If you cut low enough, you shouldn’t get any grow-back. It’s a one person job in an upright position. And, it leaves the roots intact, which is great for soil health.
Cons: The weed-eater is really messy for nearby crops, so we only do this when flipping a whole field block or tarping shortly after. Common questions: Don’t baby greens or arugula re-sprout? In our experience, if the weed eater gets ‘em below the growing point, they will not. The tarp (even if just for a week) is an extra buffer to reduce grow-back.
Best of transplanting systems- Neversink Farm-style
Many readers will have seen the Gridder, a rolling dibbler that can quickly and evenly mark out where to put transplants before planting a bed. A nice complement to the Gridder are Winstrip seedling flats, whose open design results in roots that air prune instead of getting rootbound, and they make popping plants out of their cells easier. No more sticking a pencil or stick through the holes in the bottoms of flats to pop plants out.
After using this combo of tools and methodology on several farms, we can say it is certainly one of the best transplanting methods out there. Simply roll out the Gridder to mark the desired spacing. Then, one person can move forward dropping plugs from the Winstrip trays. Since they are super expensive, we always keep the trays from touching the ground. Lastly, someone comes behind using a Hori Hori knife or their hands to pop ‘em into place.
Pros: It’s streamlined, makes straight and even rows, and it’s easy for workers to get plants in the ground quickly. Winstrips live up to all the hype and really produce super healthy transplants (hello, air-pruning!) compared to standard plastic plug trays. Keep in mind that your starts need to be established enough to gently pull the plug out rather than popping from below.
Cons: The Gridder and Winstrips are a hefty up-front investment, but worth it in the long haul. The Gridder is not as effective in a heavy clay soil in our experience, and you need separate attachments for different spacings.
Winstrip, plug popper + dibbler at Hayshaker Farm
Hayshaker Farm in Walla Walla, Washington, put their own spin on the Neversink style by adapting it to their horse-powered system. The horses pull a dibbler implement that marks the spacing. Meanwhile, one or two people quickly pop plugs from Winstrip trays with the plug popper pegs from Two Bad Cats, LLC. Someone goes ahead and starts dropping the ready-to-pull plugs in place and someone comes behind them to plant.
Pros: It’s really efficient and fast. We could plant 600-foot rows in no time. Each person only has to focus on one task at a time without shifting gears. You also minimize damage to plugs by pre-popping them. Cons: In my experience, investing in rigid trays like Winstrip or Proptek are crucial for efficiency with this method.
If you’ve ever worked on a farm that uses pencils or sticks to hand-pop every dang cell, you will appreciate what a game-changer the Two Bad Cats peg popper is. They also make versions for other types of trays, but I’ve found that rigid trays are far easier to finagle onto the pegs than a flimsy standard nursery tray. An added bonus is that the peg popper can be flipped over and used to dibble holes when seeding flats.
 Using a wheel hoe to terminate the previous crop before raking off the residue at Jareds Real Food.
Paperpot transplanter
I suppose I can’t write about small farm transplanting methods without mentioning the Paperpot. I’ll confess I’m not the biggest fan, but you can’t deny that it is an innovative invention and many farmers absolutely love it. There are lots of nuances with this tool, but it is amazing in the systems that have adapted to it.
Pros: The Paperpot is likely the fastest of all, assuming you don’t have to make a bunch of adjustments. It requires only one person and is upright. It produces exceptional root crops when sowed with three to four seeds per cell. The seeding trays take a while to get used to, however, they can make for a really efficient seeding process if using a drop seeder.
Cons: It’s a big up-front investment and continuous expense to buy specialty “paper chain” trays that lock you into this system. Paperpot is awesome in sandy soil, but can have issues in fluffy compost-mulch or heavy clay soils. It can also bury the plugs or leave paper chains exposed above the surface (the Neversink Zipper tool comes in handy).
The paper from the trays does not break down in a timely manner, and you end up with little pieces of paper littered all over your farm or in your compost pile. I also have noticed that the paper constrains the root zone of the transplant, which is good for plants like scallions since it blanches the bottoms, but not so great for longer crops. Lastly, the use of Paperpot may be an issue on certified organic farms, so as with any new inputs, check the current status with your certifier before using.
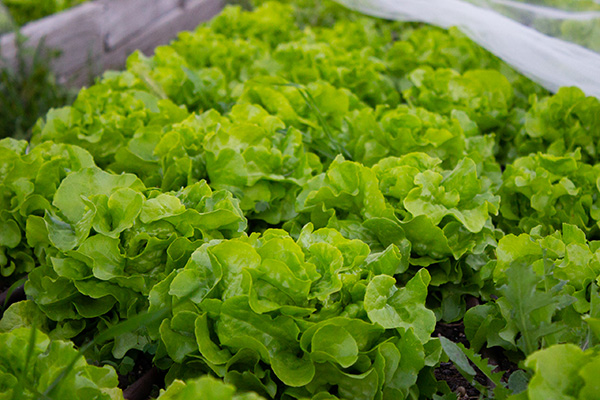 Lettuce grown in no-till beds at Singing Frogs Farm.
Soil blocks
Soil block converts like Jackson and Jesse (of No-Till Growers) have really sold us on this method and we can’t wait to put it to use. It’s simple and draws on ancient techniques, making it resilient in the face of shortages. Pros: Less plastic! Less transplant shock and faster rooting. Air-pruned starts mean longer hold time in the tray (like Winstrips), so no root-bound plugs. No popping necessary makes planting faster. And they don’t need as much hardening-off time.
Cons: Making soil blocks requires a bit more time to get started. They take longer to seed. You need to invest $200 to $300 in the block makers, but it’s cheaper than Winstrips or Propteks. Note that blocks won’t fall apart as long as you get the propagating mix texture right and achieve proper moisture levels (that means super wet)
Ultimately, there are as many ways to farm as there are farmers. It is always a blast to see the unique methods different growers are inventing or adapting to their farms. If you have any questions or ideas, get in touch at [email protected]. I’d love to connect and see what innovative systems you’ve implemented on your farm.
Logan Hailey is a farmer, writer, and co-owner of Ramblin Farmers, LLC, a mobile freelance farmhand service. She travels to farms and forests around the country in her off-grid school bus tiny home with her partner and three dogs. As they ramble and farm, they’re searching for a place to put down roots and start a farm of their own. Keep up with their adventures at www.ramblinfarmers.com.