By Pam Dawling
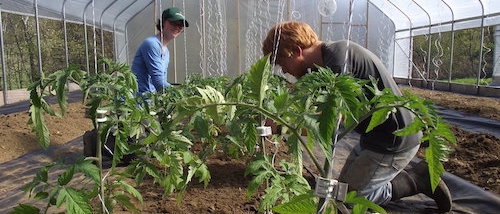
I was a reluctant adopter of drip irrigation because I thought it would be complicated and there was no one using it nearby for me to learn from. When help arrived, I set up a pilot scheme for our paste tomatoes, and I became a convert. When we put up our hoophouse, we decided on drip irrigation during the design phase. Outdoors, we now use drip for all our long-row, long season crops, and wouldn’t be without it. It has the advantages of minimizing water use, and of not watering foliage and encouraging foliar diseases. A correctly installed drip system can use 50% - 80% less water than traditional overhead impact sprinklers. Furthermore, food safety is better with drip irrigation because the water does not usually touch the leaves, and the risk of transferring any pathogens from the water is reduced.
Water can come from a well, public water system, harvested rainwater or from surface water (creek or pond). Sprinkler systems need relatively high pressure, but drip systems are low pressure and some can even be gravity-fed. Good quality water is as important as a reliable source. Surface water needs to be carefully filtered to prevent inclusion of anything that could block the irrigation system—sand, grit, small flora and fauna. Install a sand media filter. You will need a pump with an adequate flow rating.
Any water source could have high levels of chlorine, sodium, carbonates, phosphorus, iron, or other minerals. You can get water samples tested by your extension service or a private lab for a very reasonable fee, making it worthwhile to test multiple sources before making a decision, if you have options.
Drip irrigation basics
If you are new to drip, a hoophouse is a great place to start, as this small system will remain visible at all times, not covered by weeds.
The most helpful resource I have found for beginners is Melinda Fitzgerald’s Drip Irrigation Resource Guide at Chatham Farm Supply. Drip tape suppliers’ websites can also help you. Drip Works has a Drip Planning Guide, plans, and videos. Alabama Cooperative Extension System has drip tape design details in the Micro-Irrigation Handbook. There are great Drip Irrigation Tutorials (and much more) by Jess Stryker online.
Drip tape calculations
First you will need to know the volume of water available per hour. Take a known capacity bucket, open your supply valve and time how long it takes to fill the bucket. Calculate how much water you would get in one hour. Filling a 5 gallon (19 L) bucket in 10 seconds is 1800 g/h (6800 L/h). This is the flow rate. When doing your calculations, estimate 80% efficiency, that is, assume 20% less water in real life than in calculations!
I recommend always using pressure regulators to adjust the outlet pressure to a steady level. Most drip tape is designed to work at around 8 psi, and most pumps operate at a much higher pressure. Having a pressure regulator will protect your irrigation system from blowing apart. The total flow rate of the system when it’s running determines which regulator you’ll need.
Second, calculate whether you can run your system as one zone (a zone is the total length of drip tape you can run simultaneously). Usually one hoophouse will be small enough to be one zone. Do the calculation of how much water your system needs. In our example, with a flow rate of 1800 g/h (6800 L/h), you can run up to 3600 emitters with 0.5 g/h (1.9 L/h) output simultaneously. Decisions about emitter spacing and flow rate, as well as number of drip tape lengths per bed, will affect the answer.
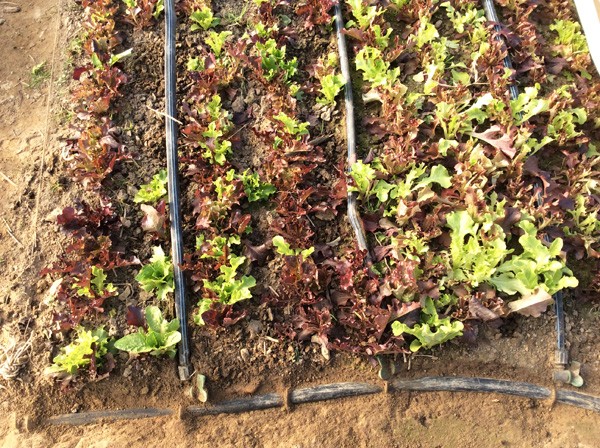
The distance between one drip tape and the next will depend on what crops you are growing, the infiltration rate of your soil, and which drip tape you choose. Generally the answer will be one line or two for each row of large plants like tomatoes, and one line between two rows of small crops like lettuce. For beds with closely spaced crops, consider 12” (30 cm) as a starting point. The diameter of your mainline tubing is also important: ½” (1.3 cm) mainline tubing can only carry 240 g/h (908 L/h), but a ¾” mainline can supply up to 480 g/h (1817 L/h), and a 1” (2.5 cm) mainline more than 500 g/h (1893 L/h). The mainline fittings will reduce the flow rate somewhat. Investigate different scenarios to see which option is best for you.
In choosing your drip tape, there are four types of choices to be made:
The 5/8” (16 mm) diameter drip tape is the commonly used size, although others exist.
There are various wall thicknesses of the plastic, 5–15 mil (1 mil is 1/1000 of an inch, so 0.1–0.3 mm). We buy the thickest, as we intend to make plastics last as long as possible.
Emitters are spaced every 4”, 6”, 8”, 12” or 16” (10, 15, 20, 30 or 40 cm). Shorter spaces between emitters are needed for germinating seeds, supplying big plants, hot conditions, and sandier soils. Using a longer emitter spacing and a faster flow rate does not provide the same service as closely spaced emitters and a lower flow rate, because it will not wet a large area in the same time. Conduct a test to see how far water moves horizontally in your soil. 8” (20 cm) or perhaps 12” (30 cm) is likely to work best unless you have very sandy or high clay soil.

There are three flow rates: Low (0.11–0.16 g/h [0.4–0.6 L/h] per emitter), Medium (0.18–0.26 g/h [0.7–1.0 L/h] per emitter), and High (0.27 g/h [1 L/h] per emitter or more). Low-flow drip tape lets you use longer total runs of tape at once, but takes longer to supply a given amount of water per area, and benefits from a high level of filtration to prevent clogging of emitters. With the faster flow tapes, you must run less tape at once. There is a newer ultra-low flow model now available for extra-long runs, but it requires 270 mesh (53 micron) filtration to prevent plugging. Application rates should not exceed 0.40” (1 cm) per hour for sandy soils. For loamy soils, don’t exceed 0.30” (0.8 cm) per hour; for clay soils, the maximum rate is 0.20” (0.5 cm) per hour.
For example, with a medium flow drip tape putting out 0.26 g/h (1.0 L/h) at each emitter, a 300 g/h (1136 L/h) supply will be enough for 1200 emitters. If the emitters are 12” (30 cm) apart, that’s 1200’ (366 m) of drip tape. At 8” (20 cm) apart, that’s only 800’ (244 m). You can figure out other options if you know how much water comes out of each emitter and how far apart the emitters are spaced.
An example to work through
Decide which flow rate is best for your soil. [low flow]
Decide which emitter spacing seems best for your plants. [8”, 20 cm]
Decide how close your lines of drip tape will be. [12”, 30 cm]
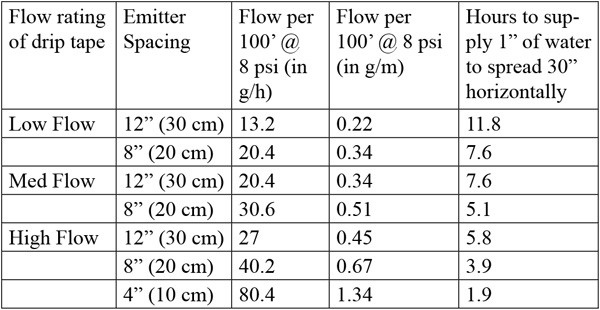
Take the flow rate per unit length of that drip tape type [20 g/h/100’, 76 L/h per 30.5 m] and multiply by the total tape length [19’ x 96’, 19 x 29.3 m] you plan to use. This gives the total flow rate you need. [20 x 19 x 96/100 = 364.8 g/h or 76 x 19 x 29.3/30.5 = 1387 L/h approx.]
Divide that total flow rate needed by the flow rate you have available and you will see the number of zones you will need. [364.8/360 = a little more than 1, meaning 1 is OK]
If your calculation shows you would need two zones, you could rework the calculation with another suitable drip tape type, such as a different flow rate, and see if it’s worth having a longer watering time to allow for having just one zone.
Another approach: the maximum length per zone = flow rate available divided by the flow rate of that drip tape type. [360 divided by 20/100 = 1800 ft. 1387 divided by 76/30.5 = 556 m, with a bit of rounding error in conversions]
In our hoophouse we use low-flow drip tape with emitters every 8” (20 cm). This is not one of the most widely-stocked combinations, but our supplier, Berry Hill, has our back. We run 19 lengths of 96’ (29.2 m) each, totaling 1824’ (556 m) with a 1% downhill grade. Although our calculations show we can run a maximum of 1800’ (549 m) as one zone, experience shows that our system works just fine (gravity is our friend). In one hour we are putting out 372 gals (1408 L) of water. Our hydrant can supply 450 g/h (1703 L/h) before friction losses in the mainline and fittings, so about 360 g/h (1363 L/h) in real life.
Irrigation timing
How do you know if you have watered enough? The general guideline is 1” (2.5 cm) per week during the growing season, but up to twice this amount in hot weather for plants with a spread of 12” (30 cm) or more. You can dig in the soil to see how deep your watering has extended—your goal is a depth of 8”–12” (20–30 cm). You can dig between two drip emitters to see if the wet spots have joined up. When there is a continuous film of moisture in the soil, all the nutrients and life-forms can move freely. The goal of drip irrigation is not an oases-and-deserts model!
The time needed to supply 1” (2.5 cm) of water is figured by first calculating the volume of water needed for the area being watered (water depth x area). Next calculate how much of this water needs to come from each 100’ (30.5 m) of drip tape in use. Then use the drip flow rate for that type of drip tape to calculate the total time. This assumes you have set out drip tape rows close enough. To supply 1” (2.5 cm) water per week, the watering time is split up over several days, even every day.
Set up your system
If you are using a public water supply or you plan to use fertigation, install a backflow preventer to remove any chance of accidentally contaminating any other water drawn from the same source.
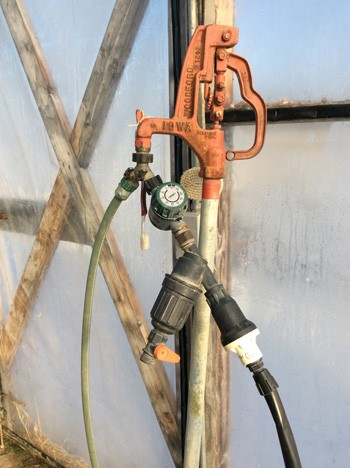
We use a Y-valve on a frost-proof hydrant, so that we can separately access water regardless of whether or not the drip irrigation is running at the time. We like manual timers, fitted with a filter washer. They are mechanical (wind up to start, and they switch off after the interval you set). These cost about $15–20 each. There are also battery-powered timers with multiple options for various lengths of time.
Connect a water filter to the timer. We like the steel mesh Y-type. The mesh filter cartridge collects fine particles that could clog the drip tape. (If you find a drip tape clogged, it may appear to be leaking at the emitter, arching a fine spray of water into the air. You can usually fix this by scratching the emitter firmly with a thumbnail, or sometimes by pinching the tape flat at the emitter for a short time.) The Y-type filters have a valve you can open regularly to backwash the filter.
We dismantle our filter once a month in winter, twice a month in summer, rinse out the cup part and scrub the filter gently with a toothbrush. If you neglect filter cleaning, your system will clog. You might think it better to connect the filter before the timer, so that the timer water is pre-filtered. The disadvantage is that the filter will then be under full pressure all the time the system is open. Having the timer first protects all the expensive parts.
After the filter comes a pressure reducer. The scientifically curious can find How Does a Pressure Regulator Work? on the Senninger website. Others can just know that this gadget will ensure that the water going into your drip tape will be at a constant pressure, high enough to put out a calculated amount of water at each emitter all the way to the end of the drip tape, and will be at a low enough pressure not to burst the tape. There are different reducers for various inflow water rates and water pressures. Pressure reducers are spring-loaded inside, and they have warnings telling you not to undo the screws holding it all together. If after several years your pressure reducer starts to leak around the seam, you can use epoxy glue on the outside to extend its lifespan.
Attached to the pressure reducer is the header line, which can be round or oval poly tubing, or vinyl lay-flat tubing. We use ¾” (2 cm) round poly tubing running across the heads of the beds, with three lines of drip tape in each full 4’ (1.2 m) bed, and two lines in each half-width bed.
All brands of drip tape are interchangeable with others of the same flow rate. Always set out the drip tape with the seam upwards (some brands have colored stripes or say “this side up”). This is where the emitters are, and the water will seep out of the emitters and run over the side. It is better not to have the emitters face down in the soil.
Although we don’t pin down our drip tape outdoors, we do in the hoophouse, because the wide changes in temperature otherwise cause the drip tape to wander too much. We use 6” (15 cm) sod staples, which are sold cheaply in boxes of 1000 at our local feed store.
Fertigation
Organic growers rely mostly on bulky solid fertilizers, but there are some organically approved liquids that can be supplied via drip irrigation. See Fertigation in Organic Vegetable Production Systems from eXtension. You will need an injector, which takes a concentrated solution of fertilizer and adds it into the irrigation system while it is running, providing the plants with a diluted nutrient solution. Irrigation suppliers can advise on the type and size of injector that you will need for your system. There are three types of injectors: pressure differential or venturi types, externally powered positive displacement pumps, and water-powered piston or diaphragm pumps. Get help on calculations from Alabama Cooperative Extension System publication, High Tunnel Irrigation and Fertigation.
Pam Dawling has lived at Twin Oaks Community in central Virginia for 26 years, growing vegetables for 100 people on 3.5 acres, training members in sustainable vegetable production. Her book Sustainable Market Farming is widely used and she is currently working on a book about year-round vegetable production in hoophouses. She blogs at www.sustainablemarketfarming.com and on Facebook.

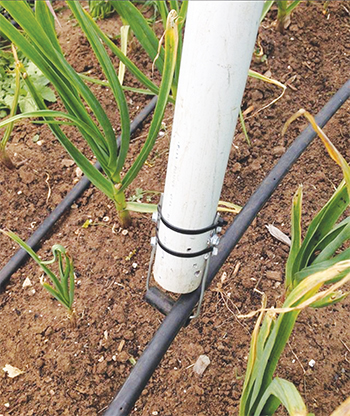 When I saw this tool I knew the exact need that inspired its creation and I loved seeing the abundant comments from other farmers around the world who had also created their own versions, born of that same common need. Nat Wiseman from Village Greens of Willunga Creek near Adelaide in southern Australia posted a very simple and relatively quick fix to the problem of laying drip lines in garlic after the canopy has already filled in.