Usually when garlic is ready to be harvested and dealt with, the farming year is in full swing, and bodies and brains are tired a lot of the time. We have made ourselves a checklist to help things go more smoothly, and make sure no important step gets forgotten. This also helps new crew know what they are supposed to be doing when and if they get confused.
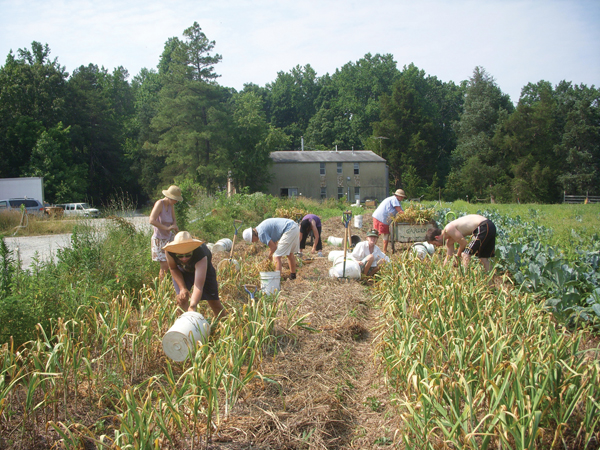
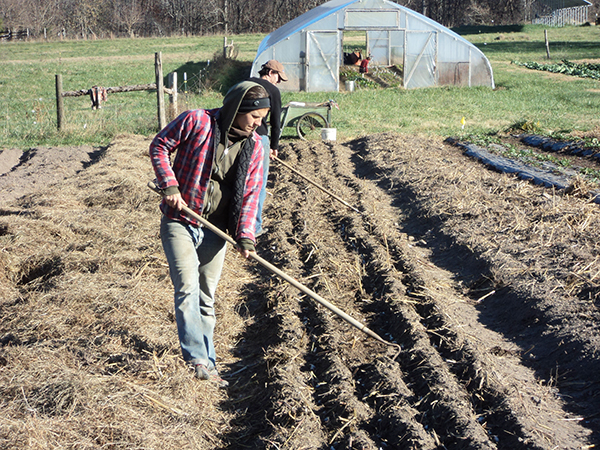
The crew at Twin Oaks harvests garlic into buckets, then moves the buckets on a cart to the barn. Photo by Marilyn Rayne Squier.
Be prepared
1. Tidy the garlic drying and curing space in preparation. Check the fans. Gather harvest containers (crates or 5-gallon buckets).
2. Monitor the garlic for maturity. Two methods:
a) The sixth leaf down is starting to brown on 50% of the crop.
b) There are air spaces between the round stem of hardneck garlic and the cloves, visible when bulbs are cut horizontally.
3. Hardneck garlic is ready before softneck. If you save your own planting stock it’s important not to mix up different varieties. We grow just one hardneck variety and one softneck, so it’s not too difficult.
Once it’s time to harvest
1. If the soil is very dry, water the night before. Very hard soil can damage the bulbs.
2. It’s important not to leave garlic in plastic buckets for long. Plan for 15 minutes per 5 gallon bucket to dig garlic and 15 minutes per bucket to hang it up. Experienced crew will be faster.
3. Treat the bulbs like fragile, sun-sensitive eggs, as bruised bulbs won’t store well. Don’t bang, throw or drop them.
4. Carefully loosen the bulbs with digging forks, without stabbing them. Pulling on unloosened garlic damages the necks, and they won’t store well.
5. If they have a lot of soil on the roots, use curled fingers to “brush” soil out.
6. Try not to rub or pick at the skin. Bulbs need several layers of intact skin to store well.
7. Put the bulbs gently into buckets or crates angled to shade the bulbs. Air above 90F can cook garlic bulbs, sun can scorch them.
8. Don’t wash the bulbs, no matter how dirty. They need to dry, not get wetter. Dirt will dry and drop off later, or can be gently brushed off if bulbs are not clean enough for market.
9. Load the containers on carts or a truck (keeping them shaded) and take to the barn for drying.
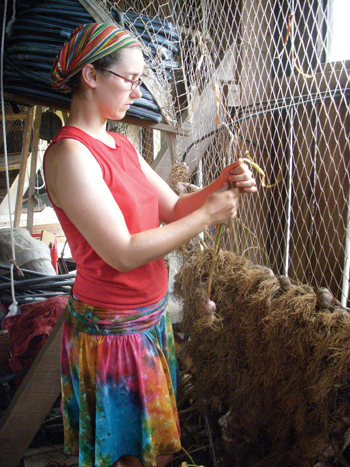
A member of the crew hangs garlic in vertical netting to dry. Photo by Marilyn Rayne Squier.

Drying the garlic
1. We want to have our garlic arranged in date order of harvesting, to make it easier to find dry garlic to trim when the time comes. We hang our drying garlic in vertical netting hung around the walls of our barn. Some people use horizontal racks, others tie the garlic in bunches with individual pieces of string and hang those from the rafters.
2. We hang the first garlic we bring in immediately to one side of the doorway, and concentrate on filling a narrow vertical stretch of the netting, before moving on.
3. We start at knee height, threading one garlic plant in each diamond of the netting. (The netting stretches down with the weight of the garlic. Starting lower would cause garlic to pile up on the floor.) Take a garlic plant, bend over the top third of the leaves, and push the leafy part through a hole in the netting. The leaves should open up behind the netting. They shouldn’t be poking through to the front.
4. We work rows back and forth, filling a 4-6 ft. wide strip per person. People hanging garlic need to work right next to each other. This is not the time to “take space.”
5. We continue upwards as high as we can reach, before moving to the next available section. We want walls covered with garlic, arranged consecutively each day. It’s helpful to flag and date where each day’s harvest ends, although we often just rely on memory. As well as simplifying trimming, sequential arrangement makes the best use of the fans, which gives the garlic the best chance of drying nicely.
6. Any damaged bulbs are designated for farm use.
7. Set fans to blow on the garlic. In our humid climate, fans are essential, even in an airy old tobacco barn.
8. Wait 3-4 weeks, then test several bulbs for dryness by rolling the garlic neck between finger and thumb. If many bulbs are slippery, slidey, or damp in any way, postpone the trimming until at least 90% of the necks are dry.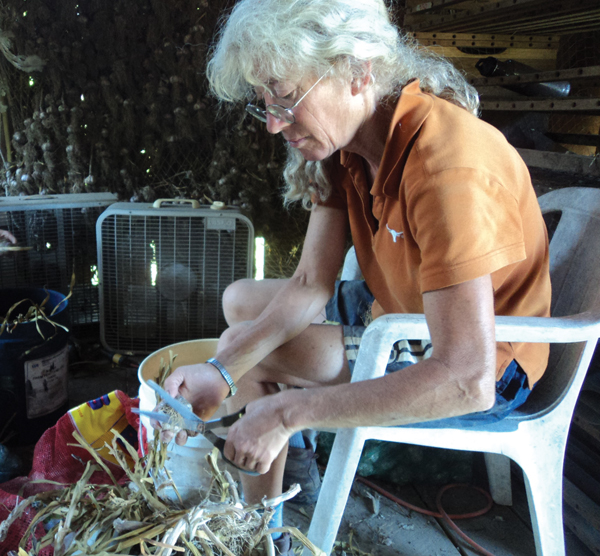 Preparing to trim and sort
1. We have garlic trimming shifts 1-4 p.m. for three weeks, with five people, six or seven days a week. We extend to four or five weeks as needed, if shifts don’t get filled or get cancelled.
2. Gather scissors, rulers, red net bags, green net bags, bag ties, plastic lawn chairs, buckets and a cart for compost material.
3. Explain the importance of handling the bulbs gently so as not to bruise them. We want long storage, which means no damage.
4. Demonstrate how to test for dryness. If 90% seem dry enough, proceed, working in the direction the garlic was harvested and hung up.
5. Gently remove some plants from the netting into a bucket. Do not cut plants off the netting leaving the foliage to drop down the back into the downstairs.
6. Each person needs a comfortable place to work, with a bucket of garlic, a compost bucket, a pair of scissors, a ruler and easy access to a green bag and a red bag. Some people like to mark off 2”and 2 ½” on the arm of the chair, a nearby wood structure, or their knee. This saves handling the ruler repeatedly. Some people like to move the fans for more or less fan action while working. Those that do this need to remember to reset the fans to blow on the garlic when they leave.
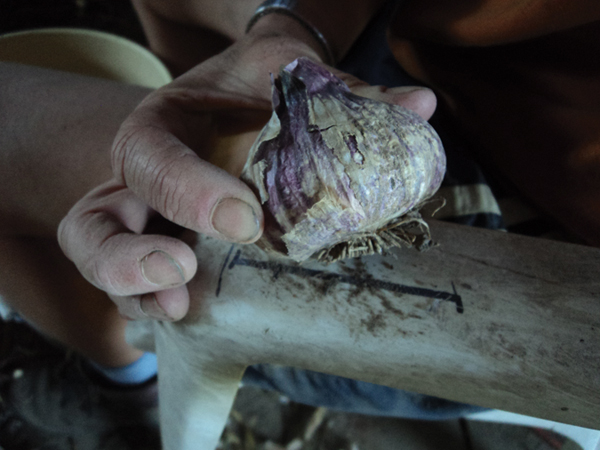
A comfortable seat is essential for the time-consuming task of trimming and sizing. A mark on the arm of the chair provides an easy way to size the bulbs. If a bulb is between 2 and 2.5 inches, it will be used for planting. Photos by Brittany Lewis.
Trimming and sorting
1. Cut the roots off the garlic into a compost bucket. Cut as close as possible in one or two snips.
2. Cut the tops off the garlic, leaving a ¼ - ½” stub
3. Do not remove any skin. We want long storage not necessarily pretty. If your garlic is for immediate sale, you will need to:
4. Decide if the bulb is dry. Feel the cut neck. The remains of the stem may have a Styrofoam texture. The stem should not be damp.
5. If damp at all, put the trimmed bulb on the Farm Use rack.
6. If more than 10% are damp, cancel the shift or selectively pull dry bulbs from the netting.
7. If not damp, decide if it’s storable.
8. If storable, decide if it’s seed size and quality. If it could be between 2 and 2 ½”, measure it. If smaller or larger, put in a red bag. It’s for eating.
9. If between 2 and 2 ½” and in good shape (and not obviously more than 10 cloves), put it in a green (seed garlic) bag. Our mnemonic is “Green for Growing”.
10. When a bag if full enough (we’re not all Amazons), tie the neck closed and lay the bag down on the floor away from the windows, which let rain in.
11. At the end of the shift, return all scissors and rulers to the tub, take all compost material out of the barn, consider doing a run to the composting area with the tops. Lay down any bags that are more than 1/3 full, as the weight of garlic in a vertical bag can damage the bulbs at the bottom. Leave no garlic in buckets. If necessary, gently set garlic on the floor boards, rather than leave it in a sweaty plastic bucket. Make sure no garlic will get rained on if rain blows in the window. Reset fans as needed. Unplug any no longer needed.
12. Periodically weigh the tied-off green bags, make neck tags from masking tape, saying “Hardneck Garlic” and the weight. We use bathroom scales for weighing bulk garlic (we don’t sell in bulk). Weigh a person with and without a bag of garlic.
13. When we have enough seed garlic, stop using green bags, stop measuring. Simply snip, sort and bag. We need 140-150 pounds of hardneck seed for 2880 row feet planted at 5” spacing. That’s about 50 pounds per 1000 feet. This allows some slack.
14. When all the hardneck garlic is dealt with, and not a moment before, record in the log book all the weights of the bags of garlic as you take them away to storage.
15. Then, and only then, when all the hardneck garlic is out of the barn, we start on the softneck garlic, if it is dry enough. We do the same as with the hardneck garlic. If possible we use purple (seed) and orange (eating) bags, rather than green and red. Certainly it helps to have the seed garlic in a different colored bag.
16. We need 70 lbs. seed for 1440 row feet. Once we have that, we stop measuring.
17. When all is done, weigh, label, record and store the garlic; clean up the mess, return the lawn chairs.
Storage
1. Take the green and purple bags of seed garlic to the Garden Shed. Lay them on the top central shelf. Although the temperature and the humidity vary, the shed is relatively dark. Our seed garlic does fine here until November when we plant it.
2. Take the red and orange bags to the basement and lay them on the shelves in the produce storage cage there. Garlic does not need to be refrigerated for several months after storage. 55-70°F is good.
3. Weigh the Farm Use garlic, record the amount in the log, take it to the kitchen.
4. When temperatures seem likely to drop to below 55°F in the basement, clear the top left shelves in the walk-in cooler and move the garlic there. The low shelves near the compressor do not work well. Use the higher, drier shelves. 32-39°F is a good temperature range. Avoid 40-55°F, or the garlic will start to sprout.
5. Ah, another successful garlic harvest!
Pam Dawling manages 3.5 acres of vegetable gardens at Twin Oaks Community in central Virginia. Some of this material is from her book, Sustainable Market Farming: Intensive Vegetable Production on a Few Acres, © Pamela Dawling and New Society Publishers, 2013. The book is widely available, including at www.sustainablemarketfarming.com, or by mail order from Sustainable Market Farming, 138 Twin Oaks Road, Louisa, Virginia 23093. Enclose a check (payable to Twin Oaks) for $40.45 including shipping. Pam’s blog is on her website and also on facebook.com/SustainableMarketFarming.


 Garlic is a high-value crop and a heavy feeder. It needs full sun and a good range of available nutrients. Planting in raised beds helps soil drainage, reduces soil compaction and facilitates harvest. Garlic does best in a sandy or clay loam with very good drainage and lots of organic matter. Fall is the best time to add compost or other fertility amendments, such as soybean meal. Avoid over-fertilizing or the growth will be too tender to survive cold conditions, and the storage life of the garlic will be shortened.


 Part 1 of this series discussed why and how to add cut flowers to your farm. This part discusses production in more detail, especially harvest and post-harvest handling. Part 3 will focus on marketing.
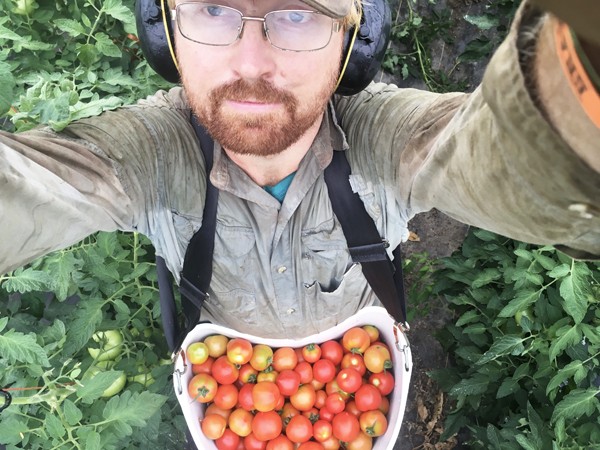 We regularly harvest into a half dozen containers on our farm. Bulb crates, flip-top crates, storage crates, pallet bins, five gallon buckets, and waxed boxes. Our new favorite receptacle, though, is vastly more ergonomic and hands-free, and has changed the way we pick several crops, making it faster and more efficient and enjoyable.


