Although it is possible to plant softneck garlic in the very early spring if you have to, better yields are obtained by fall planting. And hardneck garlic is definitely better off if fall planted. In general, the guideline is to plant when the soil temperature at 4" deep is 50°F. The usual time for thermometer readings is 9 a.m. If the year is unusually warm, wait a week.
We plant in early November, here in zone 7 central Virginia. In New Hampshire, mid-October is the time. The guideline for areas with cold winters is two to three weeks after the first frost and before the ground freezes solid for the winter. In California it can be planted in January or February. If you miss the window for fall planting, ensure that your seed garlic gets 40 days at or below 40°F before planting, or the lack of vernalization will mean the bulbs will not differentiate (divide into separate cloves).

The garlic roots will grow whenever the ground is not frozen, and the tops will grow whenever the temperature is above 40°F. In colder areas, the goal is to get the garlic to grow roots before the big freeze-up arrives, but not to make top growth until after the worst of the winter. In warmer areas, the goal is to get enough top growth to get off to a roaring start in the spring, but not so much top growth that the leaves cannot endure the winter.
If garlic gets frozen back to the ground in the winter, it can re-grow, and be fine. If it dies back twice in the winter, the yield will be decreased from the theoretical possible amount if you had been luckier with the weather. When properly planted, garlic can withstand winter lows of -30°F. If planted too early, too much tender top growth happens before winter. If planted too late, there will be inadequate root growth before the winter, and a lower survival rate as well as smaller bulbs.
If you are buying seed stock, buy from a supplier in a similar climate zone. It is not recommended to grow grocery store garlic; it may have been treated to prevent sprouting. If you buy from out of state, it will take a couple of years for the garlic to adapt to your climate and soil — an ability called “biological elasticity” or “phenotypic plasticity.”
Store planting stock at 50° to 60°F (10° to15°C). Avoid 40° to 50°F (4.5° to10°C), as this could cause sprouting before you are ready to plant. Best results come from planting big healthy cloves from large (but not giant) bulbs.
Types of garlic
Domesticated garlic usually divides into two subspecies: Allium sativum var. ophioscorodon (hardneck varieties) and Allium sativum var. sativum (softneck varieties).
Hardneck (bolting, topsetting) garlic is recommended for zones 3 through 6, some varieties in zones 3 through 8. We grow mostly hardneck because big easy-to-peel cloves make life easier when cooking for a crowd. Hardneck garlic produces stalks (scapes) with bulbils (topsets). While bulbils can be grown, they take up to two seasons to produce mature bulbs, and the young plants take special care.
Hardneck garlics do not yield as heavily as softnecks, and they require better soil and slightly more care to maximize yields. Yields (by weight) may range from 3:1 to 8:1 depending on growing conditions. Yields of 6:1 or 7:1 make complete sense when you consider you are planting one clove to get a bulb of six to seven cloves.
For highest yields, pull the scape from the center of the plant as soon as you can grasp it. Harvest bulbs about three weeks after the scapes, or when leaves begin to yellow but six to eight green leaves remain. Most varieties store well for three to six months.
Softneck (non-bolting, braiding) garlic is recommended for hardiness zones 3 to 9. Softneck garlic evolved from hardneck garlic and lost the ability to produce scapes (unless stressed), leaving a soft braid-able neck. We grow a small amount of “Polish White,” a softneck with relatively large cloves to use after the hardneck is finished.
Softnecks are more productive and easier to grow than hardnecks and store later into the spring without sprouting. Softneck garlics don’t do as well in colder regions as hardnecks. Most have small interior cloves and tighter skins.
Some people say that softneck varieties lack the complexity and richness of flavor of hardnecks. Yields between 5:1 and 8:1 are typical. Planting softneck garlic can be mechanized (lacking a flower stem, the clove can grow from any planting orientation).
Ron Engeland, in Growing Great Garlic, identifies nine phenotypically distinct types of garlic (artichoke, silverskin, porcelain, rocambole, Asiatic, Creole, turban, marble purple stripe and purple stripe). Other suppliers and growers categorize them differently.
Silverskin types have uniform bulbs with smooth, usually white, skins and are popular for braiding. Bulbs do not separate as easily as artichoke types, which are the largest, most productive and widely adapted garlic. Typically they have three to five layers of cloves that give the bulb a lumpy appearance.
Asiatic garlic (recommended for zones 3 through 9) is genetically a hardneck that produces scapes in warm climates. Turban garlics may be a softneck subtype. Both size well even if the scapes are not pulled. They mature early and suddenly and should be harvested as soon as the first leaves begin to turn brown, otherwise the bulbs may split. They store for four to six months. The flavor is rich when baked and very spicy when raw.
.png)
Dr Gayle Volk analyzed the DNA of 211 varieties and created a Garlic DNA Map, including the many names for genetically identical garlic. She found seven groups significantly different from each other: artichoke, porcelain, rocambole, Asiatic, purple stripe, marble purple stripe. Creole/turban types were too few in number for clear results. Silverskins did not show as a distinct genetic group even though they have almost vertical blue-green leaves and artichokes have yellow-green, more horizontal leaves.
Elephant Garlic, Allium ampeloprasum, is not a true garlic, but a leek. It produces a very large bulb with a mild garlic flavor. The huge cloves are easy to peel, grate, and dry. It appeals to people who want a milder taste or who need a larger clove due to reduced dexterity.
Grow elephant garlic the same way as hardneck garlic, but plant farther apart. It is much less productive (yield ratio of 3:1) than true garlics and deserves a higher price. Elephant garlic is less winter-hardy than true garlic and is not recommended in cold climates. It stores for about 10 months and withstands temperatures well below freezing when properly stored.
Covering the planted garlic with soil. Photo credit Brittany Lewis.
Crop requirements
Garlic is a high-value crop and a heavy feeder. It needs full sun and a good range of available nutrients. Planting in raised beds helps soil drainage, reduces soil compaction and facilitates harvest.
A rotation of at least four years away from alliums is good practice to reduce disease. Consider growing biofumigant cover crops (mustard or sorghum-sudangrass) to incorporate before planting. Test your soil and strive for a pH of 6.0-8.4, with 6.8-7.2 optimum. Onion maggots thrive in alkaline soil, so it pays to watch the pH.
Garlic does best in a sandy or clay loam with very good drainage and lots of organic matter. Fall is the best time to add compost or other fertility amendments, such as soybean meal. Avoid over-fertilizing or the growth will be too tender to survive cold conditions, and the storage life of the garlic will be shortened. Avoid soluble nitrogen fertilizer in the fall to prevent leaching into ground water.
Divide your harvest goal by six to see how much to plant. For large areas 750 to 1000 pounds per acre (842 to 1122 kilogram per hectare) are needed for planting in double rows, 3 inch to 4 inch in-row (7.5-10 centimeters) beds set 39 inches (1 meter) apart. For single rows, eight pounds (3.6 kilograms) of hardneck or four pounds (1.8 kilograms) of softneck fills about 100 feet (30 meters). On average in the US, one person eats three to nine pounds (1.4 to 4.2 kilograms) per year.
Generally one to two inches (2.5 to 5 centimeters) of water per week during the growing season is needed. When the leaves start to yellow and the bulbs start to dry down, irrigation should be stopped.
Side-dressing or foliar feeding provides no gain in yield if the soil had sufficient fertility at planting time. Both are wasted after the fifth leaf, and certainly after the bulb starts enlarging. Late nitrogen can actually reduce final size. If your garlic reaches four leaves before winter, as ours does in central Virginia, forget about foliar feeding and side-dressing in the spring.
Cold climate growers with uncertain soil fertility may foliar feed with liquid fish and seaweed fertilizer every two weeks in early spring until there are four leaves. It is tricky to get foliar fertilizers to stick on the waxy, near-vertical garlic leaves — it tends to run off. So, a good spreader-sticker is essential.
The crew planting garlic. All photos by Brittany Lewis except where noted otherwise.
Timing
Plant garlic in the fall for best results. If you miss the window for fall planting, you can plant softneck garlic in the very early spring but yields will be smaller. If you need to plant in spring, refrigerate your seed garlic to get 40 days of vernalization at or below 40°F (4.5°C) — aim for 27°F (-3°C) — or the bulbs will not differentiate (divide into separate cloves). In California, garlic can be planted between January and early March.
The usual guideline is to plant when the soil temperature at 4 inches (10 centimeters) deep at 9 a.m. is 50°F (10°C). Texas A&M advises less than 85°F (29°C) at 2 inches (5 centimeters) deep. Believe the thermometer. If the season is unusually warm, just wait. Garlic roots grow whenever the ground is not frozen, and leaves grow whenever the air is above 40°F (4.5°C). When well-planted, garlic can withstand lows of -30°F (-35°C). Planting too early results in excess fall leaf growth that can suffer cold damage. If planted late, there will be inadequate root growth before the winter, and a lower survival rate as well as smaller bulbs.
In winter-hardiness zones 5 to 8, the goal is to get enough top growth in fall to make fast progress in spring, but not so much that the leaves can’t survive the winter. If garlic freezes back to the ground, it can re-grow, and be fine. If it dies back twice, the yield will be lower than it might have been with better luck. In zones 5 to 8 garlic is planted mid-October to mid-November. In central Virginia we plant in early November.
In colder areas, the goal is to grow strong garlic roots before the big freeze, but no top growth until after the worst of the winter. Start two to three weeks after the first frost, but before the ground freezes solid. In Michigan, planting time is six weeks before the ground freezes. In New Hampshire, mid-October is the right time.
It is important to establish garlic at the right time so that roots and leaves are as big as possible before the plants start to make bulbs. Bulb initiation (and the end of leaf growth) is triggered by day length above 13 hours (April 10 here at 38°N), with air temperatures above 68°F (20°C) and soil temperatures over 60°F (15.5°C) as secondary triggers. It may be the accumulation of degree days (accumulated heat units) rather than one day at the trigger temperature. After the spring equinox, the farther north you go, the longer the day length is.
Northern latitudes reach 13 hours of daylight before southern ones, but garlic does not start bulbing there at 13 hours because temperatures are not yet high enough. For example, in Michigan bulbing begins in mid-May. Harvest dates are earlier in warmer areas than in cooler areas at the same latitude. We have no control over when garlic starts to make bulbs, only over how large and healthy the plants are when bulbing starts and how large the final bulbs can be. Small plants only make small bulbs.
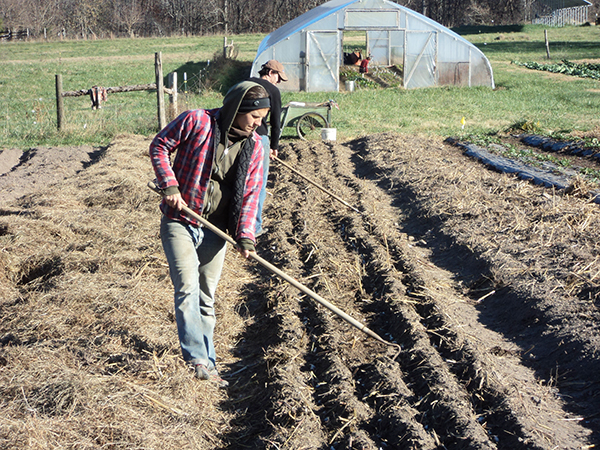
Measuring one of the four garlic rows, so that all four don't need to be measured.
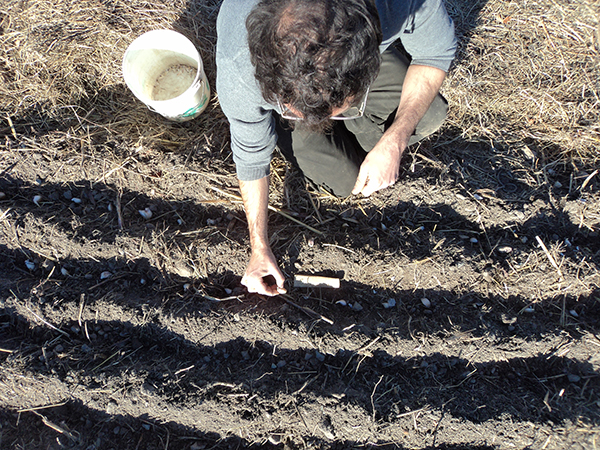
Popping the cloves
Seed garlic bulbs should be separated into cloves up to seven days before planting. This is a good group activity. We often combine it with our annual Crop Review crew meeting. Twist off the outer skins and pull the bulb apart, trying not to break the basal plate of the cloves (the part the roots grow from), as that prevents them growing.
We sort as we go, putting good size cloves in big buckets, damaged cloves in kitchen buckets, tiny cloves in small buckets, and rejected cloves and outer skins in compost buckets. The tiny cloves can grow garlic scallions. Discard anything that is soft, damaged, diseased, or discolored. Cloves will still grow successfully if some skin comes off. In general, plant the biggest and best cloves, which will build up bigger seed stock over time.
Garlic scallions
Garlic scallions are small whole garlic plants that are used like onion scallions. They are mostly green leaves, although the clove is also edible. They provide an attractive early spring crop, when few crops other than leafy greens and stored roots are available.
The main way to grow garlic scallions is to save the small cloves when you plant your main crop, and plant them close together in furrows, dropping them in almost shoulder-to-shoulder, anyway up that they fall. Close the furrow and spread organic mulch over the top. You can also plant whole bulbs (at a wider spacing) and grow the scallions in bunches. This is a good use for any surplus or sub-par bulbs.
With a last frost date of April 20 to 30, we harvest garlic scallions from early March until May. Loosen the plants with a fork rather than just pulling. Trim the roots, rinse, bunch, set in a little water, and you’re done. Garlic scallions sell in small bunches of three to six depending on size.
Some people cut the greens every two or three weeks, at 10 inches (25 centimeters) tall. We tried this, but prefer to simply pull the whole plant once it reaches about 7 to 8 inches (18 to 20 centimeters) tall. The leaves keep in better condition if still attached to the clove. Our spring is short and it works better for us to start harvest early and not expect to get a second chance.
Some growers have found they can make better money from garlic scallions than from bulb garlic, so consider this option. You could plant at times of year other than the one we use, and consider hoop houses.
Pre-plant treatments
If you have pest and disease problems, do a pre-plant clove soak. Some growers note they get better yields from treated cloves even if no problem was obvious. Anytime your garlic grows poorly and you can’t tell why, send a sample with the soil it’s growing in to your Extension Service for a nematode test.
To eradicate stem and bulb (bloat) nematode (Ditylenchus dipsaci), soak the separated cloves for 30 minutes in 100°F (37.7°C) water containing 0.1 percent soap. Or soak for 20 minutes in the same strength solution at 120°F (48.5°C), then cool in plain water for 10 to 20 minutes. Allow to dry for two hours at 100°F (37.7°C) or plant immediately.
Mites hide between the wrappers and eat the clove skins, surviving the winter and multiplying all spring, seriously damaging or even killing the growing crop. Infestations found at harvest will be controlled by the normal curing process before planting or storage. To be more sure of killing mites before planting, soak the separated cloves up to 16 hours in water, possibly with one heaping tablespoon of baking soda and one tablespoon of liquid seaweed per gallon (around 8 milliliters baking soda and 4 milliliters liquid seaweed per liter). Or soak for 24 hours in 2 percent soap (not detergent) and 2 percent mineral oil. Hotter water treatment at 130°F (55°C) for 10 to 20 minutes, or 140°F (60°C) for 10 to 15 minutes can reduce garlic bulb mite populations further, but also reduces bulb germination.
Drain cloves just before planting, and cover in rubbing alcohol for three to five minutes, allowing the alcohol to penetrate the clove skins and kill any mites inside. The water soak loosens the clove skins, allowing the alcohol to penetrate. Plant immediately.
The treatments used to kill mites also kill various fungal infections. Soaking 15 to 30 minutes is enough to kill fungi. Other treatments include either a 10 percent commercial bleach solution (one part bleach and nine parts water) or an OxiDate dip (1 percent solution). Plant cloves immediately after dipping, without letting them dry.
Fusarium levels can be managed by adding wood ash at planting and dusting the beds with more ash during the winter. Don’t add so much that you make the soil alkaline.

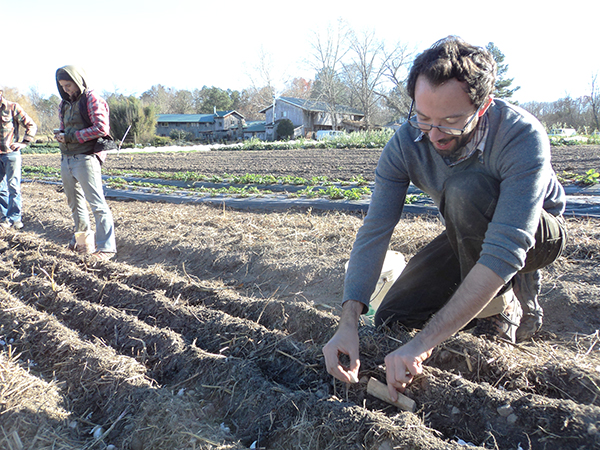
Planting subsequent rows without measuring.
Spacing and depth
The minimum spacing for good garlic yields is 32 inches squared (206 centimeters square) each. We plant at 5 inches (13 centimeters) spacing in the row, and 8 to 10 inches (20 to 25 centimeters) between rows, usually with four rows in a bed. The beds are 3.5 to 4 feet (1 to 1.2 meter) wide. That’s 40 inches squared (258 centimeters squared) each. Many growers plant at 6 inches (15 centimeters) in-row. For best use of drip tape, you can run a length of tape and plant a double row, one row each side, with plants 6 inches (15 centimeters) apart in all directions, and 40 inches (1 meter) or less between drip lines.
If you are growing a hardneck variety, make sure to plant the cloves pointy end up or you will suffer a 30 percent yield reduction.
Cloves are usually planted with 1 to 2 inches (2.5 to 5 centimeters) of soil above the cloves in the mid-Atlantic (zones 5 to 8) and the South, and 3 to 4 inches (8 to 10 centimeters) in the north. Avoid planting deeper than necessary, as fungal problems can be worse. Where winters are severe, plant 2 to 4 inches (5 to 10 centimeters) deep. Planting depth in Michigan is 6 inches (15 centimeters), to prevent excessive top growth and moderate the soil temperature. In Arizona, some growers set cloves on the soil surface, and cover with 6 inches (15 centimeters) of straw. This provides a clean crop and an easy harvest.
Our method is to make furrows with pointed hoes, then lightly press the cloves into the furrows at the chosen spacing, using measuring sticks. Then, we pull soil over the cloves using regular hoes or rakes, and tamp the soil down with the back of the tool. Some other growers who also plant by hand make a jig to make four or more holes at a time in loose soil, rather than making furrows. You can drop the cloves into the furrows through a 3 feet (1 meter) length of pipe wide enough for the garlic to tumble end-over-end, and the cloves will land the way they need to be.
To mulch or not?
Mulch improves winter survival, suppresses weeds, conserves soil moisture, and prevents erosion. We unroll round hay bales over our beds immediately after planting. We return two weeks later and free any shoots trapped by wads of over-thick mulch. Then we leave it until late February, when we start monthly weeding. If you live in a colder area, you can add organic mulch after the ground freezes. It is possible, but more difficult, to add mulch after the garlic has started to grow. If you need to allow the soil to cool before mulching in order to prevent too much top growth before winter, this is an option. Consider planting later in future years.
Mulch will make harvesting by machine difficult or impossible, so if using mechanical harvesters, grow on bare soil. Living mulches all reduce garlic yields.
David Stern in New York sows oats in late August. The oats are 6 inches (15 centimeters) tall when he plants garlic, using a disc furrower to cut slices through the oats. He sets garlic in the furrows and leaves the oats growing until winter-killed at 10° to 20°F (-10° to -7°C). This works well in areas with deep freezes. The oats go from living cover crop to dead mulch. In milder climates, if oats are not winter-killed, they become a problem in spring.
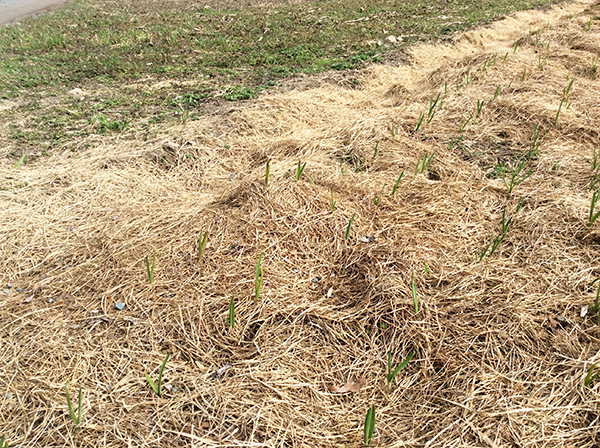
Garlic shoots coming up through mulch. Photo Pam Dawling.
Diseases and pests
The major diseases are mostly fungal: White Rot, Fusarium, Botrytis, Rust, Penicillium Molds, Purple Blotch, Powdery Mildew, Downy Mildew. Bacterial soft rots are also sometimes seen. Remove isolated moldy plants as soon as you see them. Always remove garlic debris from the field at the end of the season, or till it in and plant a non-allium crop. In summer, soil biological life is very active, and soil organisms will quickly break down the debris.
White Rot is most active below 75°F, and leads to yellowing and dying of older leaves, tip burn, and then destruction of the root system and rotting of the bulb. This fungus can persist in the soil for 10 years, and requires assertive action to reduce the problem. A clever trick is to spray garlic extract on the soil when the temperature is 60-70°F and you have no garlic growing. The fungal mycelium may grow and then die off in the absence of food. Several weeks later, garlic can be planted and will escape the rot.
Fusarium usually attacks plants that are under stress. In our garden it is the plants on the gravelly edge of the patch which get this disease. It grows during hot weather, with symptoms similar to White Rot, but slower to develop. The browning of the leaves spreads from the tips. Good sanitation and fostering strong plant growth are the main organic approaches to controlling Fusarium.
Botrytis symptoms include "water-soaked" leaves, and can lead to bulbs rotting, sometimes during storage. This fungus grows best (worst!) in warm wet weather. Good air flow during growth, curing and storage will reduce the chances of Botrytis problems.
Rust shows up initially as small white flecks on the leaves, developing into orange spots. Favorable conditions include temperatures of 45-55°F, high humidity but low rainfall, and low light. Stressed plants are the most likely to be stricken. Infected bulbs may shrink, yellow and die. Once again, good sanitation and rotations are the organic approaches.
Pests include nematodes, thrips, onion maggots, cutworm, armyworm, and mites. Weekly scouting is a good practice.
Nematode infestations show up as distorted, bloated, spongy leaves and bulbs, perhaps with brown or yellow spots. Top growth yellows and may separate from the root system. Farmscaping (planting flowers which attract beneficial insects which also feed on your pests) can work for thrips, which are on the menu for lady bugs and minute pirate bugs. Beneficial nematodes have been shown to be effective against onion maggots, and ground and rove beetles, birds and braconid wasps all prey on some life stage of the maggot. Row covers can exclude the fly (mother of the maggots).
Sources for seed
Filaree Farms, WA: https://www.filareefarm.com/ 509-422-6940. Over 115 varieties.
Territorial Seeds, OR: https://territorialseed.com 800-626-0866. 27 varieties.
Southern Exposure Seed Exchange, VA: https://www.southernexposure.com/categories/garlic/ 540-894-9480. 15 varieties.
Garlic Seed Foundation, NY: https://www.garlicseedfoundation.info/classifieds.htm Lists 10 suppliers, and many resources, including the ARS Germplasm Resource that supplies small amounts of plant material to growers.
Baker Creek Heirloom Seeds, MO: https://www.rareseeds.com 417 924 8917. Six varieties.
Johnny’s Selected Seeds, ME: https://www.johnnyseeds.com/ 877 564 6697. Three to five varieties.
Other resources
Ron L Engeland: Growing Great Garlic https://www.filareefarm.com/
ATTRA: Organic Garlic Production: https://tinyurl.com/y4suw4lh. You can now download any ATTRA technical materials free of charge.
Garlic Seed Foundation https://www.garlicseedfoundation.info/ They have an extensive library, and information on building your own harvesting equipment.
Dr Gayle Volk’s Garlic DNA Analysis: https://tinyurl.com/y5an5ac7
Pam Dawling has lived at Twin Oaks Community in central Virginia for 27 years, growing vegetables for 100 people on 3.5 acres and training members in sustainable vegetable production. She is the author of two books- Sustainable Market Farming and The Year-Round Hoophouse. She blogs at www.sustainablemarketfarming.com and on Facebook.