How to Organize All of this Information
If you were going to do something similar on paper, each row of the spreadsheet would be like an index card. There would be an index card with each planting on it and all the corresponding yield, planting, seeding, and seed order information. You could rearrange the index cards by planting date, or by crop, or by variety, or by seed company to order from, etc. but it would take a bit of time considering there would probably be hundreds of them. With the computer you can just sort the rows depending on how you want to use them.
Once I’ve gone back and forth a few times between the harvest plan, the planting plan and the maps to make sure that it all fits and makes sense I’ll consider the plan solid and I’ll start breaking the information apart into separate sheets that are useable to make the seed order, to create a bed preparation schedule, a transplanting schedule, a direct seeding schedule a greenhouse seeding schedule and a harvest record sheet.
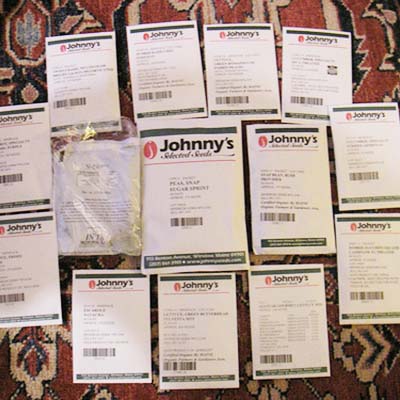
Computer spreadsheets allow you to reference selected information from other sheets in creating a new sheet, and to combine those pieces of information with new information. The first sheet I usually create for myself is the seed order. For this sheet I pull out only the information I need to make the order and then I sort the sheet by seed company so that all of the orders are separated for me. At that point I simply have a list that I can read down for each separate seed company, and I have all of the order numbers and prices to compare as I go. I make notes on a print out as I go to keep track of back orders or items that aren’t available so that I make sure to order those from other companies, or so that substitutions are noted in the planting plan.
The rest of the sheets that I make are designed to include the information that is needed only for the task being performed (e.g. direct seeding, or greenhouse seeding), and I also include blank columns next to numbers I want to have records of. I make sure that the information on the sheet can be printed out on a single sheet of letter sized paper, without any of the row flowing over onto a separate sheet. That way all of the information for a planting is contained on one line and is easy to see in a glance. For example, when the planting crew goes out into the field, they have a clipboard with a sheet that tells them the crop, the variety, how many trays they should have gotten from the greenhouse, what the week of the planting should be, what field the planting is going into, how many beds are to be planted at what spacing, and any additional notes. The sheet is sorted by date and field so that all of the plantings for the week are grouped together, and within a particular week they are grouped by the field they are going into. There are also blank spaces that the crew fills in after planting to note what day the crop was actually planted, where it was planted, and then they can also note any changes to the information given. These sheets are both the to do list and the record sheets indicating not only that the task was done, but also when and how.
Timeline
This entire process is not a short one. Plans often include 400-600 separate plantings in one season. Even when it’s just being edited from a previous year and not created from scratch, I give myself two full weeks of sitting in front of previous years’ records, a computer screen and lots of seed catalogs to complete the process. Usually that two weeks is spread out over a month or two. Here in the Northwest I like to do my planning in November, hoping to finish before the New Year and have my seed order in by early January. We start seeding in the greenhouse in late January so it’s easiest if I’m all done by then and the seed is already arriving.
With the plan finished and printed out on paper, I pretty much leave the computer spreadsheets behind for the season and work entirely off of the print outs that I make in January. Even though there are frequent edits to the plan over the course of the season due to weather, labor, and unforeseen pest issues, having a plan saves an incredible amount of time during the actual growing season, moving a chunk of the decision making to the “off” season, when there’s more time to think decisions through. Further, on a farm where you, as a manager, have to pass on all the details to a crew, or crew leaders, having those details spelled out in a standard format that they can easily access saves a lot of communication time, and makes tasks clearer. When the crew is good at keeping records it is easy to see what has already been done, and what is still remaining to be done, just by glancing at the combined to do/record sheets.
I’ve taught a number of people to use this system over the years. My partner, who now manages one of the farms that I used to work on, was one of those people and she told me it took her two or three seasons of going through the process to really understand the details. Another advantage I see to creating such detailed plans, especially in conjunction with good record keeping, is that it accelerates the learning process for how to plant out the farm successfully. At this point, after many years of farming I might be able to plant out the farm from shear seasonal muscle memory. When I was first starting, there was no way I could do that, and so creating the plan in the off season gave me a real head start to understanding what I needed to plant, how much, and when.
Additional Tips for Using Excel
The following is a cheat sheet of features I find useful to understand in computer spreadsheets that I’ve created for workshops that I teach on my crop planning method. Learning how to sort effectively is the one other essential skill not mentioned below.
Useful Excel shortcuts and terms
- Cell Address - the column letter followed by the row number (e.g. F35)
- relative cell address - when you put a cell address in a formula it defaults to a relative cell address, meaning relative to the cell the formula is in. The cell address in the formula will change if you move the formula to another cell.
- absolute cell address - you can make the column, or row, or both absolute (meaning they won't change if you move the formula to another cell). This is done by putting a $ in front of the letter, or number, or both (e.g. $F35, F$35, or $F$35 - meaning three different things)
- Referencing - this lets you reference cells in other sheets, even other workbooks. This works just like other cell addresses. Be aware that if you move cells in the referenced sheet (by sorting or any other method) the cell will still be referenced but the information that was in it will not.
Formulas I use in crop planning
- =+-/*() - pay attention to where your parenthesis are in the formula, it makes a big difference sometimes.
- +- - adding (or subtracting) a number to a date is equivalent to adding (or subtracting) days. Very useful.
- sum() - this adds up all of the cells in a range. Ranges of cells start with the top left cell address, are separated by a colon (or sometimes double periods), and end with the bottom right cell address (e.g. A1:C55, or A1..C55)
- count() - This counts the number of cells in a range that have a number in them
- countA() - This counts the number of cells in a range that have anything in them
- If() - I used to use more if statements but they take up a lot of space and aren't really so useful in the end. Basically they will do one thing if a cell matches the criteria you're looking for, or something else if it doesn't.
- Nesting formulas - I use a lot of formulas inside of formulas. You can nest a lot of formulas but usually it's easier to use multiple steps, showing each intermediate step in another column. This is much easier to edit in the future and to understand when you forget how the formula works.
- Learn key stroke shortcuts - these save a lot of time when you add up how many times you use most of them, and they help save your wrists. the most common ones I use are below. I've also included some right click features on a pointer.
- arrow keys - I find these faster and more accurate than the pointer (mouse/trackpad) in most cases
- holding shift - this allows you to select a range by simply selecting the first and last (or last and then first) cells in the range
- holding ctrl (command on a mac)- this allows you to select multiple, non-contiguous cells (mostly for deleting, doesn't work with copy and paste)
- ctrl x, c, v - cut, copy and paste. right clicking on a mouse gets you there sometimes but the keyboard is usually faster.
- ctrl d, r - fill down and fill right. I use these a lot. These paste whatever is in the top or left cell into all of the other cells in a range. Unfortunately NeoOffice doesn't have ctrl r so you have to use copy and paste instead.
- ctrl b, u, i - bold, underline and italic. Once turns it on, a second time turns it off.
- ctrl s - I don't use this one nearly enough - Save your work often!
- right clicks - on row and column headings you can add and subtract columns
- this is a shortcut to formatting the cells as well.
- scrolling - having a mouse with scrolling is very nice for working on spreadsheets. I'm excited about the new mice (and track pads) that allow scrolling in both directions.
- Help - use the help feature when you can't remember how something works. It's usually the top right pull down menu.

 Over the last three years, I’ve been involved with a new experimental farm in my province of Quebec. At my farm, La Ferme de Quatre Temps, I was asked to design and create a training farm where some of the strategies described in my book
