With more farmers aiming to produce local food year-round, storage of vegetables for sale over the winter is an important way to extend the season when it's too cold to grow in the field. Understanding the needs of different crops can help reduce your electricity bill and your carbon footprint, and maximize the amount of produce you can store for later sale. Only critical crops need refrigeration. Many others may be stored without electricity, perhaps in buildings that serve other uses at the height of the growing season.
Reasonable expectations
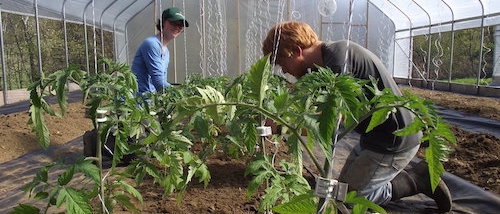
Only store the good stuff. Damaged and poor quality vegetables will not store well. All crops for long-term storage should always be handled gently, to avoid bruising. Make sure crops are fully mature but not over-mature when you harvest. Potatoes need firm skins that don’t rub off when you apply thumb pressure. Other crops, such as beets and sweet potatoes, don’t have a “ripe” stage, but are ready when they reach the size you like. Very small or skinny roots don’t store well. Expect that a small percentage of your crops will go bad in storage – it’s not a sign of failure, just a reminder that life has limitations. Some warm-weather crops get chilling injury when refrigerated or stored in cold out-buildings, so don’t expect a one-shed-fits-all solution to crop storage.
Some varieties store better than others, so scrutinize the variety descriptions in the seed catalogs before your next seed order.
.png)
Cure, then store
Some vegetables need to cure before storage and the curing conditions are different from those needed for storage. Curing allows skins to harden and some of the starches to convert to sugars. Sweet potatoes need curing at high humidity (80-90%) and high temperatures for 7-14 days: 10 days at 80-90°F, or 20 days at 70°F, until the skins remain undamaged when you rub two of them together. Then they can be safely stored in warm, dry conditions for up to 7 months. Sweet potatoes stored below 50°F will be damaged beyond usefulness.
Regular (white, Irish) potatoes need curing in moist air (90% humidity) for 1-2 weeks at 60-75°F. Wounds in the skin will not heal below 50°F. We sort our potatoes after curing and find that sorting at this point usually reduces the chance of rot so that we don’t need to sort again. Remember to keep white potatoes in the dark while curing as well as during storage.
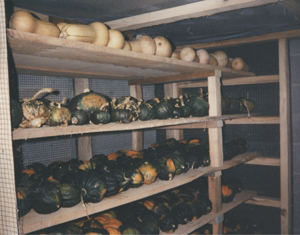
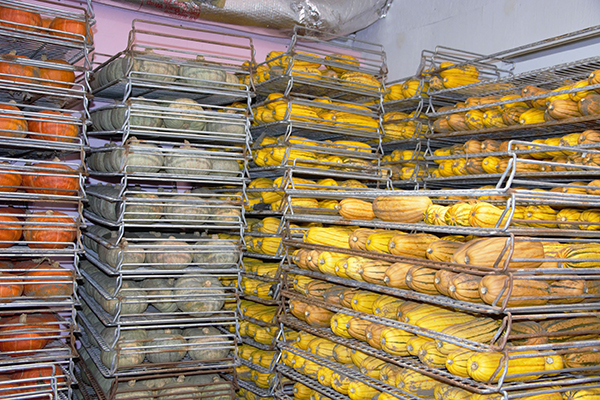
Some people cure winter squash by setting the freshly harvested squash in a windrow with the stems facing the sun or the breeze. I’ve also read recommendations to cure at room temperature for 10 days before storing. When ready, skin should be undamaged by the attempt to puncture it with a thumbnail. We never cure ours, and have seen no adverse effects. Perhaps in cooler climates it’s important to cure at a warmer temperature, with good airflow, especially if storage will be in deep crates. Our storage is on open shelves, with reasonably good airflow. Certainly the squash sweetens with length of storage, and as with potatoes, after a few weeks, the rate of deterioration drops right down. Different squash species take varying amounts of curing or storage time to fully sweeten.
Cabbage for storage benefits from having the cut stems exposed to the sun for an hour or so to dry before bagging. Weusually do this by setting the cut cabbage upside down on the outer leaves, and coming back later to bag up. Onions and garlic need curing or drying with the tops and roots on, for about two weeks, before trimming and storing.
Peanuts will cure in 2-3 weeks indoors at ambient temperatures, or as little as 6 days with perfect conditions, including good airflow. The big enemy of efforts to dry peanuts is mold. Moldy peanuts contain toxic aflatoxin, so get them dried quickly. It’s important not to heat them higher than 85°F, as this causes skin slippage and kernel splitting. To find out when peanuts have finished curing, taste some. If they are still watery and crunchy like water-chestnuts, they are not ready. For long-term storage, they need to be very well protected from mice and kept very dry.
There has been some USDA research into biological disease control for stored fruit and vegetables. It takes three directions:
Using biologicals such as Aspire yeast, BioSave bacteria (Pseudomonas syringae) and Chitins to form a semi-permeable film over the surface of the roots and fruits.
UV light to induce rot resistance. Primarily used for fruit.
Natural fungicides derived from jasmine and peaches that induce disease resistance in the crop itself.
Currently these methods are used by large operations, but in future, these methods may be useful to small growers.
Preparation for storage
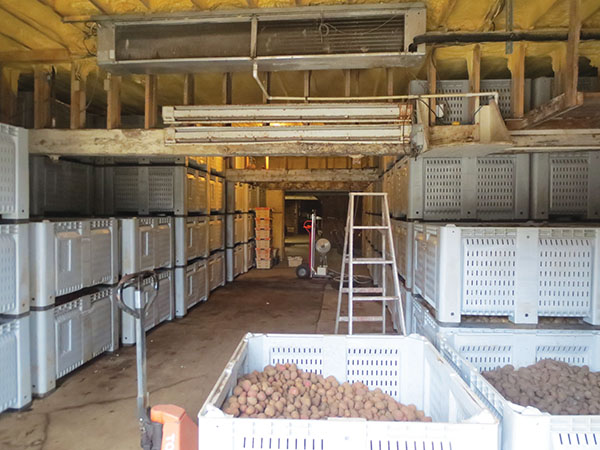
Plan your storage sites, buy a thermometer for each site, and gather suitable containers. Wood crates are good for nostalgia and agritourism, but plastic is kinder on aging backs and less likely to harbor diseases. Containers of produce should not be set on bare concrete floors, but rest on shelves, pallets or blocks of some kind. This helps improve ventilation and reduce condensation.
For root cellar storage, roots are traditionally packed in layers in damp sand, sawdust or wood ash in open boxes. The goal is to buffer temperature changes and prevent the roots drying out. Extra water can be sprinkled on the media if the crops are getting too dry. For traditional storage without refrigeration, most roots store best unwashed (less wrinkling). This can make them harder to clean later. A modern alternative is perforated plastic bags. We perforate our own, and if necessary, add more holes to bags during storage, if too much moisture is building up. If you are using perforated plastic bags for cold storage, rather than boxes of sand, you can wash the roots before storing them, as the bag reduces the water losses that lead to wrinkling. Plastic bags are less flexible about temperature conditions than open boxes, so if you might not be able to keep temperatures low enough, choose boxes rather than bags.
When you have choice in the matter, try to harvest roots from relatively dry soil, so they are less likely to grow mold. Trim leafy tops from root vegetables, leaving very short stems on beets and carrots. For non-refrigerated storage, several smaller containers of each crop are often a safer bet than one giant one, in case rot sets in.
The packing of your containers should allow for airflow, but you don’t want the produce to shrivel up, so be guided by conditions. Celeriac needs more ventilation than beets, for instance. Sometimes night ventilation offers cooler, drier air than you can get in the daytime. Keeping root cellar temperatures within a narrow range takes human intervention, or sophisticated thermostats and vents. If needed, electric fans can be used to force air through a building.
There is a lot of good information in USDA Agriculture Handbook (see resources at end of article.)
Ethylene
Ethylene is generally associated with ripening, sprouting and rotting. Some crops produce ethylene gas while in storage – apples, cantaloupes and ripening tomatoes all produce higher than average amounts. Environmental stresses such as chilling, wounding, and pathogen attack can all induce ethylene formation in damaged crops. Some crops, including most cut greens, are not very sensitive to ethylene and so can be stored in the same space as ethylene-producing crops. Other vegetables, however, are very sensitive to ethylene, and will deteriorate in a high-ethylene environment. Potatoes will sprout, ripe fruits will go over the top, carrots lose their sweetness and become bitter. When storing ripe fruit, ventilate with fresh air frequently, maybe even daily, to reduce the rate of over-ripening and rotting. Ethylene also hastens the opening of flower buds and the senescence of open flowers.
Other produce can affect your crops – don’t be tempted to set that bargain box of very ripe bananas you bought on the way home near anything you don’t want to sprout or ripen further. Conversely, ripe bananas can be a cheap ethylene source if you do want to speed ripening.
In-ground storage
Depending on the severity of your winter temperatures, some cold-hardy root crops, such as turnips, rutabagas, carrots, parsnips, Jerusalem artichokes, horseradish, and leeks, can be left in place in the ground, with about 12” of insulation, such as straw, dry leaves, chopped corn stalks, or wood shavings added after the soil temperature drops to “refrigerator temperatures.” Hooped row covers or polyethylene low tunnels can keep the worst of the weather off. There could be some losses to rodents, so experiment on a small scale the first winter to see what works for you. We have too many voles to do this with carrots or turnips on our farm, but horseradish survives without protection, as do some winter-hardy leek varieties. Besides being used as a method for storage of hardy crops deep into winter, this can be a useful method of season extension into early winter for less hardy crops such as beets, celery, cabbage, which would not survive all-winter storage this way. Access to crops stored in the ground is limited in colder regions – plan to remove them all before the soil becomes frozen, or else wait for a thaw.
Clamps, pits and trenches
Cabbage, kohlrabi, turnips, rutabagas, carrots, parsnips, horseradish, Jerusalem artichokes, salsify, winter radishes, (any roots that can survive cold temperatures), can be stored with no electricity use at all, by making temporary insulated outdoor storage mounds (clamps). The general idea is to mark out a circular or oval pad of soil, lay down some straw or other insulation, pile the roots up in a rounded cone or ridge shape, cover them with straw, then with soil, making a drainage ditch round the pile. As a chimney for ventilation, leave a tuft of straw poking out the center or one side. Slap the soil in place to protect the straw and shed rainwater. For the backyarder, various roots can be mixed, or sections of the clamp can be for different crops. Those growing on a large scale would probably want a separate clamp for each crop. It is possible to open one end of a clamp or pit, remove some vegetables, then reseal it, although it takes some care for it to be successful. There is a balance to be found between the thermal buffering of one large clamp and the reduced risk of rot that numerous smaller clamps provide.
To store in pits or trenches, dig a hole in the ground first, lining it with straw, lay in the vegetables, then cover with more straw and soil. To deter rodents, it is possible to bury large bins such as (clean) metal trash cans, layer the vegetables inside with straw, and cover the lid with a mound of more insulation and soil. Trenches can have side-walls made with boards to extend the height. Another alternative is to bury insulated boxes in the ground inside a dirt-floored shed or breezeway. A new life for discarded chest freezers! Insulated boxes stored in unheated areas need 6-8” of insulation on the bottom, sides, and top.
Basement storage and root cellars
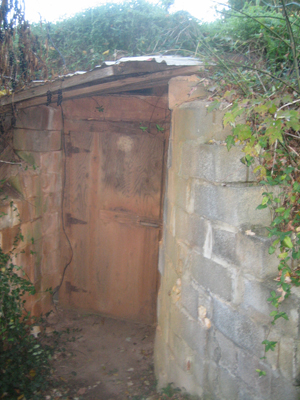
Walk-in root cellars are larger versions of the “buried box” idea. Traditional root cellars are made by excavating a large hole near the house, lining it with block or stone-work walls, casting a well-supported and well-insulated concrete roof, then covering the top with a big mound of soil. The doorway may have bulkhead doors or an entryway with additional doors.
The more modern version is to construct an insulated cellar in the basement of a building such as a CSA distribution barn or your house. See the Bubels’ book or the Washington State publication (Resources at the end of the article) for drawings and instructions on making these. These storage areas should be in the coldest part of the basement, far from all heat sources. The exterior walls do not need insulation, but the ceiling and inside partition walls need 3½” thick insulation, with a vapor barrier. (Another use for retired hoophouse plastic.) An outside window is an advantage, or a duct can be put through the wall, so the temperature and ventilation can be controlled, either by thermostats opening the vents, or by hand. To increase the humidity, pour water on the floor or drape wet burlap sacks over the crates of produce.
If you are planning to build from scratch, plan for two or three smaller storage areas, rather than one big one, so that crops with different requirements can be separated.
The Coolbot
For those needing some electrically-boosted cooling, an alternative to full-on refrigeration is the CoolBot, as advertised in Growing for Market. It is a device which enables you to run a standard window air-conditioner at a lower temperature. Any well-insulated small room or building can be used.
Green tomatoes
In a category of their own are green tomatoes stored for ripening. They’ll never taste as good as vine-ripened fruit, but a few weeks after your local frost date they’ll be better than jet-lagged vegetables shipped in from afar. Fruit from late-planted vines still in good condition will ripen best. Only unblemished fruit that have passed a certain magic point will ripen. Unripenable fruits are matte, dark green and often fuzzy. If they are paler green, shiny and no longer fuzzy, they will ripen if nothing goes wrong. Set them in trays such as those in boxes of apples. It helps prevent rot if the tomatoes don’t touch. Stack the trays in a warm place. Light is not necessary. Sort through once a week, removing the ripe ones and the composting ones. It probably helps ripening to mix in a half-ripe fruit in each tray (because of the ethylene). At 65-70°F they will ripen in 2-3 weeks. At 55°F, they will take about a month. Temperatures cooler than this will not produce reliably good results.
“Unstoring” vegetables
Out of sight should not mean out of mind! Keep a record of what you have stored where. Watch the thermometer readings and control temperature and humidity as needed. We have a natural tendency to “check out” once the daily vigilance and plate-spinning is over for another year. Look over your stored crops regularly, removing damaged specimens. Monitor the rate of use and notice if you’d benefit from more or less of each crop next winter.
After long storage, some vegetables look less than delicious, and benefit from a bit of attention before the public gets them. Cabbages can have the outer leaves removed, and can then be greened up by exposing to light for a week at 50°F. This isn’t just cosmetic – the vitamin C content increases ten-fold. Carrots can lose their sweetness over time, unless frequently exposed to fresh air, by ventilating well.
Resources
USDA Agriculture Handbook 66, 1986. The Commercial Storage of Fruits, Vegetables and Florist and Nursery Stocks. www.ba.ars.usda.gov/hb66/
Susan MacKay, Home Storage of Fruits and Vegetables (NRAES #7) 1984 paperback, out of print.
Washington State University Extension, Storing Vegetables and Fruits at Home cru.cahe.wsu.edu/CEPublications/eb1326/eb1326.pdf includes adapted material from the elusive NRAES Bulletin #7: Home Storage of Fruits and Vegetables
Postharvest Technology Research and Information Center, Dept Pomology, UC Davis has a list of publications, with weblinks, covering around 70 crops: postharvest.ucdavis.edu/libraries/publications/
Pam Dawling works in the 3.5 acres of vegetable gardens at Twin Oaks Community in central Virginia. Her books, Sustainable Market Farming: Intensive Vegetable Production on a Few Acres, and The Year-Round Hoophouse, are available from Growing for Market. Her weekly blog is on her website and on facebook.com/SustainableMarketFarming.


 This article outlines designing and building a facility for long-term vegetable storage. A well-designed storage facility enables you to store high-quality vegetables many months after harvesting and thus access lucrative markets starved for local produce during the winter.
 This is the first in a series about why and how to add long-term vegetable storage to your farm to bolster off-season sales.