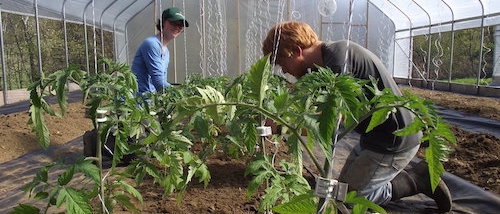
While thyme and rosemary don’t show signs of stress after harvesting, mints and oregano can seem to wilt before your eyes if you’ve waited for the morning’s dew to evaporate before harvesting. Protecting the harvested crop, cooling it properly, and maintaining proper temperatures and humidity all have a very real impact on the quality of the product when it gets to the final customer.
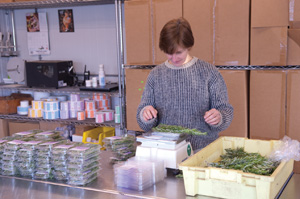 An employee packages herbs in clamshells at the author's farm. Photo by Bob Blanchard Photography.
We used a cargo van as our harvest vehicle, which allowed us to shelter our harvest from sun and wind as soon as the herbs were harvested. Weighing the herbs right at the van helped us to avoid over- or under-harvesting. Periodically during the harvest, we drove the van to the packing house—how frequently depended on the weather conditions—and the herbs were put immediately into the walk-in cooler.
Adequate cooling is key to ensuring a quality product, but we never rinsed our herbs, with the exception of the members of the Apiaceae family - parsley, dill, and cilantro. Tender chives and tarragon would rot if they had any standing moisture on their leaves when packaged. Thyme, oregano, sage, basil, and the mints are all members of the Lamiaceae family, and the essential oils that give them flavor are held in thin-walled oil glands on the surface of their leaves. The oil glands rupture when they are disturbed by touch, releasing the volatile oils; when washed, these oils dissipate in the water, and are lost.
If a crop did come in wet, or with so much soil on the leaves that washing was simply unavoidable, we spread the herbs in a shallow layer on a wire rack in the packing house and turned a large fan on them. This requires care and close observation, since the edge between a completely dry leaf surface and wilting is a fine one.
Having plenty of storage and the ability to rapidly remove field heat without hydrocooling not only allowed us to extend shelf-life by slowing respiration rates; it also allowed us to harvest ahead of rain events or extreme heat, and store the herbs for several days if necessary.
The 7-inch tall vented trays that we used for harvest allowed for rapid cooling. Good air circulation is critical, so we stacked our totes on wire shelving in the walk-in cooler for chilling. If the herbs came in slightly wilted—unavoidable some days in Iowa if we waited to harvest until the dew had dried—we would use a Fogg-It nozzle to lightly mist the herbs to encourage evaporative cooling and rehydration. Just misting the top of the herbs in the tote is enough to speed the cooling process for the entire tray.
Once they had fully cooled, we covered the totes with a plastic bushel-crate liner to prevent further water loss. Herbs that would be stored more than 36 hours were packed into one-pound polyethylene bags, loosely closed with tape. The one-pound bags facilitated inventory and packaging, and provided more humidity retention.

While cooling herbs is always an important consideration for post-harvest quality, it is especially important to completely cool the crop when packaging in bags or clamshells. Herbs confined to a clamshell or bag will cool more slowly than loose herbs, and further cooling will almost certainly result in condensation on the interior of the package. This condensation results in moisture on the surface of the leaves, which is a prime space for rot organisms to multiply.
As with vegetables, different herbs have different shelf lives once they are cooled. We shipped herbs twice each week, on Mondays and Thursdays, and with the volume we produced and the short turn-around time, we always needed to package and harvest at least some crop before we had our orders in. Every tray and every package of herbs was labeled with a code indicating when it was harvested or packed. We managed the inventory of tender crops such as oregano, chives, tarragon, and basil on a last-in, first-out basis, so that we were always packing and selling the most recent harvest. Hardier crops, such as rosemary, thyme, and sage, we managed on a first-in, first-out basis.
We packaged our herbs in a 3/4-ounce clamshell that was the same size as the dominant national supplier for our retail store customers. This made it easy to substitute in the event that our supply ran short. We purchased labels that were pre-printed with our farm contact information and logo, with six different background colors, and printed crop-specific information on these with a thermal transfer printer. (As an additional bonus, we also used this for the rest of the labels on the farm, since we had it on hand.) Clamshells were labeled before clamshelling days, and stored in rubbermaid totes.
For clamshelled herbs, the labor for packaging was a significant expense and a major bottleneck, so we always emphasized the importance of establishing a good work flow. We used small scales so that they didn’t take up too much space. Clamshells were stacked behind the scale with the tray facing the worker, and herbs placed on the dominant-hand side of the scale to minimize the movement necessary to put the herbs in the clamshell. After a few hours of clamshelling, most workers were able to consistently package the right amount without paying close attention to the scale.
We packaged our 3/4-oz herb clamshells in bundles of six for sale to retail stores and wholesale distributors. This simplified invoicing and order packing, and I always felt that it resulted in more sales. We also sold our herbs in one-pound packages and 12-count bunches, which were both packaged in polyethylene bags that were folded over and held closed with a wholesale label.
Because the herb packages were dry, we didn’t need the moisture protection of a wax carton. Corrugated cardboard boxes provided a less-expensive, more easily recycled option for us.
Food safety concerns
Any fresh cut herb is likely to be used without cooking or with only minimal cooking, so good food safety practices are especially important. Make sure workers have good hand-washing facilities close at hand and that they use them, and that the surfaces you use for packaging are suitable for food handling. A scheduled program of cleaning and sanitizing surfaces is another important and relatively easy step you can take.
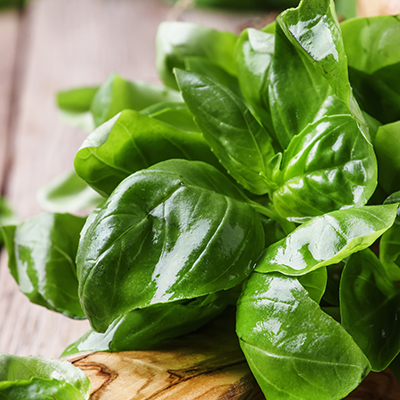
Basil requires special attention
While it’s fairly easy to grow and potentially lucrative, basil can be more than a little fussy. The tender herb needs warm soil and air temperatures to grow, and suffers from chilling damage at temperatures below 50°F. In addition, the large leaves are especially susceptible to cosmetic damage from chewing insects and slugs, and to bruising when handled poorly.
I prefer to grow basil from transplants, for the ease of stand establishment and the jump on weeds. Early in the season, single seeds in a 128-cell flat allowed us to get nice, large plants; for later plantings, we put three or four seeds in each cell. I like the way the Genovese varieties look and taste, but the Italian Large Leaf varieties really put out the yields, and make the clamshells appear more full.
We spaced successions at one-month intervals to help manage flowering and to make harvesting easy. With the high yields and high value of this crop, you can afford to use some extra ground to make fertility and weed control easier to manage, and to speed up the harvest.
You want to keep basil from flowering not only to keep the plants productive, but also because flowering basil turns strong and bitter. Harvest about two-thirds of the plant, and leave the rest as a basis for regrowth. Like the other herbs, you can afford to harvest this with the next step in mind: if you are going to put it in a clamshell, harvest to the length of the clamshell; if you are selling to high-end customers at a high price, take the time to be a little fussy; and if you are selling large quantities at a low price for pesto, it’s okay to just shear the plant one-third of the way from the ground.
To make re-cutting easy, cut the stems long, right down at the internode. Otherwise, you end up with stumps that will turn brown and hard. Not only do they look bad in the bag or clamshell after a subsequent harvest, but they hurt your hands when you’re going through the plant a second time! We used snips or just snapped the stems to harvest, depending on the plant conditions.
Basil must be kept warm after harvest - but not too warm. Temperatures below 50 degrees will cause chilling damage that makes the crop unsalable, but much higher temperatures will also reduce the crop’s shelf life. We stored our harvested basil in a cooler with the thermostat set for 40 degrees, and kept it wrapped in reflective foil bubble wrap for additional insulation.
Chris Blanchard provides consulting and education for farming, food, and business through Flying Rutabaga Works. As the owner and operator of Rock Spring Farm, in northeast Iowa, since 1999, Chris raised twenty acres of vegetables, herbs, and greenhouse crops, marketed through a 200-member year-round CSA, food stores, and farmer's markets. Prior to 1999, Chris managed student farms, worked as an intern, packing house manager, plant breeding assistant, and farm manager, and provided consulting for a major organic processor, in California, Wisconsin, Iowa, Maine, and Washington state. His workshops, writing, and consulting throughout the country about farm business concepts, food safety, organic vegetable production, and scaling-up have gained a reputation for fresh approaches, down-to-earth information, and honesty.



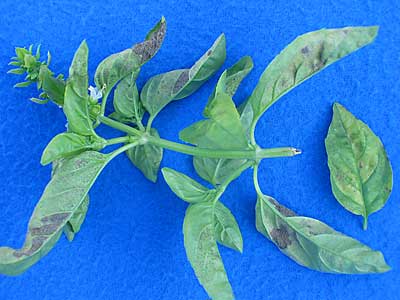 Basil downy mildew, first identified in the United States two years ago, is spreading rapidly on the East Coast and has also been found in California and the Midwest. Plant pathologists warn that basil crops everywhere are at risk, and they urge growers to inspect their plants for signs of the disease.
 Chris Blanchard, one of the leading lights of the organic farming world, passed away on October 28 from cancer. He leaves an impressive body of work that will help market farmers far into the future.
.svg.png)
