By Liz Martin
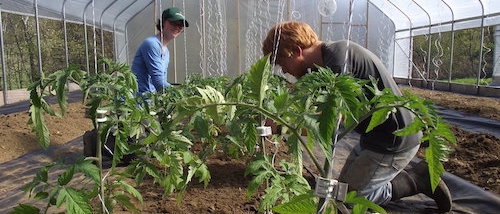
A few years back we realized we hated picking beans. Not only do they take a disproportionate amount of time to harvest, but also it is backbreaking work. So we decided to try growing a bed of pole beans. We loved picking them standing up and we congratulated ourselves on how clever we were!
But when we got the long Fortex beans to market and stuck them in our quart boxes (more like stuck them out of our quart boxes) next to the slender little bush beans, we found that we couldn’t get customers to try them. We heard over and over again that those beans looked like they would be tough. We told people how delicious pole beans are and were sometimes able to talk people into taking them home, but realized we were only hearing from the people who said it aloud. We were not even getting to the people walking past our booth thinking dismissive and derisive thoughts about our pole beans!
So the following year we decided to find pole beans that looked like regular green beans. We didn’t want anything really long, or a bean with bumpy pods that made it look like the beans inside were too big. And we didn’t want a flat-podded bean.
So in 2015 we trialed eight different kinds of green pole beans. Some of them were labeled “haricot vert.” We liked Emerita and Blue Lake from Renee’s Garden. Last year we grew Matilda and Cobra (Osborne Seed Company) and they were both fine as well.
Next challenge: a trellising system that could hold the plants up all season long and not sway in the wind. The design we initially used was okay, but it danced in the wind too much and there were spots where the Hortonova netting was drooping by the end of the season. Since the plants grow to eight feet tall and are quite leafy we needed a stronger trellis system.
Our farm has permanent beds that are 42 inches wide with sod paths. We find two rows of pole beans is too hard to harvest efficiently, so we plant the north row of the bed with pole beans and the south row to something else. We still grow Dragon’s Tongue beans, which are bush beans, but only a small amount. So we may plant bush beans, edamame or some other crop on the south side of the row of pole beans.
We aim to plant our first seeding in the third week of May with plantings three and six weeks after. We expect to harvest a bed of pole beans all season, with production decreasing in the late summer and autumn. Normally, we wait to see what kind of germination we get and cultivate before we install the trellis. But trellising must begin by the time the beans start to reach for support. Don’t wait or they will climb other beans, weeds, or whatever they can find to grab onto!
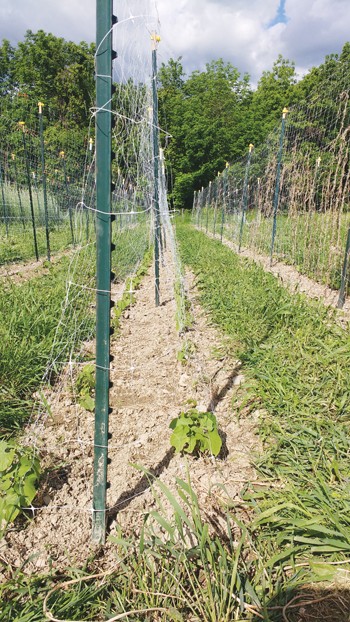
We begin by pounding a ten foot t-post about one and a half feet into the ground every 15-20 feet. We then install yellow t-post insulators at the top of each post. Use only the short insulators because the extended ones will break under the weight of the beans. We run electric fence wire across the top of the posts in these insulators and wrap the wire around every other t-post to keep the trellis from sagging. We do not put the wire under tension and we typically use 17-gauge wire as it is easy to wrap around the posts. We finish by tying Hortonova netting to the wire and to the t-posts with 8-12 inch pieces of plastic hay string. We may try zipties this year.
Then we tie the netting to each t-post at the top, middle, and bottom, then tie the netting to the top wire every 4 feet. If the Hortonova hangs neatly at ground level we may leave it, especially if the plants are tall enough that they’ll grab it right away. If the netting is short of the ground, the beans are too short, or it is really windy, we’ll insert an 8 inch ground staple every 10 feet or so to hold the netting right where the plants will be looking for it.
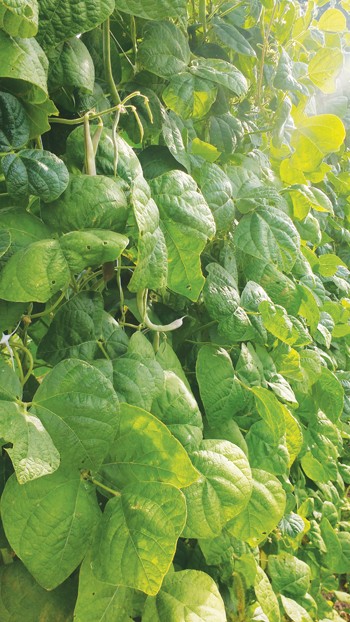
This leaves us with about eight feet of vertical growing space for the beans. The bean harvesters vary in height from 5’ 3” to 6’ 4”. Even the shorter harvester can reach the beans until the very end of the season. As the beans grow past the top of the netting, gravity brings the latest beans down within arm’s reach.

The first couple pickings are just as annoying as picking bush beans, and perhaps even more so as the trellis is in the way. But after that, the primary harvest section gets higher off the ground every harvest! Pole beans do continue to have a few beans growing at every level, though. It’s important not to let them develop mature seeds, or they will start putting their energy into the seeds instead of the pods. So look down as well as up when harvesting!
Typically we do not experience significant disease or insect problems on our pole beans (I hope I am not jinxing our future crops by writing that!). Though if you have pest or disease problems with bush beans, you are likely to have the same problems with pole beans. One benefit of pole beans is that the foliage dries faster so we are less likely to spread disease during harvesting. In order to minimize the spread of disease, we try not to pick beans when the leaves are wet, but sometimes this is unavoidable.
We like to leave the trellises in place all winter. Not only are we too tired and too busy in the autumn to remove them, but this helps them shed some of the dead vines over the winter. We have found we can use the netting for at least two years. In the spring when we are ready to move the trellises we take the netting down on a dry day and walk on it to remove as much of the dead vine material as possible. We are careful not to get the netting into a tangled mess! If you had problems with disease on the beans the previous year, you may want to use new trellis material as disease can over-winter on dead vines.
Overall, this method has been a big saver of our backs and our time. And now both our customers and we love pole beans!
Pole beans for seed
We’ve been growing and saving seed for a few years to try and adapt crops to our farm that have been difficult for us to grow. We decided in 2017 to see if this could be a new income source for us as well as a new farming challenge. It must be hard for seed companies to find farmers to grow pole bean seeds (due to the infrastructure required, I guess) because two companies asked us to grow pole beans for them.
We realized that since pole beans grown for seed are only harvested in the fall rather than weekly, we shouldn’t have any trouble growing two rows in each bed. Once we had this realization we decided we could have one set of t-posts down the middle of the bed between the two rows of beans and run Hortonova nets from each row of beans at a slant up to the wire at the top of the center of the bed. The trellises are shaped like an upside down V. This worked really well and had the happy bonus of being less post-pounding in the spring as well as requiring less t-posts.
We found we were able to cultivate inside the upside down Vs by sticking our arms and hoes through the netting. Despite the ability to cultivate inside of the trellising, next year we plan to try planting some of our pole beans through plastic or biomulch. The actual planting will take a little longer, but not having to cultivate through the netting will make it worthwhile.
When growing beans for seed, we allow the pods to turn completely brown and get quite dry. We did not have disease problems last year, but if we did we would have discarded any diseased beans and vines. We harvested into apple-picking bags and dumped these into one-ton tote bags. Then we put the beans in our barn to dry further until we had time to deal with them. Next year we may put them in a room with fans and a dehumidifier for a few days.
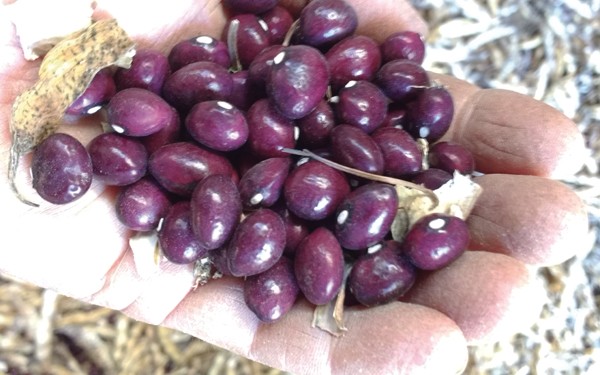
Then came the threshing and winnowing. There are many ways to do this, but because we lack the specialized tools available for cleaning seed our methods were rudimentary. We spread a sheet of greenhouse plastic on the floor of the barn and dumped the pods onto it. We ran a few fans and when we had time we stomped the beans to break the pods (but not the beans!). Then we dumped the beans and pods through a screen and into a concrete mixing tray, to separate the beans from the broken up pods.
The final step was to pour the beans in front of box fans to winnow off the crushed pod pieces that didn’t get separated by the screen. We placed two or even three box fans together to give a good strong air stream and get as much chaff off as possible with each pour. It can take a few pours to get really clean seed. Then we enjoyed marveling for a few minutes at the beauty of the glistening seeds that came out of those dusty old pods!
How did growing seed compare financially to growing fresh beans for market? It depends! For years we’ve used $400/100 foot bed as a bare minimum benchmark for each of our crops. The pole bean seed from one company earned us $280/bed (175 lbs. from 5 beds at $8/lb). Two varieties of seed for a second seed company earned us approximately $800/bed ($20/lb for one variety and $25/lb. for the other). All of the varieties yielded about 17-18 pounds of seed per 100-foot row.
Liz Martin and Matthew Glenn run Muddy Fingers Farm, a certified organic vegetable farm in its 16th year of production. Muddy Fingers Farm is a three-acre, two-person farm that grows for CSA, farmers markets and local restaurants.

 Fifth Crow Farm lies nestled below some ragged hills – the native grass fully brown, the oaks wide and green. The farm grows 50 acres of certified organic crops on 150 acres of leased land, including vegetables, cut flowers, dry beans and eggs. The farm land is completely flat, tucked in a tiny valley in zone 9B. Believe it or not, just across the street, a mere two miles from the ocean, there are acres and acres of open land with cows grazing. How can land so close to such beauty, and with such a wonderful growing season be devoid of development? The answer is complicated, but mostly it’s because the parcels of land have always been quite large, and much of it is being purchased for conservation purposes.