By Pam Dawling
Originally published in the September 2020 Growing for Market
Last month I wrote about wet-seed processing. That’s more of a summer activity as you have to deal with the ripe fruits in a timely way. Dry seeds develop in pods, husks or ears, and dry on the plant rather than inside a fruit. While you obviously want to get seeds into the hands of growers before they need to plant, and into seed catalogs before they get printed, often there is no urgency to extract the dry-seeded crops from their pods. You can wait for a slower time, or use seed cleaning as a rainy-day job.
In May 2017 I wrote for this magazine Seed: a hot-climate summer hoop house crop. Seed growing can be a good way to diversify your sources of income. Often it has a higher dollar-per-hour value than growing food. If you sell your crop to a seed company, you have money coming in during the winter when they pay their growers. You could instead sell your seeds directly through your farm website or by joining Local Harvest (localharvest.org) and selling on their website.
Most seed growers continue to grow a mix of produce crops and seeds to spread their workload and their risks. But if seed growing really suits you, you could move more toward growing seeds and away from other crops. When you are ready to grow a commercial seed crop, contact seed companies in the early fall to get a contract for the following year. According to Ira Wallace of Southern Exposure Seed Exchange, one person could grow seeds for several different companies and earn $25,000 a year on 2 acres.
Dry-seed crop considerations
Dry-seeded crops can take a lot longer to mature seeds than to grow produce (lettuce can take up to two months more). Biennials, such as carrots, are dry-seeded crops that need a second growing season to mature seed. Replant the roots in spring or leave them in the field over the winter, which is easier. But if your climate gets very cold and fluctuates a lot (ours does), or you have lots of voles (we do), then digging the roots and storing them in a cool, damp root cellar is wiser. It also gives you the chance to select well-shaped roots as your seed stock.
Double benefits
For some crops, you sometimes can grow seed and food in the same planting. With dry-seeded crops, harvesting leaves from greens grown for seed need not detract from seed production. Most crops can take 30 percent defoliation by insects, so why not by you? Studies of amaranth for both leaf and seed production found that seed yield and quality were not reduced by a single harvest of up to 50 percent of the leaves. Two and three consecutive harvests of 25 percent of the leaves did not affect the seed crop either. Harvesting larger amounts of leaves, or more frequently did reduce seed quantity in some circumstances, but seed quality did not seem to be affected. (See the journal and website Frontiers in Plant Science.)
You also can harvest the edges of a block planting as produce and save seed from plants in the center of the block. This makes good use of the edge plants and helps preserve the purity of the seed. It does mean your planting might be larger than if you were only growing for produce.
Dry-seed processing
Dry-seed processing involves four steps:
1. Harvesting the pods or heads of the plants, completing the drying indoors if needed.
2. Threshing – breaking open or cracking up the pods to release the seeds.
3. Screening the seeds and chaff through two or more different gauge mesh screens.
4. Winnowing the seed using a fan. Some seeds are screened but not winnowed; some winnowed but not screened.
During harvesting, twigs, leaves, soil, stones, and weed seeds are inevitably collected along with the seed. Small quantities of seed can be cleaned with basic kitchen equipment, but once you move into larger quantities, you will want to buy or make some specialized equipment. While some growers use small amounts of seed cleaning as hand work while watching movies, having meetings or chatting with friends, dealing with larger volumes requires machinery (such as fans and winnowers). There are good details on seed cleaning methods in Organic Seed Processing: Threshing, Cleaning and Storage and the Seed Processing and Storage Guide from Saving Our Seed.
Threshing
For crops with seeds not enclosed in pods, the seeds can be roughly stripped by hand to reduce the amount of material to dry and break up. Before threshing, check for dryness by squeezing a handful of seed and plant material. If the plant material feels damp, not crisp, it is not dry enough to thresh. Threshing may be done by hand or machine, depending on the scale and type of seed to be processed.
For small seed lots it is often more efficient to thresh by hand than to thresh with machinery. Mechanical threshers increase efficiency if you are dealing with more than 50 to 100 pounds (25 to 50 kilograms), but they often don’t operate properly unless the load is big enough. They can require a lot of work to clean after use.
Threshing can be fun. Set out a big tarp, scatter seed heads over it, cover with a second tarp and stomp or dance on them without damaging the seed by being heavy-footed. However, use soft shoes and dance gently on delicate crops like beans. Broken bean seeds are useless as seed. Delicate seeds can be threshed by rubbing between gloved hands or rubbing the seed and plant material over a screen or other rough surface.
For smaller quantities, put the material in a pillowcase or plastic bag before treading on it or hitting it against a wall or tree, or thresh by foot in a bucket or plastic tote. Slide your feet from side to side on top of the seeds, twisting as if squashing a nasty bug. Keep several layers of seeds and chaff between your feet and the bottom of the bucket or the ground while threshing. Crops vary in how much pressure they can take without getting ruined, so check the seeds from time to time to get feedback on your technique. They need enough pressure to separate from the plant material but not so much that they crack.
For threshing large amounts of seed, growers often use commercial threshing machines (belt threshers or combines), or convert mulching machines into threshing machines. There are also desk-top threshing machines sold for processing samples of large seed lots, or for agricultural research.
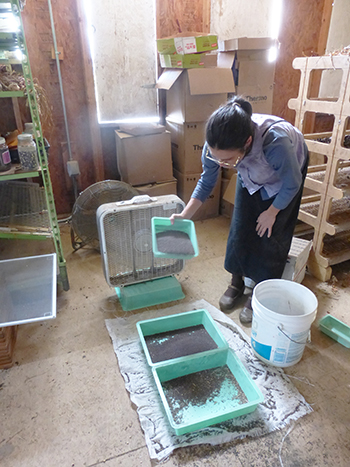
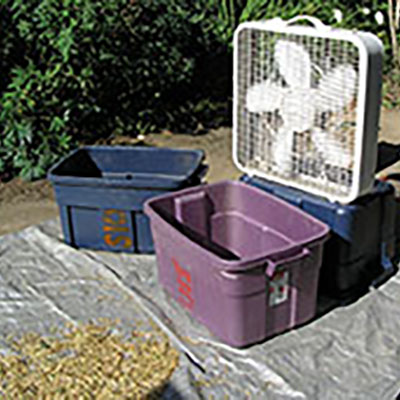
Winnowing collard seed using a box fan. Photo from Southern Exposure Seed Exchange.
Cleaning Crops
After threshing, the seeds are separated from the waste materials by methods relying on differences in size, weight or shape of the seeds. Larger seed companies have machines that separate the seed from waste materials based on the color of the seed or on electromagnetic charge, but those machines are unlikely to be in your barn.
Separation by size or shape
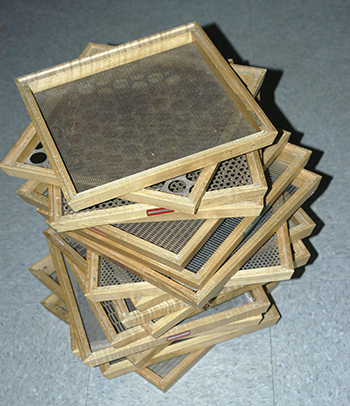
Screens with various mesh sizes are sold by Southern Exposure Seed Exchange in sets of five 2 mesh (strands per inch), 4 mesh, 8 mesh, 16 mesh, and 32 mesh. Screens are hand-cut to 11 inches by 11 inches (28 centimeters by 28 centimeters). Instructions are available at tinyurl.com/y4cwbmuy on how to use screens, and how to build a frame that screens can easily be moved in and out of. They also sell frames. Wear gloves to handle unframed screens as the edges can be sharp.
Use at least two screens: the larger one keeps back the big pieces of chaff and lets the seed pass through. The smaller one keeps back the seed and lets the small chaff pass through. Some special screens are made for particular seeds (e.g., rectangular holes that allow lettuce seed through but hold back larger, round seed). Hand-held screens are very useful for small-to-medium scale seed cleaning (up to 50 to100 pounds). For larger seed harvests there are machines that hold one or more interchangeable screens.
Separation by weight
Winnowing is a traditional hand method of cleaning seeds based on weight, using the wind to blow away the dust and chaff. Seed and waste materials are dropped by the wind or a fan. The heavier materials fall first, while the lighter materials are carried farther from the source of the wind. On a small-to-medium scale this is a very effective method to quickly clean seed. Position a large tote in front of the fan on a tarp to collect as much of the seed as possible. On the other hand, don’t chase after every single seed, because the smaller, lighter ones are often not viable.
Gravity tables are probably the most widely used machines to separate seeds by differences in weight. Air blows up through the fine-mesh deck of the vibrating tilted table. The seeds travels over the table and the air moving through the screen lifts the lighter chaff, which then drifts down the table and is funneled off to one side. The seeds, being heavier, remain in contact with the screening fabric because of its nap and move to one side of the tilted deck and are funneled into a different chute. You can watch YouTube videos of the process.
See last month’s article for details on seed storing and germination testing.
Okra
We only grow one variety of okra, and nothing that would cross with it. Saving seed is just a matter of flagging choice pods on good sturdy plants, and letting those pods ripen. We collect the dry pods before they shatter. We dry the seed in a mouse-proof place. Okra has large seeds, and the dry pods shatter easily, so it’s simple to separate the seed from the pod pieces with screens and tilted trays. We don’t grow a large okra seed crop, so it’s not a major undertaking.
It’s true that leaving pods or fruit on a plant to ripen will decrease the yield of food from that plant, so it is important to balance your goals and not lose your cash crop for the price of a small packet of seeds.
Seed crops in hoop houses
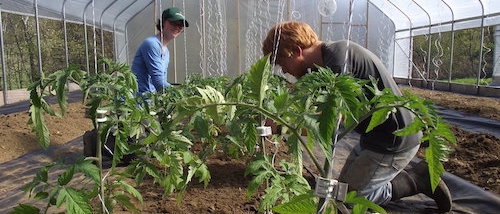
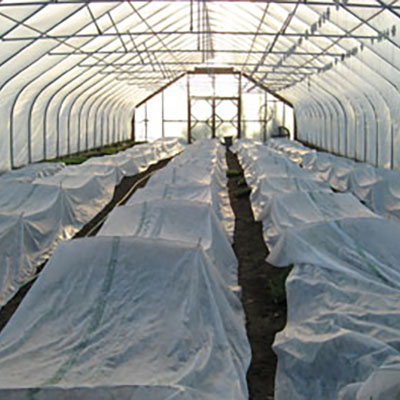
There is still not much information available about growing seed crops in hoop houses, but this is a very promising opportunity. Hoop houses can be great places to grow seed crops. The walls of the hoop house provide a partial physical barrier to prevent cross-pollination. In humid climates, it is hard to grow dry-seed crops, but using covered spaces opens more options. Inside a hoop house the hotter air can hold more water without dampening plants. Compared to outdoor crops in our climate, legumes grown in the hoop house have very clean, unspotted pods and seeds.
Summer legumes make a great class of summer hoop house crops (either as produce or as seed crops). We don’t grow many legumes at other times of year in our hoop house, so the summer beans and peas make a good break crop, helping the crop rotation. Plus, legumes can add nitrogen to the soil. Some southern peas, such as “Mississippi Silver” and “Carolina Crowder,” are resistant to root knot nematodes, and they have been part of our strategy to manage this pest. Most bean species are largely self-pollinating, so we can have pure seed with 100 feet (30 meters) isolation distance.
Fast-growing cover crops such as buckwheat could be left to produce seed provided you harvest before the seed sheds on your beds. Growing (biennial) beet and chard seed could become an opportunity for organic growers not in the Pacific Northwest, as contamination by pollen from genetically modified sugar beets threatens those crops there. To increase beet and chard seed production and keep plants manageable, cut off the first tall stems that grow after the winter, and the plants will produce many more flower stems of a shorter height. An extra benefit is the wonderful smell of the flowers.
Surprisingly, hoop houses with shade and good ventilation can be good places to quickly dry seeds. Dry-seeded crop plants pulled up from outdoors can be tied in bundles from the purlins or trusses. Bag the plants if there’s danger of the heads shattering and seeds being lost. “If it’s not too hot in there to grow a crop, it’s likely not too hot to dry seeds for a short time,” says Wallace.
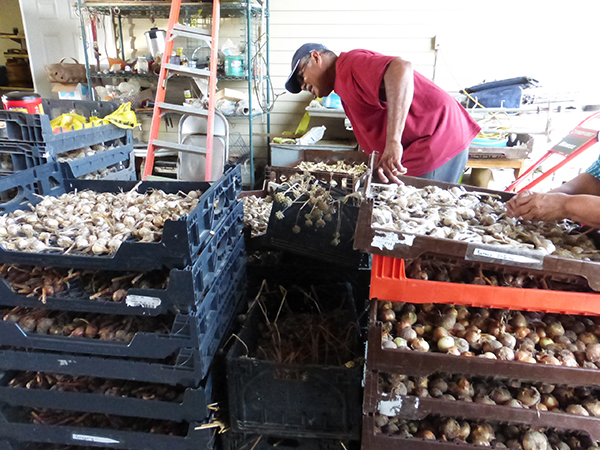
Clif Slade dealing with his garlic and onions. Photo by Southern Exposure Seed Exchange.
Southern peas
We sow southern peas from late-May to mid-July, after pulling up our early warm-weather crops (cucumbers, early tomatoes and squash). We harvest seed 95 to100 days later. The seed crops finish just in time for us to transplant our winter salads and greens. Early sowings (from May 29 in central Virginia) finish in time for our September 15 plantings; a July 13 sowing can be followed by greens on October 13; a July 16 sowing can be followed by planting on October 23; and a July 23 sowing can be followed by November-planted crops. We tried a July 27 sowing of “Mississippi Silver” southern peas, but it was a bit too late.
According to Nancy Bubel, in The New Seed-Starters Handbook, bean seed is ready when your teeth can scarcely make a dent in a sample bean. Maturing happens faster in a hoop house. We harvest mature pods every other day and finish drying them on racks in the barn where we dry alliums. As they get fully dry, we bag them up and keep them to process in a big batch in the fall. If you try this method, watch out for mice. Especially if you store your drip tape header pipes in the drying barn, they will stash dry beans in the tubing.
Edamame
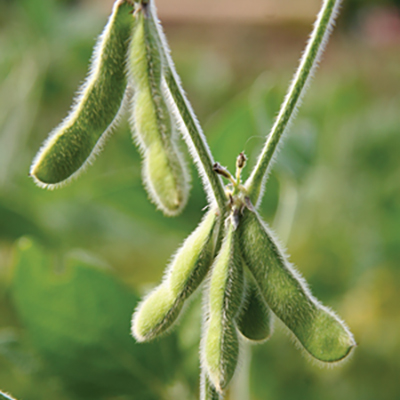
Edamame does particularly well in our hoop house. Growing it under cover means we get beautiful pods (an important feature for fresh sales of edamame). We like “Envy,” a short bush type that matures quickly. We can sow June 2 to July 23, allowing 100 to 110 days to mature seed. We can follow a June 22 sowing with other crops on September 23, and a July 13 sowing with greens on October 23. Any of these sowings can be harvested for some fresh pods and then left a little longer to mature the rest for seed. We can sow as late as July 27 and harvest October 4 to 13 for fresh use and November 9 for seed.
Edamame tends to mature in a short window, compared to southern peas, a useful trait in the high-value real estate of a hoop house. We pull the pods from the stems before finishing the drying as we do for southern peas. You could pull up whole plants if that works better for you.
It’s important with hoop house summer crops that you keep your fall planting dates and crop rotations in mind, especially if the winter greens and salads are the main purpose of the hoop house. Our winter hoop house crops are planted in September or October and harvested until April. Our early warm weather crops are planted in March or April and harvested until late July. Our summer crops are planted in July to be finished in time to fit in with our all-important winter crops. We can only grow crops that mature fairly quickly. Your rotations might be different.
Wallace suggests that winter greens can be inter-planted in a hoop house with biennials such as carrots or onions for seed. As the biennial plants grow bigger the next spring, remove the greens and let the seed plants grow.
Two seed crops in one year
Clifton Slade has grown two seed crops in one year in a hoop house in Virginia. He is in zone 7b. He grew a whole 24 foot by 96 foot high tunnel full of collard greens overwinter for a seed crop the next spring, then grew an okra produce and seed crop in the same tunnel. You can read more details of his method in my May 2017 article.
He direct-seeded Champion collards December 1. On February 15, he started rolling up the side curtains every day to vernalize the plants (steer them into flowering, the thing we try to avoid with our early cabbages). Ninety days from sowing, on March 1, he had greens. Although he had not intended to sell greens, he did sell about 1,000 pounds to a neighboring farmer who had a market for them.
On March 10, the plants flowered, and in April the seed matured, earlier than outdoors. Clif used pruners to harvest the tops of the plants into totes. He had 100 pounds of pods, which gave 30 pounds of cleaned seed. The yield was double that grown outdoors, and the seeds were bigger than outdoor-grown seed, with good germination.
After clearing the collard seed crop, Clif transplanted okra in the hoop house (four rows of 30 plants). He was the first to market with fresh okra and got a good price. Once other growers were selling okra, Clif stopped picking and let his plants grow a seed crop. The seeds were plentiful and in very good condition. Okra really benefits from hot weather. Clif benefited from not harvesting fresh okra in the hot hoop house every day.
I recognize that it’s hard for growers in colder climates to understand how someone could benefit more from growing seed crops in a hoop house than tomatoes, say. But if tomatoes grow like weeds outdoors where you are, market prices for produce can get low once lots of growers have it to sell. Summer use for seed crops can really pay well. You’ll have to crunch the numbers to know. Compare labor, income and expenses to see what will pay you best. The Organic Seed Alliance has a seed economics toolkit (in English and Spanish).
Other sources of income include vegetatively produced clones, e.g., seed garlic, yellow potato onions, shallots and sweet potato slips. I plan to address these in future articles.
Resources
-The Seed Garden, Micaela Colley and Jared Zystro, Seed Savers Exchange
-The Organic Seed Grower, John Navazio, 2012
-Seed to Seed, Suzanne Ashworth, 1991
-Breed Your Own Vegetable Varieties, Carol Deppe, 1993
-Principles of Plant Breeding. 2nd Ed. R.W. Allard, 1999
-Organic Seed Resource Guide https://eorganic.org/node/378. Trove of Western U.S. focused information about organic seed production.
-Seed Savers Exchange www.seedsavers.org/
-The Grassroots Seed Network https://grassroots-seed-network.sharetribe.com/.
-Saving Our Seeds www.savingourseeds.org/resources.html Resources including information on isolation distances, hot water and bleach seed treatments, instructions for making equipment and more.
-Saving Our Seeds www.savingourseeds.org/publications.html Specific seed production manuals. Beans, brassicas, cucurbits, peppers, tomatoes for Mid-Atlantic and South; beans, beets, carrots, lettuce, radish, spinach for PNW.
-The Organic Seed Alliance https://seedalliance.org/publications/ Enterprise Budget Tool for Seed Producers (in English and Spanish). Seed production manuals for many crops.
Pam Dawling is the author of the books Sustainable Market Farming and The Year-Round Hoophouse. She blogs at sustainablemarketfarming.com, on Facebook and for Mother Earth News.

 Why two of our hoophouses are named because of Emily
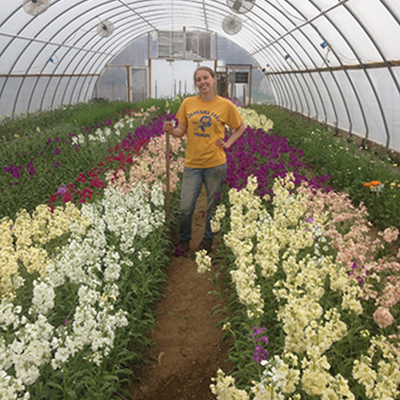
 As soon as we start driving our routes in the spring our customers ask us when we’ll have roselilies. They’re that popular and have become a signature crop for us. They’re basically a type of oriental lily, but with multiple layers of petals, and without stamens and pistils (i.e. no pollen!).

 In the hoophouse plants grow bigger and faster. We want to avoid anything that slows growth down. All that growing burns up the organic matter and nutrients in the soil at a fast rate, particularly in hot, humid climates. We need to replenish the soil more generously and more often than we do outdoors. Good soil health means having enough plant nutrients, not surplus. If you have too much soluble nitrogen (N), it can leach into the groundwater or burn up the organic matter. Using manure or compost for a nitrogen source can cause the build-up of excess phosphorus (P).
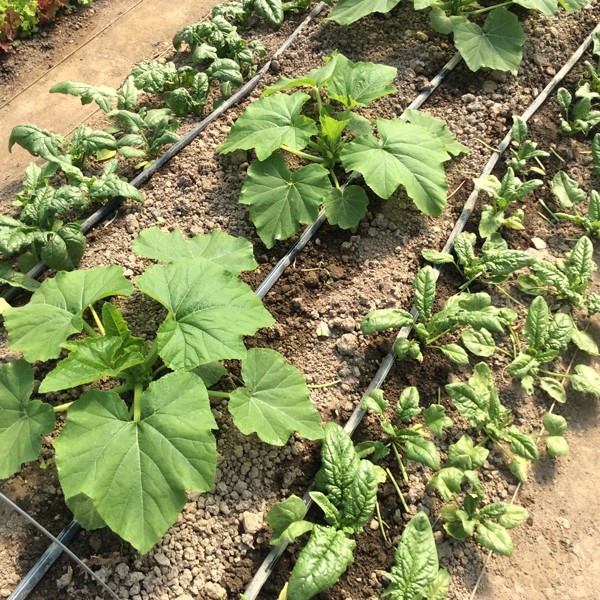 We have three main seasons in our zone 7 central Virginia hoophouse: fall-winter (October to March), spring-early summer (March to July) and high summer (August and September). We grow one bed (90’/27.5 m or so) each of yellow squash and bush cucumbers in the spring-summer season, for reliable early harvests and to help with crop rotation. If you farm in a colder climate than ours, you might be questioning allocating the precious real estate to a crop that so quickly goes from desirable to over-abundant, especially when there are more profitable things to give the space to. One reason is a difference between southern and northern climates.
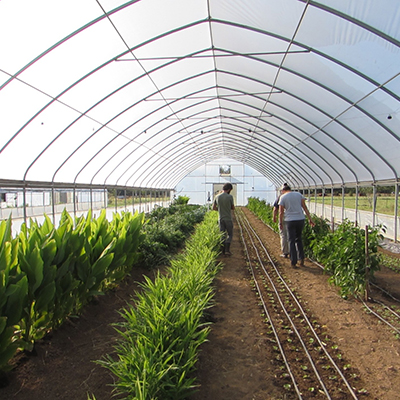
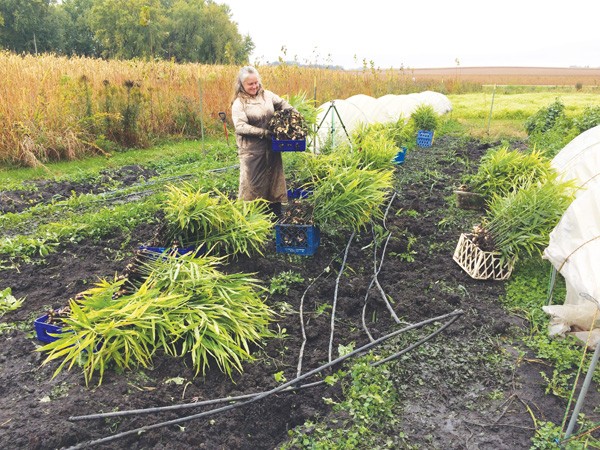 Local and organic ginger is a high-value crop that in the right market can be in high demand. Growing this tropical crop in the Midwest can be a challenge, and thus far, farmers thought they had to own a high tunnel to ensure adequate heat during the variable spring and fall seasons. High tunnel space on most farms is at a premium, so it is expensive space to devote to a long-season crop.
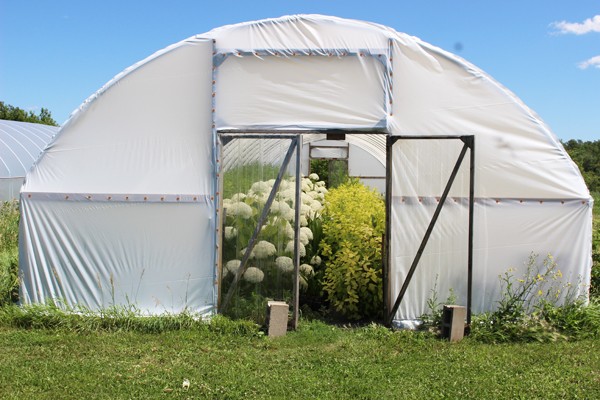 With protected space on the farm at a premium, we have to choose wisely when deciding which crops are worth putting under cover. We start out by deciding what to grow overall, and then deciding how much of that can fit inside structures, by doing a little revenue and profit analysis. Quickbooks is used to record sales, so it’s easy to list sales per item at the end of the year to see what brought in the most revenue. A version of that report extracted to a spreadsheet calculates profit per square foot by first subtracting the costs of plugs or bulbs, and then dividing by the cultivated area for each item.
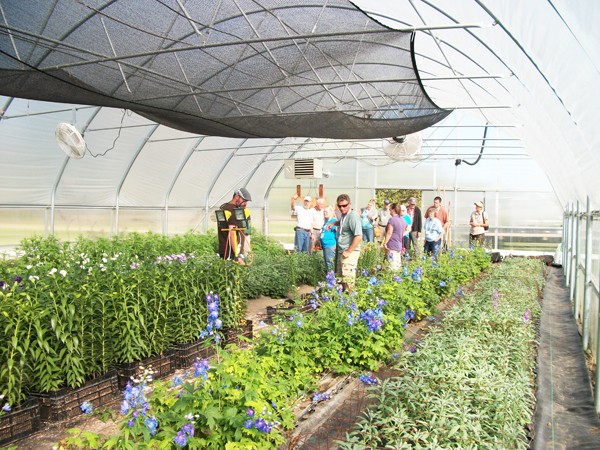 Prairie Garden Farm has been growing cut flowers for florists and studio designers since 2010. As we’re on an exposed hillside in west-central Minnesota, we’re dependent on protected culture to grow quality flowers. This article describes our approach – planning, financial, and operational details - that helps us make the most of our structures.
 For years, my wife and I have been considering offering a winter CSA, but have been hesitant. This hesitation stemmed mostly from not having any real experience growing over winter (beyond the kale and collards that persist until January in our fields), but also from lacking the proper infrastructure. This year, however, with two small tunnels up and some decent storage facilities, we decided to make the leap. But I first wanted to talk to a few winter growers to see how they run their winter CSAs to get some pointers on what to expect, what to plan for, and how to manage everything from the hoophouse to the wash/pack. Here is what I learned.
 When we talk about high salt levels in soils we do not mean simply sodium chloride, as we would if we complained of too much salt in our soup. “Salts” in the agricultural sense means all soluble ions or nutrients - nitrate, ammonium, potassium, calcium, magnesium, chloride and sulfate. Remember that these are essential nutrients – they are our friends. As with much in agriculture, soluble salt concentration is a matter of balance.