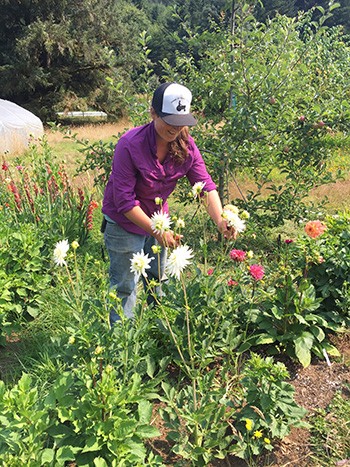
Here's a system to track all those details
By Doug Trott
A year ago, in the August 2018 issue of GFM I wrote about how we decide what to grow in protected culture, with an emphasis on understanding the financial impacts. With this article I’d like to get more into the nuts and bolts of planning for the upcoming season– a deep dive into a spreadsheet workbook we use for planning successions, determining seed quantities, tracking seed orders, and scheduling sowing.
Most of our planning effort takes place in September, when we make a copy of the current year’s spreadsheet for the following year. Doing this work in September allows us to take advantage of the early order discounts offered by seed vendors, and it also helps ensure that what we order is still available. It’s hard to imagine now, but when we started ten years ago we would order our seeds in January or February, and then be disappointed with all of the items that were no longer available.
As a reminder, we’re in west-central Minnesota, and enjoy a windy zone 4a climate. Our season ends by November 1– by then it’s too cold at night for the high tunnel crops, and the short days have slowed production anyway. We could crank the heat in the greenhouse and extend the days with lights, but that hasn’t been cost-effective.
We plan our deliveries to start on May 1 (give or take a week). At that point we’re selling strictly out of our greenhouse, which we turn on by mid-March. We’ve been experimenting with starting the greenhouse later and later, but running it warmer. By waiting until March we’re usually past the -20° F nights, in which keeping the house above freezing requires a significant amount of propane.
The point of all this is that we have six months to make our living, and those months fly past. Our planning helps us make the most of those months. We need to hit the ground running in May and need to be as productive as possible through the rest of the season. The screenshots of spreadsheet pages don’t necessarily include all columns and rows, but I hope enough is shown to make it clear how I use them.
Structures
We begin our planning by deciding what to plant in our structures. We will have ordered our lilies by the end of July, and so we know how many beds (under shade) we need for them. One tunnel is covered in white plastic for permanent shade, and we have enough Aluminet shade cloth for two more tunnels, though we’ll likely shade just one more. But we now need to plan the rest of the beds.
We use a spreadsheet with two columns for each structure (spring and fall) in which we enter the number of beds (or fraction of a bed) planned for each crop. The crops are listed in their own column. Many crops will take the entire season, and the X in the Fall column indicates a continuation of the Spring planting, but we have a few that will end early and thus can be followed by a second. The Spacing column is important because we prefer that crops that share a bed have the same spacing, so we’re not cutting up ground cover.
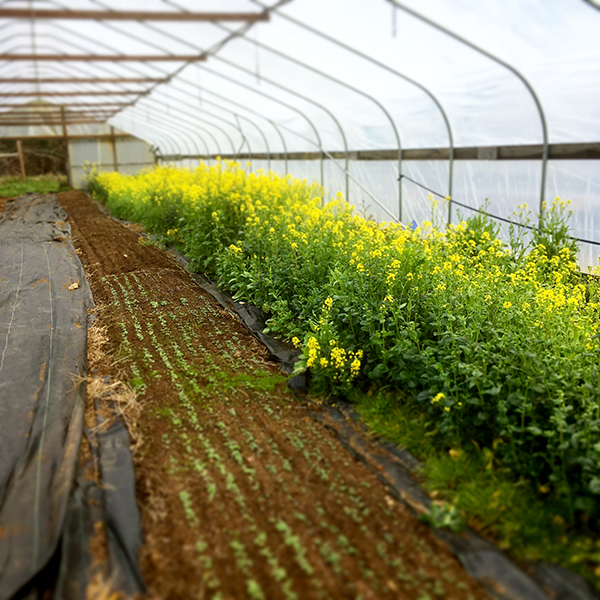
We first fill the remaining beds that are under shade. Candidates include sweet peas, Campanula medium (Canterbury bells), Molucella laevis (Bells of Ireland) and sweet William (though we don’t grow all of these every year). Some of those choices might surprise you, but the shade allows us to grow some of them later into the summer than usual – most will have had an earlier planting in the greenhouse or a high tunnel.
The next (and easiest) category is perennials. We don’t grow a lot of them in high tunnels, due to the difficulty in irrigating them in the Spring when it’s still freezing at night. We do have beds set aside for raspberries, bearded iris, Astilbe and Delphinium (which we re-plant every three years).
The last (and largest) category is the annuals. We have twenty-five or so that we’ll make room for in high tunnels. Every year we drop and add a few, perhaps rotating some to the field to see if they do well enough there.

Because we’ve made a copy of last year’s workbook, as we decide what to plant where we can avoid re-planting a crop in the same beds. This is a recurring theme – by documenting what we do with spreadsheets, and re-using them each year, we are basically re-using the old plan, with maybe 10-20% that’s new.
Plantings
Crops have their own tab in the workbook if they have more than a couple plantings. These sheets are simple – just a list of the cultivars or colors grown, and then additional columns for each planting (by week), with the cells holding the number to be planted (for each planting). Totals tell us the number of seeds we need to purchase for each cultivar. Examples of multiple plantings include sunflowers, snapdragons, lisianthus, celosia and amaranthus.
Ordering
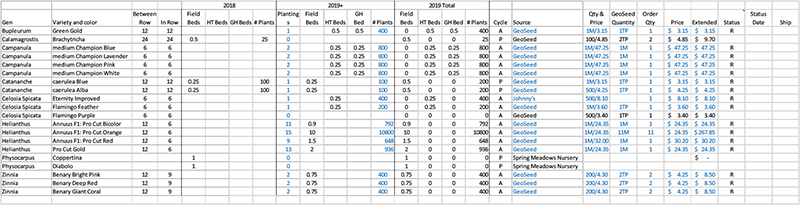
This takes us to one of the main tabs of our spreadsheet. It lists everything we’re growing, annuals and perennials, and indicates how many plantings are planned for the season. In the example, the 2018 section shows the perennials we have from last year, the 2019+ section is what we’re adding (perennials and annuals), and the 2019 Total is the two sections combined. We will note if we’re planting a quarter, half or full bed, and we know the number of plants that is needed for each of the bed spacings we use. Based on germination experience, we can determine the number of seeds to purchase.
We have columns for the source vendor, packet size, price, number of packets, and status. Most of our seeds are purchased from GeoSeed, and we can take an extract from this page and send it to them as our order. We enter a letter in the status field to let us know if the order has been placed, received, back-ordered, or cancelled.
There’s a column for the expected ship date for back-ordered items, and for the status date – the date the current status was entered (whether ordered, received or backordered). This section is a must – it’s too easy to lose track of what’s been ordered and received, and we need to be on top of it in case we need to cancel an order because it won’t ship in time, and select an alternative.
As you can imagine, we’re just re-ordering many of our flowers year over year, and making a few changes. Again (cue the recurring theme music), by re-using this spreadsheet much of our work is done for us. A separate Archive tab is a list in the same format (copied and pasted) of things that we no longer want to grow. It helps us not to repeat our mistakes.
Schedule
The other “main” tab of our spreadsheet is our sowing schedule. We schedule our sowing by week, and so each line is one particular cultivar for a specific week. Each line also contains germination instructions, carried over every year, because once I look that stuff up I never want to have to do it again.
What I’m interested in is germination temperature, growing-on temperature, and whether the seeds should be uncovered, lightly covered (vermiculite) or covered (growing media). There are also columns for the tray size, number of trays, seeds per cell, and then total number of seeds to be sown.
Also, we have columns for the label, outside (facing away from the tray) and inside (facing into the tray). We’re very strict too about label placement. I do most of the seeding myself, but my crew does some, and we all need to be able to identify each tray. When I tell them to bump something up or bring out certain items from the germination room, they need to be able to find them.
When bumping up a tray the new labels need to be the same as the old. In order to operate efficiently we need to be able to do things without thinking, so when I grab a tray I don’t want to have to look for a label or try to figure out what it is. Standardizing labels and their placement makes things easier. OK, I think I’m done with the rant now.
By the way, to make the sheet sort correctly, for the sowing to be done before the current year ends, I’ll count back from week one and enter a negative number. So the last week of November is something like week -5.
There is an Action column, which usually has an S for Sow. It might also have an SF to tell me to place the tray in the fridge (or cooler) when sowing. In that case, there will be another line for that crop with an OF reminding me to take it out of the fridge.
Some lines will have a B for Bump up, but I only use that to indicate that I’m receiving plugs that week (which I try to bump up immediately). I don’t try to schedule bumping up or even transplanting the seeds I’ve sown, as those activities are dependent on the plants’ readiness, not my schedule.
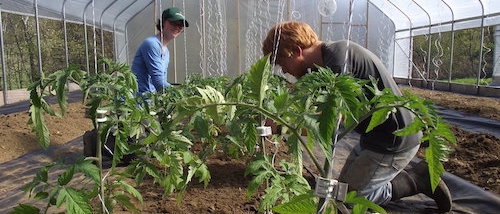
Of course, the sowing date is a little dependent on the transplanting date, but I don’t plan that with precision. I want to transplant into the greenhouse starting in mid-March, the high tunnels starting in late April, and the field starting in mid-May (I’m sure this sounds crazy to those of you in the Southern states). Successions in high tunnels (i.e. a fall planting replacing a spring planting in the same bed) usually occur toward the end of July.
So those are the four “windows” I aim for in scheduling sowing. Plants are then transplanted in the order that they’re ready, which depends not just on the sowing date, but on heat and sunlight. I have some extra columns on the sowing schedule spreadsheet (not shown) to indicate when a planting is ready to be hardened-off, ready to be transplanted, or overdue to be transplanted, as well as for the actual number of plants I ended up with, and the length of bed that they need (which helps me know how I can combine annuals in the same bed when I’m short of what I wanted).
Regarding hardening-off, since we’re starting everything indoors, I’m concerned about sun scalding, rather than cold temperatures. Hardening-off for us consists of three days under 50% shade cloth, after which the plants can be in the sun with virtually no scalding. Since we want to get everything out into the sun as early as possible, we’ll harden things off as soon as they’re large enough to handle top-watering, and so after they’re hardened they still might need a few weeks to be ready to transplant.
One more important column to mention – the Notes column (also not shown in the example). Here I might indicate that I want to move the crop up or back in the schedule, or change the tray size or seeds per cell, etc. I’ll make these notes during the year, and then make the actual changes after I copy the spreadsheet for the following year.
Beneficials
A tab that’s a bit unrelated lists the beneficial insects that I like to use (against aphids, spider mites and thrips) and the approximate date I’ll want to order them. I have the supplier’s item numbers, so I don’t have to look that up every time.
Cover crops
Another unrelated tab lists the cover crops I like to use, and the circumstances (before a crop, after a crop, or full season). I’m still in the early stages of using cover crops, but this page helps me know not just what to order, but what my windows are for seeding and terminating the cover crops.
Things to try
Finally, we have a page for tracking plants and techniques I want to try. Sometimes, after researching a plant I’ll realize it wouldn’t do well for us, and I color code those rather than erase them, so I don’t forget and add them again later. Techniques might be things such as “try sweet peas under shade” or “grow Eucalyptus in crates” – ideas that I want to consider for the following year.
I’m not trying to suggest that you do precisely as I do, and copy my spreadsheet exactly, but I do recommend that you have a way to re-use your plans year over year, as well as have a way to record what you want to do differently, in order to make your annual planning as efficient and painless as possible. Get your seed orders in early!
Doug and his wife Robin started growing flowers on their farm in 2010, making bouquets on their kitchen table for the local grocery store. Flower farming became Doug's full-time job in 2014. Robin also breeds registered Katahdin sheep.


 Since its founding in 1968 by my husband Eliot Coleman, Four Season Farm has sought to produce the best vegetables possible, using soil-based organic methods, on a small amount of land. When I showed up in 1991, Eliot had begun to pioneer winter vegetable production, and I was delighted to give up the landscape design business I’d run in Connecticut and grow veggies with him. Then, about 10 years ago, flowers started to creep in.


 If you’ve been a subscriber to Growing For Market (or even if you haven’t), you’re probably familiar with the many advantages of no-till agriculture. No-till methods can reduce a farm’s carbon footprint, promote complex soil biology, and preserve and build organic matter.


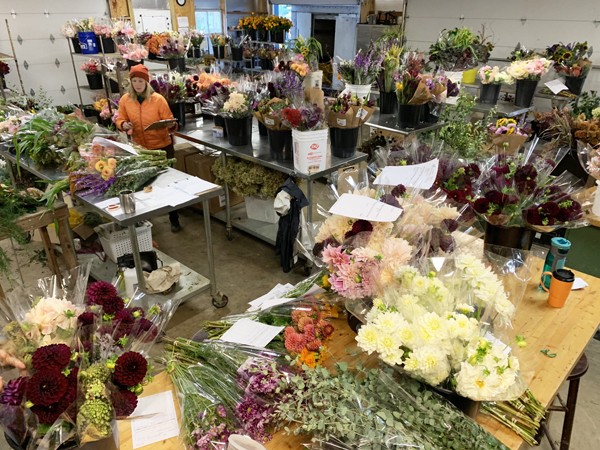 Over the years we have worked through many versions of our inventory and sales systems. As florist sales continue to increase, it is becoming more important that our count and estimated availability are accurate. From pre-orders to last minute emergencies we handle it all, and folks often ask me how I keep it straight when there is volume coming out of the field. These are the most important steps of our process, from where we started in 2006 to what we are doing now.
 The pool of flower farmers is growing quickly it seems, leading to some changes in the industry. Most importantly, flower seeds, bulbs, and tubers are selling out fast, are in limited supply, or are not available altogether. Be sure to get your orders in on time, which is basically as soon as the season for that item is over.


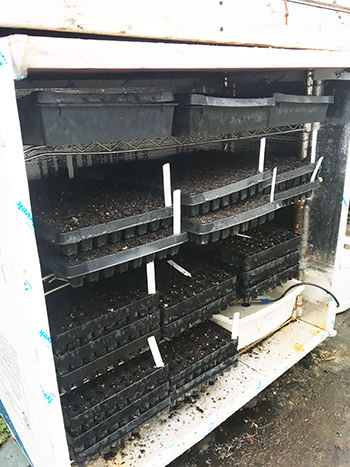 Until two years ago I was germinating all seedlings in greenhouses using almost exclusively bottom heat from electric heat mats. At my current farm we only had space for about 8-10 trays on our two mats and we definitely noticed differences in the germination (and presumably the heat the mats were providing) on the edges of our trays.